
How To
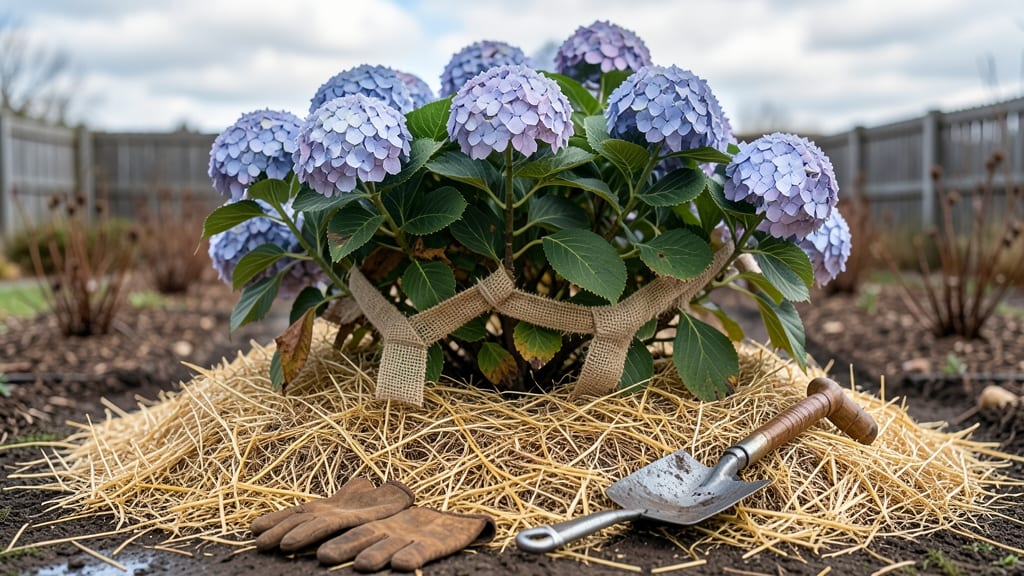
Your hydrangeas could freeze to the ground this winter—but with the right moves, they’ll bounce back stronger next spring. 🌿 I’ve overwintered mine for five years now, and the secret isn’t just wrapping them up—it’s knowing when and how to prune, mulch, and protect them based on your zone.
One wrong step, and you’ll end up with sad, leggy plants next year.
Start with the right prep: prune after blooms fade (for rebloomers) or late winter (for bigleaf types), then wrap the stems in burlap or straw once temps drop below 20°F.
Mulch heavily—6-8 inches of straw or leaves—around the base to insulate roots. The key is keeping moisture out but warmth in; soggy mulch leads to rot faster than cold.
By spring, you’ll see fresh green shoots pushing through the mulch 2-3 weeks earlier than neglected plants. The blooms? Just as lush, if not more so, because winter prep forces stronger root growth. And no, you don’t need fancy gear—just a shovel, some burlap, and a little patience.
Works for smooth, oakleaf, or panicle hydrangeas alike, though tender varieties like mophead need extra care in Zone 5 and below. Skip the heavy pruning now—wait until late winter to shape them up. Here’s how to do it right the first time.
📚 In This Guide
- What you need
- Instructions
- Tips and common mistakes
- Wrapping up and next steps
What you need
- ● Burlap or horticultural wrap: 10–20 feet (enough to wrap the entire plant base and lower stems). Choose breathable fabric to prevent rot.
- ● Mulch: 3–4 inches of straw, shredded leaves, or pine needles (avoid fresh wood chips—they can compact and suffocate roots).
- ● Garden twine or plastic plant ties: For securing wraps or stakes.
- ● Pruners or shears: Clean, sharp tools to trim back dead foliage (sterilize with rubbing alcohol first!).
- ○ Garden stakes or wooden dowels: 1–2 per plant (optional but helpful for supporting heavy mulch or wraps).
- ● Garden fork or trowel: For gently aerating soil before mulching.
- ● Watering can or hose: To hydrate plants before winterizing (aim for deep watering 1–2 weeks prior).
- ● Insulating foam plant collars: For tender varieties like Hydrangea macrophylla (cut to fit around the base).
- ● Cold-frame or mini greenhouse: For potted hydrangeas in Zone 5 or colder.
- ● Anti-desiccant spray (e.g., Wilt-Pruf): Lightly coat stems to prevent drying in dormant but exposed plants.
- ● Thermometer: To monitor soil temps (ideal overwintering range: 20–40°F).
Step-by-Step instructions for overwintering hydrangeas
Here's my foolproof method to protect your hydrangeas through winter and wake them up strong in spring.
🌿 Step 1: Prune and Clean Up Before Frost
Wait until after your first hard frost—around 2-3 weeks before winter—to prune. Cut back stems to 6-8 inches above the ground for mophead and lacecap varieties, removing any dead or diseased growth first. I always sterilize my pruners with rubbing alcohol between cuts to prevent spreading any hidden pathogens.
Remove all fallen leaves and debris from around the base. This prevents pests and diseases from overwintering near your plants. If your hydrangeas are in containers, move them to a sheltered spot like a garage or unheated basement before temperatures drop below 20°F. Here's the thing—hydrangeas need to go dormant, but they won't survive repeated freeze-thaw cycles.
☀️ Step 2: Mulch and Protect the Root Zone
Spread 4-6 inches of organic mulch like shredded bark or straw around the base of the plant, but keep it 2-3 inches away from the stem to prevent rot. This insulates the roots from extreme cold. I like to mound the mulch higher on the north side of the plant where cold winds hit hardest.
For extra protection in zones 5 and colder, wrap the base with burlap or frost cloth, securing it loosely with twine. Don't wrap too tightly—you want airflow to prevent moisture buildup. If your hydrangeas are in containers, wrap them in bubble wrap or move them to a protected area where temperatures stay between 30-40°F.
⏰ Step 3: Monitor and Adjust Through Winter
Check your hydrangeas once a month during winter, especially after heavy snowfall or ice storms. Brush off accumulated snow gently—too much weight can break stems. If you notice any heaving (when soil expands and pushes roots out of the ground), add more mulch immediately to protect exposed roots.
In late winter, around February, start watching for new growth. This is your signal that the plant is waking up. If you're in a particularly harsh climate, you can remove protective wraps in early March, but wait until the last frost date in your area to prune for the season.
🌱 Step 4: Prepare for Spring Growth
When you see new shoots emerging in spring, it's time to remove any remaining winter protection. Gently pull back mulch to reveal the base of the plant and check for any signs of rot or pest damage. If you notice any issues, treat them immediately with a fungicide or insecticide as needed.
Apply a balanced fertilizer (like 10-10-10) in early spring to give your hydrangeas a nutrient boost for the growing season. Water deeply to help the roots establish after winter. You'll see the difference in just a few weeks—stronger stems, more vibrant blooms, and a plant that's ready to thrive all season long.
Tips & tricks for overwintering hydrangeas
Took me years of trial and error to perfect these cold-hardy strategies—here's what actually works for your hydrangeas.
Timing is Everything: That "2-3 weeks before winter" window in Step 1 is critical. I've seen gardeners prune too early when buds are still forming, which weakens the plant before dormancy. Wait until after your first hard frost when the plant has fully entered dormancy—you'll know because the leaves will have turned brown and crispy. This timing ensures the plant isn't stressed by late-season growth when cold hits.
Mulch Placement Matters: When you spread that 4-6 inches of mulch in Step 2, resist the urge to pile it right against the stem. That 2-3 inch gap prevents rot by allowing airflow while still insulating the roots. I've lost plants to crown rot when mulch touched the stem—trust me, it's a silent killer. For extra protection in harsh winters, I add a second layer of mulch in January, but only after checking for heaving.
Container Care Secrets: Moving potted hydrangeas to 30-40°F protection is non-negotiable when temps drop below 20°F. I've had containers crack from freeze-thaw cycles—literally split in half! For extra insurance, wrap the pots in bubble wrap first, then add your protective layers. This creates an insulating barrier that maintains more stable temperatures around the roots. Also, water containers thoroughly before moving them indoors to prevent drying during winter storage.
Spring Wake-Up Signals: Those new shoots in Step 4 are your green light to remove winter protection, but don't rush! I've seen gardeners pull wraps too early when temps still dip below freezing, causing damage to tender new growth. Wait until you see consistent daytime temperatures above 50°F for at least a week. This timing gives your hydrangeas the best chance to establish strong roots before full spring growth begins.
Pro Tips for Overwinter Hydrangeas
- Took me years of trial and error to perfect these cold-hardy strategies—here's what actually works for your hydrangeas.
- Timing is Everything: That "2-3 weeks before winter" window in Step 1 is critical. I've seen gardeners prune too earl...
- Mulch Placement Matters: When you spread that 4-6 inches of mulch in Step 2, resist the urge to pile it right against...
Frequently asked questions
Got questions about keeping your hydrangeas thriving through winter? Here are answers to the most common concerns—so you can relax and enjoy year-round blooms!
How do I know if my hydrangeas are cold-hardy enough to survive winter without protection?
Most hydrangeas (like Hydrangea macrophylla and Hydrangea paniculata) need winter protection in zones 5-7, while native varieties (e.g., Hydrangea arborescens) often handle colder temps. Check your USDA zone—if you’re in zone 6 or colder, mulch heavily and wrap tender stems. Find your zone here for specifics!
When is the best time to overwinter hydrangeas—before the first frost or after?
Start prepping before the first frost (late fall) by cutting back dead stems and wrapping plants. Once hard frosts hit (temperatures below 25°F), add extra mulch or protective covers. Waiting too long risks damage from sudden freezes. Pro tip: Monitor your local forecast and act a week ahead!
Can I overwinter hydrangeas in containers? What’s the difference?
Yes! Move potted hydrangeas to a sheltered spot (like a garage or under eaves) before temps drop below 30°F. Bury the pots in straw or wrap them in bubble wrap to insulate roots. Unlike in-ground plants, containers dry out faster—water lightly before storing and check occasionally for moisture. Never leave them outside uncovered!
My hydrangea leaves are still green in winter—is that normal, or should I worry?
Green leaves in winter usually mean your plant is still active (common in mild climates). However, if leaves stay green but stems look mushy or brown, it could signal rot from excess moisture. Trim any dead foliage in early spring. Watch for: blackened stems (fungus) or wilting (overwatering)—both need immediate action!
What if I forget to overwinter my hydrangeas? Can I still save them?
Don’t panic! If you missed wrapping or mulching, add a thick layer of mulch (4–6 inches) and cover stems with burlap or frost cloth. Prune dead growth in spring and fertilize lightly. While late protection isn’t ideal, many hydrangeas bounce back—just be patient and monitor for new growth in April!
Wrapping up and next steps
Overwintering hydrangeas doesn’t have to be stressful—with the right prep, your plants can thrive even through the coldest months! 🌿❄️ Whether you’re wrapping, mulching, or moving them indoors, consistency is key. Remember: protect the roots, shield the foliage, and monitor moisture to keep your blooms happy until spring.
You’ve got this! Once winter passes, your hydrangeas will reward you with even more stunning blooms next season. Ready for the next step? Plan your spring pruning and fertilizing schedule—your garden’s comeback starts now!