
Planting
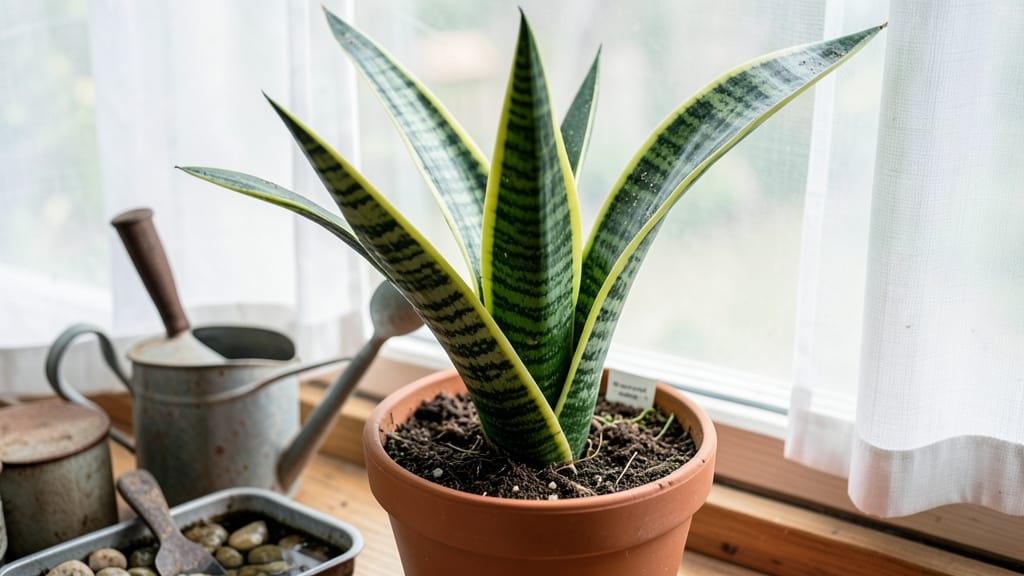
How to keep a plant alive isn’t about luck—it’s about understanding their basic needs before they start screaming for help. My first plant died in three weeks—crispy brown edges, drooping leaves, all because I overwatered. 🌱 The truth is, keeping plants alive isn’t about luck; it’s about understanding their basic needs before they start screaming for help. Most plants fail because we either drown them in love or ignore them completely, but the science behind their survival is simple once you know where to look.
The key is checking three things weekly: soil moisture, light exposure, and leaf condition. Stick your finger an inch into the soil—if it’s damp, wait. If it’s bone-dry, water thoroughly until it drains from the bottom.
Light matters too: most houseplants want bright, indirect light, not a dark corner where they’ll stretch pitifully toward the window. And those leaves? Yellowing means overwatering; brown spots mean too much sun or pests hiding underneath.
Once you master these basics, your plants will thrive. My snake plant now stands tall and proud after years of neglect, and my pothos grows faster than I can repot it.
The payoff isn’t just green thumbs—it’s the confidence that comes from knowing exactly what your plants need before they start wilting. Let’s fix this together, one leaf at a time.
Here’s the game-changer: most plants can bounce back from one mistake, but they’ll give up if you ignore their signals. Start with these three checks, adjust your routine, and watch them reward you with lush, healthy growth. No more guesswork, no more dead plants—just science-backed care that actually works.
📚 In This Guide
- What you need
- Instructions
- Tips and common mistakes
- Wrapping up and next steps
What you need
- ○ Pot: A container with drainage holes (size depends on plant—small plants: 4-6 inches; medium plants: 8-12 inches). Optional: Self-watering pots for forgetful plant parents!
- ● Potting Soil: High-quality, well-draining mix (e.g., Miracle-Gro Potting Mix or Black Gold Natural & Organic). Avoid garden soil—it compacts and suffocates roots!
- ● Water: Room-temperature, filtered or distilled water (tap water with chlorine can harm plants over time).
- ● Plant: Choose a species suited to your light conditions (e.g., snake plants for low light, succulents for bright sun).
- ● Spray Bottle: For misting humidity-loving plants (e.g., ferns, calatheas).
- ● Trowel or Scoop: For transferring soil or repotting.
- ○ Fertilizer: Balanced liquid fertilizer (e.g., Dyna-Gro Grow) or slow-release granules. Optional: Organic options like fish emulsion or compost tea.
- ● Grow Lights: LED or fluorescent lights for plants in low-light areas (e.g., Samsung LM300).
- ● Humidity Tray: A pebble-filled tray with water to boost moisture for tropical plants.
- ● A designated spot with appropriate light (check your plant’s needs—most do well near a window but not in direct sun).
- ● Consistency in care (plants thrive on routine!).
- ● Patience—some plants take weeks to adjust to their new home.
Step-by-Step instructions for plant survival basics
Here's the straightforward approach I use to keep plants thriving—no guesswork, just science-backed care.
💧 Step 1: Master the Watering Routine
Water only when the top 1-2 inches of soil feel dry. Stick your finger in—if it's damp, wait. Overwatering kills more plants than underwatering. I use the "soak-and-dry" method: water deeply until it runs out the drainage holes, then let excess drain completely. This encourages strong root growth instead of shallow, weak roots.
Most houseplants need water every 7-10 days, but this varies wildly. Watch your plant's leaves—drooping slightly in the morning is normal; crispy or mushy leaves mean you've messed up. Adjust based on your home's humidity and light levels. A bathroom with high humidity might need watering less often than a dry bedroom.
☀️ Step 2: Position for Proper Light
Check your plant's light needs first—most common houseplants thrive in bright, indirect light. Place it near an east-facing window for gentle morning sun, or a few feet back from a south-facing window. Direct sunlight can scorch leaves, turning them yellow or brown along the edges. If leaves look pale and stretched, your plant needs more light.
Rotate your plant a quarter turn weekly so all sides get even light exposure. You'll notice new growth leaning toward the light—this is the plant reaching for its energy source. If you're using artificial grow lights, position them 6-12 inches above the plant and keep them on for 12-14 hours daily.
🌿 Step 3: Dust and Clean Regularly
Dust blocks sunlight from reaching leaves, weakening your plant over time. Wipe leaves gently with a damp microfiber cloth every 2-4 weeks. For larger plants, use a soft brush or sponge to remove dust from the undersides where pests love to hide. I do this in the shower—it's easier to rinse off any remaining dust afterward.
Occasionally, give your plant a lukewarm water shower to remove dust buildup completely. Let it dry in indirect light afterward. This mimics natural rain and helps the plant absorb more light. Just don't do this more than once a month—too much water on leaves can cause fungal issues.
✂️ Step 4: Prune for Health and Growth
Remove any yellow or brown leaves immediately—they drain energy from healthy growth. Use clean, sharp scissors or pruning shears to cut just above a leaf node (the bump where leaves grow). This encourages new growth from that point. I also trim leggy stems back by about 1/3 to promote bushier growth.
Propagate healthy cuttings in water or fresh soil if you want more plants. This gives you free plants while keeping your original healthy. Just make sure your cutting has at least 2-3 sets of leaves before propagating. Avoid cutting into woody stems—focus on soft, green growth for best results.
🪴 Step 5: Repot When Needed
Repot your plant when you see roots growing out of the drainage holes or circling the bottom of the pot. Choose a container that's only 1-2 inches larger in diameter—bigger pots hold too much moisture and can rot roots. Spring is the best time to repot, giving your plant time to establish before winter dormancy.
Use fresh well-draining potting mix and avoid compacting the soil when repotting. Water lightly after repotting, then wait a week before fertilizing. The stress of repotting means your plant needs time to recover before additional nutrients. You'll know it's settled in when you see new growth within 4-6 weeks.
Tips & tricks for plant longevity
A few simple tricks that'll transform your plant from struggling survivor to thriving centerpiece.
The Finger Test: In Step 1, when checking soil moisture, press your finger about an inch deep—this gives you the most accurate reading. Topsoil can dry faster than deeper layers, so don't rely on just the surface. I've learned this the hard way after overwatering plants that actually needed more time between drinks. The key is consistency: check the same depth every time.
Light Rotation Hack: For Step 2's weekly quarter-turn rotation, set a reminder on your phone or tie a piece of yarn to the plant stem and move it with the plant. This ensures even growth without you having to remember. I've caught myself forgetting this step before, and that's when plants start looking lopsided. Think of it like turning a roast in the oven—you want even cooking on all sides.
Pruning Confidence: When trimming in Step 4, don't be afraid to cut back more than just the yellow leaves. Snip off the leggy stems at their base—this might seem drastic, but it encourages fuller growth from the base. I've seen plants go from sparse to bushy in just a few weeks after this treatment. Just remember to always cut just above a leaf node where new growth can sprout.
Repotting Timing: For Step 5, if you're not seeing roots at the drainage holes but your plant still looks cramped, gently press the sides of the pot. If roots are pressing against the container, it's time to upgrade. I've waited too long before, and the plant becomes stressed trying to grow in too-small conditions. Spring is ideal, but if you must repot in winter, choose a sunny spot to help the plant recover faster.
Pro Tips for Keep Plant Alive
- A few simple tricks that'll transform your plant from struggling survivor to thriving centerpiece.
- The Finger Test: In Step 1, when checking soil moisture, press your finger about an inch deep—this gives you the most...
- Light Rotation Hack: For Step 2's weekly quarter-turn rotation, set a reminder on your phone or tie a piece of yarn t...
Frequently asked questions
Got questions about keeping your plant thriving?
You’re not alone—even green thumbs hit snags! Here are answers to the most common queries to help you avoid wilting disasters and grow with confidence.
How often should I water my plant?
Watering depends on the plant type, but a general rule is to check the soil’s moisture before watering. Stick your finger 1-2 inches deep—if it’s dry, it’s time! Overwatering is a bigger killer than underwatering. For most houseplants, every 7-10 days is a safe starting point, but adjust based on humidity, pot size, and light exposure.
Why are my plant’s leaves turning yellow?
Yellow leaves usually signal overwatering or nutrient deficiencies. First, check the roots—if they’re mushy or smell rotten, trim the damaged parts and repot in fresh, well-draining soil. If the soil is bone-dry, you’ve likely underwatered. Yellowing can also mean too much direct sunlight or poor drainage. Pro tip: Adjust one care factor at a time to pinpoint the issue!
What’s the best temperature for indoor plants?
Most houseplants thrive in 65–75°F (18–24°C) during the day and don’t tolerate drafts (like AC vents or heaters). Avoid placing them near windows in extreme cold or hot spots. Tropical plants, like snake plants or pothos, can handle slightly cooler nights, but never let temps drop below 50°F (10°C)—they’ll go dormant or die.
Can I save a plant that’s completely dried out?
Sometimes! If the soil is dry but the stems are still firm, soak the pot in water for 10–15 minutes, then drain excess. For severely dehydrated plants, trim dead leaves and repot in fresh soil. Warning: If the stems are shriveled or black, the plant may be beyond saving. Prevention is key—use a moisture meter or your finger to monitor soil consistently!
What’s the easiest low-maintenance plant for beginners?
Start with snake plants or ZZ plants—they survive neglect, low light, and irregular watering (every 2–4 weeks!). Other forgiving picks: pothos (thrives in dim corners), succulents (drought-tolerant), or peperomias. These plants are your safety net while you learn the ropes!
How do I tell if my plant needs fertilizer?
If your plant looks pale, leggy, or stops growing, it’s likely hungry for nutrients. Most houseplants need fertilizer every 4–6 weeks during spring/summer (their growing season). In fall/winter, cut back to once every 2–3 months or skip it entirely. Always dilute fertilizer to half-strength to avoid burning roots.
Wrapping up and next steps
Keeping your plant alive is all about understanding its needs—light, water, soil, and a little love! 🌱 With the right care, you’ll watch it thrive and grow stronger over time. Start small, observe your plant closely, and adjust as needed.
Ready to take the next step? Pick a plant that excites you—whether it’s a hardy succulent or a lush fern—and put these science-backed tips into action. Your green thumb is just a watering can away! 🌿