
Tools
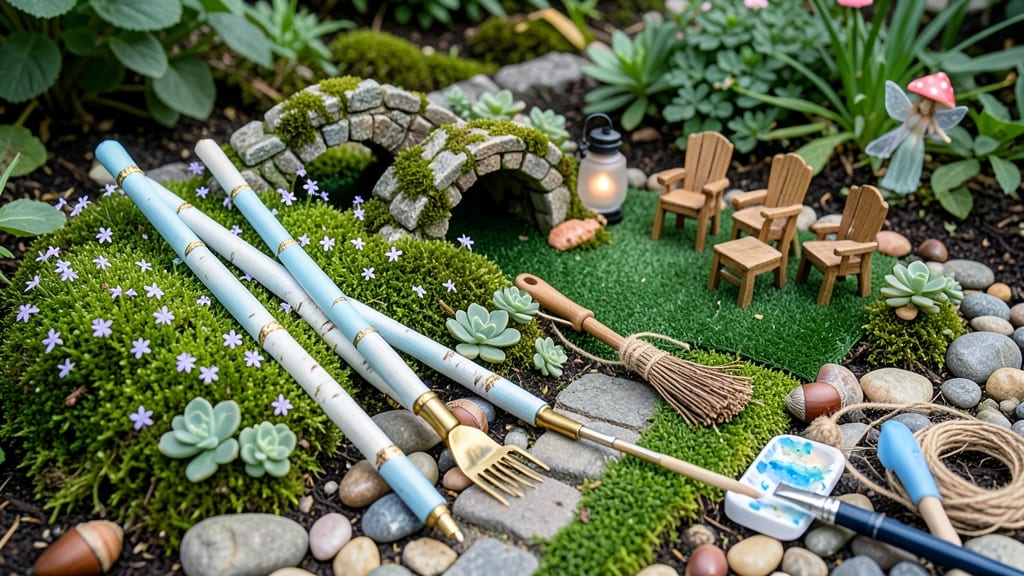
Tiny stakes, big magic. ✨ These fairy garden stakes transform your miniature landscape from flat to three-dimensional, giving that "lived-in" cottage charm where every plant has its own little story.
I’ve crafted stakes from twigs, bamboo, and even painted driftwood—each one becomes a tiny work of art while keeping plants upright.
You don’t need fancy tools or materials—just a handful of sticks, some glue or twine, and a little creativity. Bamboo splits easily for ladders, driftwood adds rustic texture, and painted designs turn stakes into fairy doorways or tiny bridges.
The best part? They’re lightweight, weather-resistant, and blend seamlessly into any whimsical scene.
By the end, your fairy garden will feel like a real tiny world, with stakes holding up delicate flowers or framing cozy nooks. The stakes double as decor—imagine a stake wrapped in moss as a fairy’s "path" or a painted stick as a signpost for visitors.
Functional and enchanting? That’s the fairy garden way.
Works for any size garden—from a windowsill display to a full backyard fairy village. Let’s get crafting! (And yes, the kids will love helping.)
📚 In This Guide
- What you need
- Instructions
- Tips and common mistakes
- Wrapping up and next steps
What you need
- ● Wooden stakes: 3–4 inch diameter, 12–18 inches long (cedar or pine work best for durability). Quantity: 10–20, depending on your garden size.
- ● Sandpaper: Medium (120–150 grit) and fine (220 grit) for smoothing rough edges.
- ● Acrylic paint: Vibrant colors (pastels, jewel tones, or metallic for fairy flair). Tip: Use non-toxic paint for outdoor safety!
- ● Paintbrushes: Fine-tip for details and wider brushes for base coats.
- ● Wood glue or Mod Podge: For attaching decorative elements (e.g., twigs, beads, or lace).
- ○ Sealer (optional but recommended): Waterproof varnish or polyurethane to protect your stakes from weather.
- ● Hot glue gun & glue sticks: For quick, sturdy attachments (great for lightweight decor).
- ● Decorative elements: Miniature beads, sequins, tiny charms, or dried flowers.
- ● Stencils or stencil tape for crisp designs.
- ● Wood-burning tool (for intricate patterns or names).
- ● Twine or ribbon to wrap stakes for a rustic look.
- ● Glitter or iridescent paint for extra sparkle.
- ● Small nails or hooks to hang tiny lanterns or signs.
Step-by-step instructions for crafting fairy garden stakes
Here’s how to create charming wooden stakes that’ll make your tiny garden look magical.
🪴 Step 1: Gather Materials and Tools
You’ll need 4 wooden stakes (about 6-8 inches tall and ½-inch thick), a wood-burning tool (or pencil for drawing), non-toxic paint or acrylic markers, a sanding block, and a sealant (like Mod Podge or clear varnish). I like to use cedar or pine—they’re lightweight and easy to work with. Sand each stake lightly to smooth rough edges, then wipe away dust with a damp cloth.
For extra whimsy, gather small charms (like tiny mushrooms, flowers, or beads) and hot glue to attach them later. If you’re using paint, thin it slightly with water for easier application on wood. This step sets the foundation, so take your time—your stakes will only be as charming as their details.
🔥 Step 2: Design and Decorate Your Stakes
Sketch your design lightly with a pencil first. Classic fairy garden stakes often feature tiny doors, ladders, or tiny houses—think of them as mini signs or markers for your garden. Use the wood-burning tool to etch details like windows, vines, or names (like "Fairy Path" or "Mushroom Grove"). If you’re not burning, trace with a fine-tip marker and fill in with paint or markers.
Let creativity guide you here—some stakes can be functional (like a "Do Not Disturb" sign for a fairy’s home), while others can be purely decorative. I like to add tiny dots for stars or wavy lines for vines to make them feel alive. Once dry, seal the paint with a matte varnish to protect it from rain and sun. This step is where your stakes truly come to life!
✂️ Step 3: Add 3D Touches for Depth
This is where your stakes go from flat to magical. Use hot glue to attach small charms, beads, or even tiny fabric scraps (like lace for a "fairy curtain"). For extra texture, wrap thin twine around the stakes to create ropes or fences. If you’re feeling ambitious, paint tiny mushrooms at the base or tiny flowers along the sides—just use a toothpick to hold them in place while the glue sets.
Let everything dry completely before handling. I often add a tiny loop of wire at the top of each stake so I can hang them from strings or tuck them into the soil. This step makes your stakes feel like they belong in a real fairy tale—every detail matters!
🌱 Step 4: Plant and Position Your Stakes
Now it’s time to bring your stakes into the garden! Push them 1-2 inches deep into the soil at the edges of paths, around tiny houses, or near clusters of plants. For a cohesive look, I like to group stakes in sets of three—like a "Welcome" trio or a "Danger" warning for a fairy’s private space. If your garden has a theme (like a forest or cottage), match the stakes to the vibe.
Water the soil lightly after planting to help the stakes settle. You can also lean them against rocks or branches for a more natural look. Over time, they’ll weather slightly, adding to their rustic charm. This is the moment your fairy garden starts to feel like a real tiny world!
Tips & tricks for perfect fairy garden stakes
Transforming simple wooden stakes into enchanting fairy garden markers takes a few clever touches—and avoiding common pitfalls. Here's how to make yours stand out without the headaches.
Material Matters: Cedar or pine stakes work best because they're lightweight and easy to carve, but avoid pressure-treated wood—it's too heavy and can contain chemicals that might leach into your garden soil. If you can't find cedar, untreated pine is your next best option. Sanding is key: use a fine-grit sandpaper (around 120-150 grit) to smooth rough edges before decorating, which prevents splinters and helps paint or varnish adhere better. I like to sand each stake until it feels silky smooth to the touch.
Design Strategy: In Step 2, when sketching your designs, I recommend using a light pencil first—this prevents mistakes from showing through when you add paint or markers. For intricate details like tiny windows or vines, trace over your pencil lines with a fine-tip marker before filling in with paint. This creates clean, crisp lines that look professional. Pro tip: If you're using a wood-burning tool, practice on scrap wood first to get comfortable with the pressure needed for clean lines.
3D Touches That Wow: The secret to making your stakes feel truly magical is in the details of Step 3. When adding charms or beads, use a toothpick to hold them in place while the hot glue sets—this gives you more control than just pressing with your fingers. For wrapping twine, start at the base and work your way up, keeping the wraps tight and even. I also recommend adding a tiny loop of wire at the top of each stake before planting—this makes them easy to remove and reposition if needed, and you can hang them from strings or tuck them into the soil with ease.
Placement Pro Tips: When positioning your stakes in Step 4, think about creating a narrative for your fairy garden. Place "Welcome" stakes at the entrance, "Danger" signs near delicate plants, and "Fairy Path" markers along walkways. For a cohesive look, I suggest grouping stakes in odd numbers (like three) to create visual interest. If your garden has a specific theme, match the stakes to that vibe—forest stakes might have mushrooms and vines, while cottage stakes could feature flowers and lace.
Pro Tips for Make Fairy Garden Stakes
- Transforming simple wooden stakes into enchanting fairy garden markers takes a few clever touches—and avoiding common...
- Material Matters: Cedar or pine stakes work best because they're lightweight and easy to carve, but avoid pressure-tr...
- Design Strategy: In Step 2, when sketching your designs, I recommend using a light pencil first—this prevents mistake...
Frequently asked questions
Got questions about crafting fairy garden stakes? You’re not alone! Here are some of the most common queries—and their simple solutions—to help you create sturdy, magical supports with ease.
What’s the best wood to use for fairy garden stakes?
Opt for lightweight, durable woods like bamboo, cedar, or pine. Avoid softwoods like poplar—they’ll warp or break. For a rustic look, sand the wood smooth and seal it with non-toxic outdoor varnish to protect against moisture.
How long do fairy garden stakes last outdoors?
With proper sealing, wooden stakes can last 1–2 years before weathering. For longer life, store them in a dry place when not in use or replace them seasonally. Bamboo or metal stakes (like rebar) are even more resilient but may lack charm!
Can I use non-wood materials for stakes?
Try toothpicks (for tiny gardens), plastic dowels (lightweight and cheap), or metal skewers (for a modern twist). Just ensure they’re safe for outdoor use—avoid treated lumber or anything that could leach chemicals.
How do I prevent stakes from leaning or toppling?
Dig stakes 1–2 inches deep or use a mallet for firm placement. For extra stability, tie them to nearby plants or rocks with twine or wire. If using heavy decorations (like mushrooms or bridges), add a second stake for support.
What’s the easiest way to paint or decorate stakes?
Use acrylic paint or wood-burning tools for designs. Seal with a clear varnish to protect your artwork. For a no-mess option, wrap stakes with twine or lace and secure with glue. Pro tip: sketch designs first to avoid mistakes!
Wrapping up and next steps
Creating your own fairy garden stakes is a rewarding and creative way to bring magic to your tiny landscapes! With just a few simple materials and a little imagination, you can craft charming supports that elevate your fairy garden’s charm.
Whether you’re a beginner or a seasoned DIYer, these stakes add a personal touch that store-bought options can’t match.
Now that you’re inspired, why not take the next step? Gather your tools, experiment with designs, and watch your fairy garden flourish! 🌿✨ Happy crafting!