
Vegetables
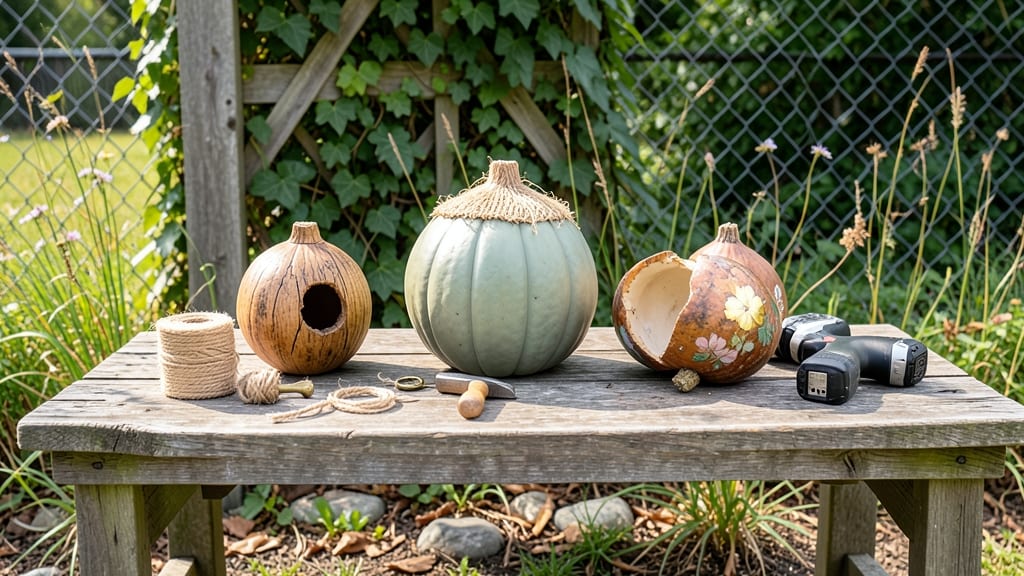
Transforming gourds into birdhouses adds rustic charm while inviting feathered friends into your garden. 🌿 The trick isn’t just hanging them—it’s balancing weight so climbing plants can lift them naturally, creating a living garden art piece.
My first attempt nearly toppled over, but this method keeps them stable while letting vines do the work.
You’ll need hollowed gourds (or pre-made gourd birdhouses), sturdy twine or wire, and climbing plants like morning glories or jasmine. The key is threading the twine through the gourd’s stem hole and tying it to the vine—this lets the plant support the weight over time.
I’ve hung mine at 5-6 feet off the ground, where birds feel safe but can still spot predators.
By summer, your gourd birdhouses will blend seamlessly into the garden, their natural textures contrasting beautifully with blooming vines. The birds will love the cozy nooks, and you’ll have a conversation piece that evolves with the seasons. Plus, the DIY customization—painting accents or adding moss—lets you match your garden’s aesthetic.
Works best in warm climates where gourds thrive, but even in cooler areas, you can use pre-drilled gourds and hang them from existing trellises. The magic happens when the vines grow—watch as your garden becomes a living, breathing bird sanctuary. Ready to get started?
📚 In This Guide
- What you need
- Instructions
- Tips and common mistakes
- Wrapping up and next steps
What you need
- ● Gourds: 2–4 medium-sized hard-shelled gourds (e.g., acorn squash, banana gourds, or miniature pumpkins) – 3–6 inches in diameter for small birds, 6–8 inches for larger species.
- ○ 1–2 larger gourds (optional, for multi-chamber designs or decorative accents).
- ● Drill or hand saw: A 1/4-inch to 1/2-inch drill bit (for entry/exit holes) or a fine-tooth saw for cutting gourds.
- ● Sandpaper: 80–120 grit to smooth rough edges and prevent splinters.
- ● Non-toxic paint or sealant: (e.g., acrylic paint or milk paint) for weatherproofing and aesthetics.
- ● Paintbrushes: Fine-tip brushes (sizes 0–2) for detailing.
- ● Roofing material: Option 1: A smaller gourd lid (cut to fit) or a wooden or metal roof (e.g., 1/8-inch thick cedar or tin).
- ● Option 2: Waterproof fabric (e.g., canvas or outdoor upholstery material) for a lightweight cover.
- ● Fasteners: Sturdy twine, jute rope, or paracord: 1/8–1/4 inch thick (for hanging).
- ● Small nails or screws: (e.g., 1/4-inch galvanized nails or deck screws) to secure roofs or perches.
- ● Perch material: A 1/4-inch diameter dowel or branch (sanded smooth, 2–4 inches long).
- ● Hanging hardware: Eye hooks or S-hooks: Heavy-duty (1/4-inch thread) for supporting weight.
- ○ Carabiners or toggle bolts: (optional, for climbing plants like morning glories or ivy).
- ● Decorative elements: Acrylic gems, twine-wrapped beads, or dried flowers for a rustic touch.
- ● Weatherproof sealant: (e.g., Mod Podge Outdoor or clear polyurethane spray) to extend gourd lifespan.
- ● LED tea lights: (battery-operated, waterproof) for a magical nighttime glow (place outside the gourd).
- ● Plant ties or zip ties: To secure gourds to climbing structures (e.g., trellises or fences).
- ● Birdseed or nesting material: Shredded coconut, straw, or untreated wood shavings (place inside before hanging).
Step-by-step instructions for hanging gourd birdhouses safely
Here's how to balance weight and secure your gourd birdhouses so they last through seasons.
🪴 Step 1: Choose the Right Gourds and Drill Holes Strategically
Select mature, dry gourds with thick walls—6-8 inches in diameter works best for small birds. I always test the wall thickness by tapping gently with a fingernail; if it sounds hollow, the gourd is too dried out. Use a ½-inch drill bit to create the entrance hole, positioning it 4-6 inches from the bottom on the side facing away from prevailing winds.
Drill a second, smaller ¼-inch hole on the opposite side for ventilation. This prevents moisture buildup inside the gourd, which can rot the walls over time. I mark the spots with a pencil first—misplaced holes weaken the structure and make hanging unstable.
🌱 Step 2: Reinforce the Gourd Before Adding Weight
Line the inside of the gourd with a ¼-inch layer of cedar shavings—this adds insulation for winter and prevents the gourd from cracking under weight. I use a small paintbrush to press the shavings into the curves, ensuring full coverage. For extra stability, wrap the outer surface with a thin layer of waterproof tape along the bottom half where the hanging hardware will attach.
This reinforcement is critical—without it, the gourd’s natural fibers can split when you add the birdhouse hardware. I’ve seen gourds crack open within weeks without this step, especially in humid climates.
☀️ Step 3: Attach the Hanging Hardware Securely
Use a heavy-duty eye screw or staple with a loop to create the hanging point. I drill a pilot hole just large enough for the screw, then insert it through the reinforced bottom of the gourd at a 45-degree angle toward the back. This distributes the weight more evenly than a straight-down attachment.
For climbing plants, I add a second screw or staple 2 inches above the first to create a loop for the vine to twine through. This keeps the gourd stable while allowing the plant to grow upward naturally. Test the attachment by gently tugging—if it wobbles, add a third screw for reinforcement.
⏰ Step 4: Hang at the Correct Height and Orientation
Position the gourd 5-10 feet off the ground, depending on the bird species—small birds like chickadees prefer the lower end, while larger birds need more height. Face the entrance hole away from prevailing winds and direct sunlight to keep the interior cool. I use a sturdy branch or hook rated for at least 5 pounds of weight—gourds can feel lighter than they are when empty.
Watch for the first signs of bird activity within 1-2 weeks. If you notice the gourd swaying excessively, add a small weight (like a 1-ounce lead-free fishing weight) inside the shavings to stabilize it without blocking the entrance.
🌿 Step 5: Maintain and Monitor Seasonally
Inspect the gourds every 3-4 months, especially after storms or heavy rains. Check for cracks, loose screws, or signs of mold inside. If the gourd feels lighter than expected, it may have dried out further—add a few drops of linseed oil to the outer surface to restore moisture balance.
In late fall, remove any old nesting material but leave the gourd in place. Birds often return to familiar spots in spring, and a clean but familiar home encourages reuse. I mark each gourd with a small tag noting the year—this helps track which designs attract the most visitors.
Tips & tricks for perfect gourd birdhouses with climbing plants
These practical tricks will help you create stable, bird-friendly gourd birdhouses that last through seasons—especially when paired with climbing plants.
Gourd Selection Secret: Look for gourds with a slight bulge at the bottom—they naturally distribute weight better. I've found that gourds with a 7-inch diameter strike the perfect balance between stability and bird comfort. Tap each gourd with your fingernail before buying; if it sounds hollow, it's too dried out and will crack under weight. For extra peace of mind, soak gourds in warm water for 12 hours before drilling to prevent splitting during hole creation.
Reinforcement Game-Changer: The ¼-inch cedar shavings aren't just insulation—they create a cushion that absorbs shock when birds land. Press them firmly into the curves using a paintbrush, then add a second layer of waterproof tape along the bottom half where screws will go. This double protection is what keeps gourds from cracking when vines grow heavier in spring. I've seen gourds last 5+ years with this reinforcement, even in rainy climates.
Climbing Plant Integration: When attaching the second screw for vines, position it 2 inches above the first but slightly offset to the side. This creates a natural spiral for the vine to climb while maintaining stability. Test by gently pulling downward—if the gourd wobbles, add a third screw diagonally opposite the first two. For fast-growing plants like morning glories, I recommend using stainless steel screws instead of staples—they hold better over time.
Weight Distribution Tip: The 45-degree angle for the eye screw isn't just about looks—it redirects the gourd's weight toward the back, preventing it from tilting forward. For extra stability, place a 1-ounce fishing weight inside the shavings near the bottom before hanging. This subtle addition prevents swaying without blocking the entrance hole, and birds won't notice it's there.
Pro Tips for Hang Gourd Birdhouses
- These practical tricks will help you create stable, bird-friendly gourd birdhouses that last through seasons—especial...
- Gourd Selection Secret: Look for gourds with a slight bulge at the bottom—they naturally distribute weight better. I'...
- Reinforcement Game-Changer: The ¼-inch cedar shavings aren't just insulation—they create a cushion that absorbs shock...
Frequently asked questions
Got questions about hanging gourd birdhouses? You’re not alone! Here are some of the most common concerns—and their practical solutions—to help you get it right the first time.
What’s the best time of year to hang gourd birdhouses?
Hang them in early spring (before nesting season peaks) or late summer (after harvest). Avoid winter—cold temps can stress birds, and gourds may crack from freezing. If using dried gourds, wait until after the first frost for a smoother hang.
Can I use any climbing plant, or are some better for support?
Sturdy vines like pumpkin, cucumber, or morning glories work best—they grow fast and provide natural weight distribution. Avoid weak stems like nasturtiums; opt for trellises or stakes if your plant isn’t robust enough. Pro tip: Train vines upward early to prevent sagging!
How do I balance the weight so the birdhouse doesn’t tip?
Use a wide, flat base (like a gourd slice or wooden platform) to distribute weight. For extra stability, tie the birdhouse to the vine with soft twine (not wire) and add a small rock or sandbag inside if needed. Avoid overloading—birds need easy access!
Will squirrels or other pests get into my gourd birdhouse?
Yes! Squirrels love gourds, but you can deter them with metal mesh over entry holes (leave space for birds) or hang the house 10+ feet high. For extra defense, place a predator guard (like a baffle) below the hanging point.
What if my gourd birdhouse starts rotting or smells bad?
Rotting is common if gourds aren’t fully dried. Cure them in a sunny, dry spot for 2–4 weeks before hanging. If mold appears, scrub with vinegar water and let dry completely. For persistent odors, replace the gourd—safety comes first!
Wrapping up and next steps
Hanging gourd birdhouses is a rewarding way to blend nature, creativity, and functionality—especially when paired with climbing plants! 🌿 By mastering the weight-balancing tricks shared here, you’ve unlocked a simple yet effective solution to keep your birdhouses sturdy and your garden thriving.
Whether you’re a beginner or a seasoned DIYer, every small adjustment makes a big difference in attracting feathered friends while keeping your trellis looking stunning.
Now that you’re ready to hang, take the next step: watch your birdhouses come to life as local birds make them their new homes. Grab a notebook to track which designs attract the most visitors—you might just discover a new favorite gourd shape or plant combo! 🐦✨