
Vegetables
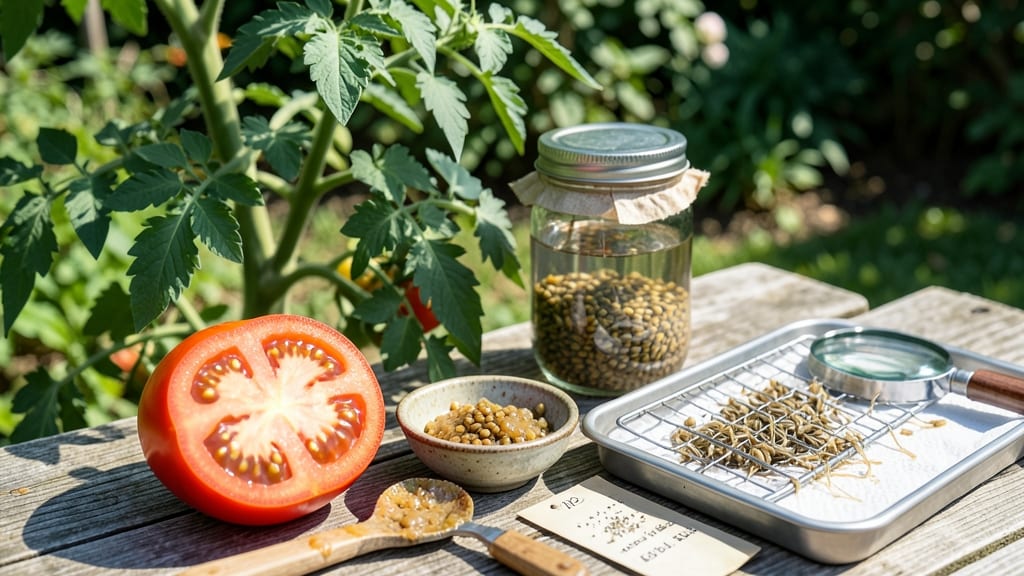
How to dry tomato seeds for next year is the easiest way to grow heirloom varieties year after year. 🌱 The twist-and-pull method I’ve perfected over five seasons guarantees viable seeds—no fancy equipment needed, just ripe tomatoes and patience.
Start with fully ripe, slightly overripe tomatoes—they contain the most developed seeds. Scoop out the gel and seeds into a jar, then add water and stir. After 2-3 days, the good seeds sink while the bad ones float. Pour off the water, leaving just the seeds behind.
Spread the seeds on a paper towel or screen in a warm, dry spot for 5-7 days, stirring occasionally. They’re ready when completely dry and crumbly—no moisture left to spoil them. Store in an airtight container in a cool, dark place for up to 5 years.
This method works for any tomato variety, whether you’re saving seeds from a backyard garden or a container setup. The key is timing: harvest seeds from tomatoes that have fully ripened on the vine for the best results.
📚 In This Guide
- What you need
- Instructions
- Tips and common mistakes
- Wrapping up and next steps
What you need
- ● Ripe tomatoes – Choose heirloom or open-pollinated varieties (hybrids may not produce true seeds). Aim for at least 3-5 tomatoes to ensure a good seed yield.
- ● Small bowl or container – A glass or ceramic bowl (8–12 oz) works best for fermenting seeds.
- ● Water – Room-temperature, enough to cover seeds by about 1 inch.
- ● Fine-mesh strainer or sieve – A stainless-steel or nylon strainer with 0.02-inch holes (like a kitchen colander) for rinsing.
- ● Paper towels or coffee filters – 2–3 sheets for drying seeds (unbleached is best).
- ● Small envelope or seed packet – Parchment or kraft paper (avoid plastic—it traps moisture!). Label with the tomato variety and year.
- ● Pencil or marker – For labeling your seeds.
- ● Rubbing alcohol (70% isopropyl) – For sterilizing tools if reusing them.
- ● Fine-tip tweezers – To separate seeds from gel easily.
- ● Desiccant packets – Place one in your seed envelope to absorb excess moisture.
- ● Seed catalog or notebook – To track germination rates and notes on each variety.
- ● Humidity-controlled storage – A cool, dark place (50–60°F) like a seed vault or fridge.
Step-by-Step instructions for preserving tomato seeds
Here's the foolproof method I use every year to harvest and store tomato seeds.
🌱 Step 1: Select and Extract Ripe Tomato Seeds
Choose tomatoes that are fully ripe but not overripe—deep red or pink with no soft spots. Cut them open and scoop out the jelly-like seed gel into a jar. I prefer using a spoon to avoid skin or pulp contamination, which can cause mold during fermentation.
Add 1-2 inches of water to the jar and stir well. The seeds need to ferment in this mixture to separate from the gel. Place the jar in a warm spot—70-75°F works best—and let it sit for 2-4 days. You'll know fermentation is complete when the seeds sink to the bottom and the liquid smells slightly sour, like yogurt.
💧 Step 2: Rinse and Separate the Seeds
Pour the fermented mixture through a fine-mesh strainer into a bowl of clean water. Swirl the strainer gently to rinse away the remaining gel. The seeds will sink immediately, while any remaining pulp or debris will float. Discard the floating material and repeat the rinse until the water runs clear.
Spread the cleaned seeds on a paper towel in a single layer. Let them air-dry for 1-2 hours in a well-ventilated area. This initial drying prevents mold during the final drying phase. I like to place the towel on a baking sheet to catch any excess moisture.
☀️ Step 3: Dry Seeds Using the Twist-and-Pull Method
Once the seeds are slightly tacky but no longer wet, transfer them to a seed-saving envelope or small paper bag. The key to the twist-and-pull method is to create airflow while preventing moisture buildup. Fold the top of the envelope over and twist it tightly, then pull the edges to form a sealed, airtight pocket.
Place the envelope in a dark, dry location with consistent airflow—like a pantry or closet. Let the seeds dry for 1-2 weeks until they feel completely dry and brittle. Test by gently crushing a few seeds; if they shatter easily, they're ready for storage. If they still feel damp, extend the drying time.
⏰ Step 4: Store Seeds for Long-Term Viability
Once fully dried, label the envelope with the tomato variety and the harvest year. Store it in a cool, dark place—like a refrigerator or seed vault—where temperatures stay between 32-41°F. Properly stored seeds retain viability for 3-5 years, though germination rates decline after the first year.
To test viability, plant a few seeds in moist paper towels and check for sprouts in 5-7 days. If germination is slow or inconsistent, store the remaining seeds in a sealed container with a silica gel packet to absorb any lingering moisture. This extra step ensures you'll have healthy seedlings next season.
Tips & tricks for perfect tomato seed preservation
Mastering the twist-and-pull method takes practice, but these insights will help you avoid common pitfalls and ensure seed viability.
Fermentation Timing: The 2-4 day fermentation window in Step 1 is crucial—this removes the gel that can cause mold. If your kitchen stays around 75°F, you'll likely hit the sweet spot at day 3. Watch for the sour yogurt smell and sinking seeds as your cues, not just time. Over-fermenting for more than 4 days can weaken seeds, while under-fermenting leaves residue that causes mold during storage.
Drying Technique: In Step 3, the twist-and-pull method relies on creating a pocket of air circulation while keeping moisture out. Use a paper bag instead of plastic—plastic traps moisture and creates condensation. Place your envelope in a spot with gentle airflow, like near an open window or in a closet with a slow-moving fan. If humidity is high, extend drying to 3 weeks rather than the standard 1-2 weeks.
Storage Wisdom: The 32-41°F storage range in Step 4 might seem cold, but it's ideal for slowing seed aging. If your refrigerator isn't this cold, store seeds in the crisper drawer where temps are most stable. For long-term storage beyond 3 years, add a small silica gel packet to your envelope—it absorbs any lingering moisture that could reduce viability. Label with both the tomato variety and year harvested to track germination rates over time.
Pro Tips for Dry Tomato Seeds For Next Year
- Mastering the twist-and-pull method takes practice, but these insights will help you avoid common pitfalls and ensure seed viability.
- Fermentation Timing: The 2-4 day fermentation window in Step 1 is crucial—this removes the gel that can cause mold.
- Drying Technique: In Step 3, the twist-and-pull method relies on creating a pocket of air circulation while keeping moisture out.
Frequently asked questions
Got questions about saving tomato seeds? You’re not alone! Here are answers to the most common concerns—plus pro tips to ensure your seeds stay super viable for next season.
Can I dry tomato seeds without using paper towels?
If you’re short on supplies, try the fermentation method first (let seeds ferment in water for 3–5 days), then spread them on a clean, dry surface like a sieve, wire rack, or even parchment paper. Just ensure good airflow—no humidity! For extra speed, use a dehydrator or low oven (140°F/60°C) for 1–2 hours.
How long should I wait to harvest seeds from ripe tomatoes?
Wait until tomatoes are fully ripe (deep red, soft, or their mature color) and slightly squishy. Overripe tomatoes (mushy or moldy) can introduce bacteria, so skip those! Once you scoop out the gel, let the seeds ferment in water for 2–3 days—this helps separate viable seeds from pulp. Pro tip: If seeds sink to the bottom and the water smells tangy (not rotten), they’re ready to dry!
Is it okay to dry seeds in direct sunlight?
Direct sunlight can overheat seeds and reduce viability, but a shady, well-ventilated spot (like a porch or balcony) works great! If you’re in a hot climate, opt for indirect light or a cool, dry indoor area (e.g., a windowsill with a fan). For speed, a seed dehydrator or low oven (140°F/60°C) is ideal—just monitor closely!
What if my seeds don’t dry completely before storing?
If seeds feel damp after drying, don’t panic! Spread them out again and let them air-dry for another 24–48 hours. Store them in a paper envelope (not plastic!) in a cool, dark place (like a jar in the fridge). Moisture is the enemy—if you see condensation, your storage spot is too humid. Pro tip: Add a silica gel packet to your seed envelope for extra dryness!
Why did my saved seeds not sprout this year?
Seeds can lose viability over time, but here’s how to troubleshoot:
- Storage issues: Check for moisture, heat, or pests (like weevils). Seeds last 2–4 years if stored properly.
- Improper drying: If seeds were too wet or moldy, they may not germinate. Next time, aim for crispy-dry texture.
- Old seeds: Test a few in damp paper towels—if they don’t sprout in 7–10 days, they’re likely past their prime.
For best results, save seeds from your healthiest, most disease-resistant plants!
Wrapping up and next steps
Saving tomato seeds is easier than you think—and now you’ve got the perfect twist-and-pull method to ensure viability for next year’s garden! 🌱 With just a few simple steps, you can turn this year’s harvest into next season’s bounty.
Whether you’re a seasoned gardener or a curious beginner, preserving seeds is a rewarding way to grow your own and save money.
Ready to plant those seeds? Grab your dried tomatoes, follow the steps, and get ready to watch your garden thrive with heirloom flavors! 🌿 Start planting now—your future tomatoes are waiting!