
Propagation
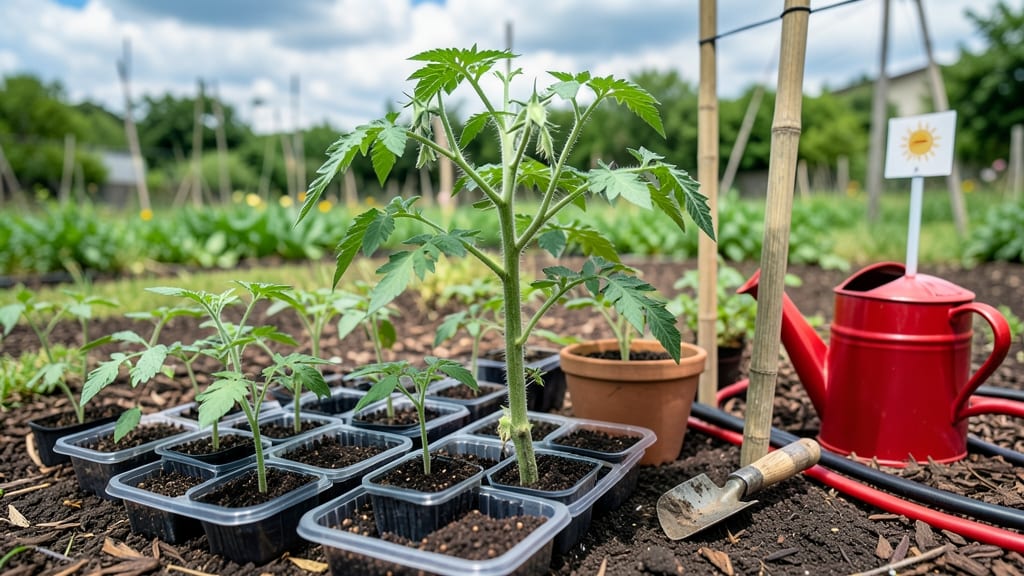
Growing tomatoes from seeds outside how to grow tomatoes from seeds outside starts with tiny specks that become sun-drenched vines. 🌱 I’ve watched my first seedlings push through soil in late spring—it’s the most rewarding part of the process.
The key difference from indoor growing is patience: outdoor tomatoes need time to harden off before facing real sunlight and wind.
You’ll need 6-8 weeks of indoor starts (for cooler climates) or direct sowing after last frost, plus a sunny spot with 6+ hours of sunlight daily. The soil should be loose, well-draining, and rich in compost—tomatoes hate soggy roots. Water consistently but avoid wetting leaves to prevent disease.
By midsummer, you’ll harvest tomatoes that taste nothing like store-bought. The plants grow tall, sometimes needing stakes, and produce fruit until frost. Just watch for common pests like hornworms and keep an eye on blossom end rot.
This method works best in zones 4-10, but even in colder areas, a long growing season pays off. Let’s get those seeds planted!
📚 In This Guide
- What you need
- Instructions
- Tips and common mistakes
- Wrapping up and next steps
What you need
- ● Tomato seeds: Choose heirloom or hybrid varieties (e.g., Cherry Tomatoes, Beefsteak, or Roma). Start with 5–10 seeds per pot or 100+ seeds for bulk planting.
- ● Seed-starting mix: A sterile, well-draining mix (e.g., coco coir + perlite or a pre-mixed seedling blend). Use 1–2 cups per seedling tray or 1 gallon per 4-inch pot.
- ● Containers: Seedling trays with biodegradable pots (2–3 inches deep) or plastic cell packs (for 100+ seeds).
- ● 5–6 inch pots (for transplanting seedlings after germination).
- ● Grow lights or sunny windowsill: A full-spectrum LED grow light (12–16 hours/day) or a south-facing window (if natural light is sufficient).
- ● Watering can or spray bottle: With a fine mist nozzle to avoid displacing seeds.
- ● Plant labels: Small wooden sticks or plant markers to track varieties (especially if growing multiple types).
- ○ Gloves (optional): To keep hands clean while handling soil.
- ○ Heat mat (optional): Speeds up germination (70–80°F is ideal).
- ● Fertilizer: A balanced, water-soluble fertilizer (e.g., 10-10-10) or compost tea for seedlings.
- ○ Hardening-off tray (optional): A shallow container for acclimating seedlings to outdoor conditions before transplanting.
- ● Stake or cage: 5–6 foot tall stakes or cages for supporting tomato plants (install at transplanting).
Step-by-Step instructions for growing tomatoes from seeds outside
Turn those tiny seeds into thriving plants with this foolproof outdoor method.
🌱 Step 1: Start Seeds Indoors 6-8 Weeks Before Last Frost
Fill small seed trays with sterile seed-starting mix and moisten until damp but not soggy. Plant seeds ¼ inch deep—any deeper and they’ll struggle to reach the surface. I like to use a toothpick to make small holes for precise placement. Cover the tray with plastic wrap to retain warmth and humidity, then place it in a warm spot (70-75°F).
Germination usually takes 7-14 days, depending on your climate. You’ll know it’s time when you see tiny green sprouts breaking through the soil. Once they appear, remove the plastic wrap immediately to prevent fungal growth. Keep the soil consistently moist but never waterlogged—you’ll see seedlings wilt if they’re too dry or develop yellow leaves if overwatered.
☀️ Step 2: Provide Bright Light and Harden Off Seedlings
Tomato seedlings need 12-16 hours of light daily to grow strong. If starting indoors, use a grow light 2-3 inches above the plants. You’ll spot leggy growth (long, weak stems) if they’re not getting enough light—this is a red flag to move them closer. Rotate the trays daily so seedlings grow straight instead of leaning toward the light.
About 2 weeks before transplanting, begin hardening off seedlings by placing them outside in a sheltered spot for 1-2 hours daily. Gradually increase exposure over 7-10 days
Choose a sunny spot with 6-8 hours of direct sunlight and well-draining soil. Dig holes twice as wide as the seedling’s root ball but no deeper. Gently remove seedlings from their trays, tease the roots slightly to encourage spreading, then place them in the holes. Fill with soil, firming lightly around the base to eliminate air pockets. Space plants 18-24 inches apart for determinate varieties (bush types) or 24-36 inches apart for indeterminate (vining) types. Water deeply right after planting to help roots establish. Mulch around the base with 2-3 inches of organic mulch to retain moisture and suppress weeds—this is especially important in hot climates where soil dries out quickly. Water tomatoes at the base 1-2 inches deep, keeping soil consistently moist but not soggy. You’ll notice wilting in the afternoon if they’re thirsty—this is normal as long as leaves perk up after watering. Avoid wetting foliage to prevent fungal diseases like early blight. A drip irrigation system works best, delivering water directly to the roots without splashing leaves. Install stakes or cages at planting time—waiting until plants are tall makes it harder to insert supports without damaging roots. Prune suckers (the small shoots that form in the leaf axils) regularly to encourage stronger fruit production. Harvest tomatoes when they’re fully colored and slightly soft to the touch—this ensures peak flavor and prevents overripe fruit from cracking.🪴 Step 3: Transplant Seedlings Outdoors After Last Frost
💧 Step 4: Maintain Moisture and Support as Plants Grow
Tips & tricks for perfect tomato seedlings
Here's what nobody tells you about turning those tiny seeds into robust tomato plants.
Seed Placement Precision: When planting your seeds ¼ inch deep in Step 1, use a toothpick to create small holes—this ensures consistent depth and prevents overcrowding. I've learned the hard way that seeds planted too deep struggle to break through the soil, so aim for just enough coverage to protect them while allowing sunlight to reach the surface once they sprout. The key is gentle pressure when pressing the soil back over the seeds.
Lighting is Everything: Those 12-16 hours of light daily in Step 2 are non-negotiable for strong seedlings. If your seedlings develop leggy stems (long, weak growth), it's your first sign they're light-deprived. Move your grow light closer—just 2-3 inches above the plants—and rotate the trays daily to prevent them from leaning toward the light source. This simple habit makes all the difference in creating sturdy plants ready for transplanting.
Transplanting Timing: The 2 weeks before transplanting hardening off period in Step 3 is your chance to prepare seedlings for outdoor conditions. Start with just 1-2 hours daily in a sheltered spot, then gradually increase exposure. Watch for leaves curling or wilting—they're telling you they need more time to adjust. This gradual process prevents transplant shock and gives your plants the best chance to thrive once they're in the ground.
Root Care Matters: When transplanting, dig holes twice as wide as the seedling's root ball in Step 3. This extra space encourages roots to spread outward rather than circling, which can strangle the plant. Gently tease the roots before placing them in the hole—this simple step promotes better root establishment and sets your plants up for success in their new home.
Pro Tips for Grow Tomatoes From Seeds Outside
- Here's what nobody tells you about turning those tiny seeds into robust tomato plants.
- Seed Placement Precision: When planting your seeds ¼ inch deep in Step 1, use a toothpick to create small holes—this ...
- Lighting is Everything: Those 12-16 hours of light daily in Step 2 are non-negotiable for strong seedlings. If your s...
Frequently asked questions
Got questions about growing tomatoes from seeds outside? You’re not alone! Here are some of the most common queries—and their answers—to help you succeed in your gardening adventure.
When is the best time to plant tomato seeds outdoors?
Timing is key! For most climates, start seeds indoors 6–8 weeks before the last frost date (around March–April in many regions). If you’re direct-sowing outdoors, wait until soil is at least 60°F (15°C) and nighttime temps stay above 50°F (10°C)—usually after Memorial Day in cooler zones. Cold soil can stunt seedlings, so patience pays off!
How do I protect my seedlings from pests and diseases?
Use row covers or lightweight mesh to shield young plants from insects like aphids and flea beetles. For fungal diseases (e.g., damping off), ensure good airflow by spacing seedlings 12–18 inches apart and avoid overhead watering. A homemade spray of 1 tsp baking soda + 1 quart water can also deter mildew. Rotate crops yearly to break disease cycles!
Can I grow tomatoes in containers, or do they need a garden bed?
Tomatoes thrive in 5-gallon+ containers with drainage holes, especially determinate (bush) varieties. Use a balanced fertilizer (like 10-10-10) and stake or cage plants for support. Just ensure pots get 6+ hours of sunlight daily and water consistently—containers dry out faster than garden soil. Dwarf or cherry tomatoes are perfect for small spaces!
Why are my tomato seedlings stretching tall and weak?
This is called etiolation, caused by too little light or overcrowding. Move seedlings to a sunny windowsill or under grow lights (14–16 hours/day). If they’re leggy, bury them deeper when transplanting—the lower stem will root! Thin seedlings to 12–18 inches apart and use a reflective surface (like aluminum foil) to maximize light.
How do I know when my tomato seeds are ready to harvest?
Harvest when tomatoes are fully colored (red, yellow, or purple) and slightly soft to the touch. For heirloom varieties, wait until they’re plump and fragrant. Pick them before frost hits—even green tomatoes can ripen indoors in a paper bag with a banana! Overripe tomatoes split easily, so check plants every 2–3 days during peak season.
Wrapping up and next steps
Growing tomatoes from seeds outside is a rewarding journey that turns tiny specks into thriving, sun-kissed plants bursting with flavor! 🌱 With patience, the right conditions, and a little love, you’ll soon be harvesting juicy, homegrown tomatoes—far tastier than store-bought.
Start small, stay consistent, and don’t forget to celebrate every milestone, from sprouts to fruit.
Ready to dive deeper? Once your seedlings are thriving, explore pruning techniques or companion planting to maximize your harvest. Happy growing—your garden (and taste buds) will thank you!