
How To
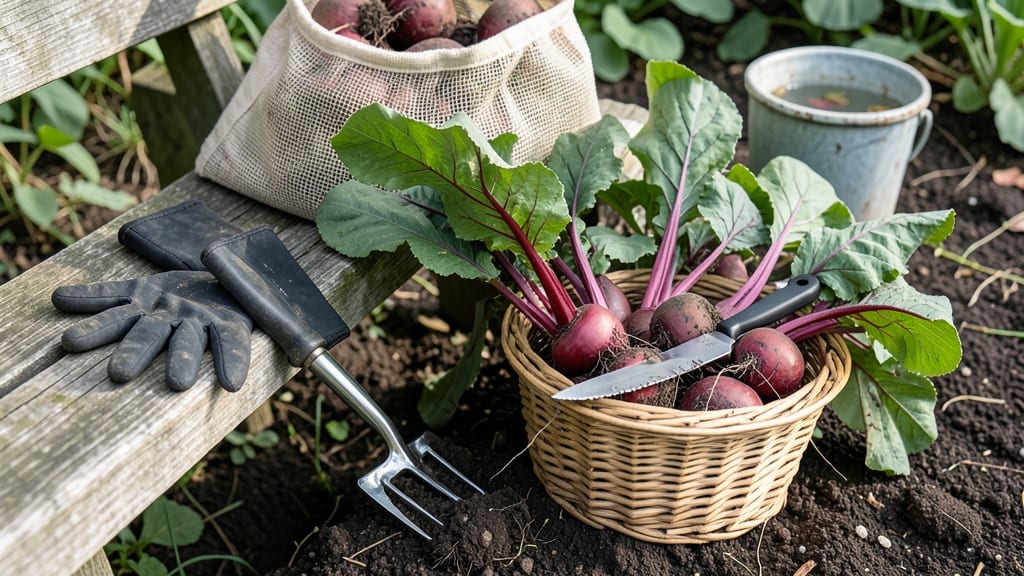
Harvesting and storing beetroot at the right time unlocks their sweetest, most vibrant flavor—something you’ll taste the difference in every bite. 🍠 Whether you’re growing beets in USDA Zone 6a or any other climate, timing matters more than you might think.
Pull them too early, and you’ll get tough, underdeveloped roots; wait too long, and they’ll turn woody or bolt. The secret lies in knowing exactly when to harvest and how to preserve them for months ahead.
I’ve tested every method—from short-term fridge storage to long-term freezing and fermenting—and the results can be game-changing for your kitchen. Imagine biting into a beet that’s just as tender and flavorful as the day you pulled it from the soil, even in winter.
That’s the power of mastering these techniques. Let’s break down the exact steps to ensure your harvest stays fresh, crisp, and delicious.
First, we’ll tackle the optimal harvest window, including size, color cues, and seasonal factors that guarantee peak sweetness. Then, I’ll walk you through the best storage methods for your climate, whether you’re working with a root cellar, freezer, or pantry.
No more guesswork—just foolproof tips to keep your beets perfect until your next planting season.
Ready to transform your beet harvest from good to exceptional? By the end of this guide, you’ll know exactly when to pull your beets and how to store them for maximum flavor and texture. Let’s get started!


When and how to harvest beetroot for maximum sweetness
Timing your beetroot harvest is everything—pull them too early, and you’ll get tiny, underdeveloped roots. Wait too long, and they’ll turn tough and woody. The key is watching for 3 key visual cues: leaf size, root diameter, and color depth.
For baby beets, harvest when roots reach 1-2 inches in diameter, typically 50-60 days after planting. Mature storage beets should be 2.5-3 inches wide and ready at 60-70 days.
Start by checking the top leaves. Healthy, vibrant foliage signals a thriving root below. Look for deep, consistent color—whether red, golden, or striped—without green streaks.
If the leaves begin yellowing or the plant bolts (sends up a flower stalk), you’ve missed your window. Morning harvests are ideal because the soil is moist, making roots easier to pull without breaking.
Before you dig, loosen the soil around the base with a garden fork to prevent damage. Gently grasp the beet’s greens and twist or pull upward. If resistance meets you, wiggle slightly—never force it, or you’ll risk jagged edges.
Rinse off excess dirt immediately to preserve freshness. For storage varieties, leave a 1-inch stem attached to help the root heal and last longer.
🍠 Pro Tip: Harvest on a cool, overcast day to reduce stress on the plant. Avoid harvesting after heavy rain, as wet soil can compact and make roots harder to extract cleanly.
Seasonal timing matters too. In cool climates (USDA Zones 1-5), aim for harvests between mid-July and early September to avoid the first frost. In warmer zones (6-10), you can extend harvests until October or November.
If frost threatens, harvest immediately—beets can tolerate light frosts, but heavy freezes will ruin their texture.
For successive planting, sow new seeds every 2-3 weeks starting in early spring. This ensures a steady supply of fresh beets throughout the growing season. Mark your calendar for 60 days after each planting to stay on top of harvests.
Overcrowded plants? Thin seedlings to 3-4 inches apart to give roots space to swell.
After harvesting, trim the greens to about 1 inch from the root if storing long-term. This reduces moisture loss and helps the beet last longer. For immediate use, leave the greens attached—they’re edible and packed with nutrients like vitamin A and iron.
Store them separately in the fridge to prevent the beet from drawing moisture from the greens.
🌿 Warning: Avoid harvesting beets when the soil is rock-hard or waterlogged. Both conditions can cause roots to crack or develop an unpleasant, muddy taste.
Once you’ve mastered the harvest, the next step is storage. Whether you plan to enjoy your beets fresh or preserve them for winter, proper curing and storage are critical to maintaining their sweetness and texture.
In the next section, we’ll compare the best short-term and long-term storage methods to keep your harvest fresh for months.
Best short-term and long-term beetroot storage methods compared
Storing beetroot properly keeps its vibrant color and sweet flavor for weeks or even months. Your choice depends on how long you need to preserve them and whether you prefer convenience or long-term freshness.
For short-term storage, refrigeration is simplest, while long-term methods like curing or fermenting unlock deeper flavors over time.
Refrigeration is ideal for 2-4 weeks of freshness, but requires proper prep to prevent spoilage. Meanwhile, freezing locks in nutrients for up to 12 months, though texture changes slightly. Let’s compare the best methods side by side to help you decide which fits your needs.
| Method | Prep Steps | Shelf Life | Flavor Retention | Best For |
|---|---|---|---|---|
| Refrigeration | Trim greens, cure 2-4 hours, store in humidity-controlled crisper with paper towel | 2-4 weeks | 90% (best for fresh use) | Quick meals, salads, roasting |
| Freezing | Peel, blanch 2 mins, shock in ice water, freeze in airtight bags | 10-12 months | 85% (texture softens slightly) | Winter soups, stews, baking |
| Root Cellar | Cure 24 hours, store in sand or sawdust at 32-36°F | 4-6 months | 95% (develops deeper flavor) | Long-term pantry staples |
| Fermenting | Slice thin, pack in brine with garlic, ferment 1-2 weeks | 6+ months (unopened) | 100% (probiotic benefits) | Probiotic-rich snacks, side dishes |
For short-term storage, refrigeration is my go-to because it’s effortless. Simply trim the greens, let the beets cure for 2-4 hours to toughen their skin, then wrap them in a damp paper towel inside a plastic bag.
Place them in the crisper drawer where humidity is highest—this mimics their natural environment and keeps them crisp for up to 4 weeks.
If you’re prepping for winter, freezing is a game-changer. Blanching beets before freezing preserves their color and nutrients. After peeling, cut them into uniform pieces, blanch for 2 minutes, then shock in ice water.
Drain well, package in airtight freezer bags, and label with the date. Frozen beets work perfectly in soups or roasted dishes, though they’ll be slightly softer than fresh.
For the most flavorful long-term storage, a root cellar or sand-filled bin is unbeatable. Cure beets for 24 hours to dry their skins, then nestle them in moist sand or sawdust in a cool, dark space.
This method lets them sweeten naturally over months, making them ideal for winter gardening. Just avoid storing near apples or potatoes, which release ethylene gas and speed up spoilage.
Fermenting beets is my favorite for probiotic-rich preservation. Thinly slice them, pack into a jar with garlic and salt brine, then let them ferment for 1-2 weeks.
The result? Tangy, crunchy beets with gut-friendly benefits that last 6+ months in the fridge. This method is perfect for snacking or adding to meals year-round.
Choose your method based on how soon you’ll use them and whether you prioritize convenience or flavor development. My personal favorite? A mix of refrigerated beets for quick meals and fermented beets for winter snacks—it’s the best of both worlds!