
Tools
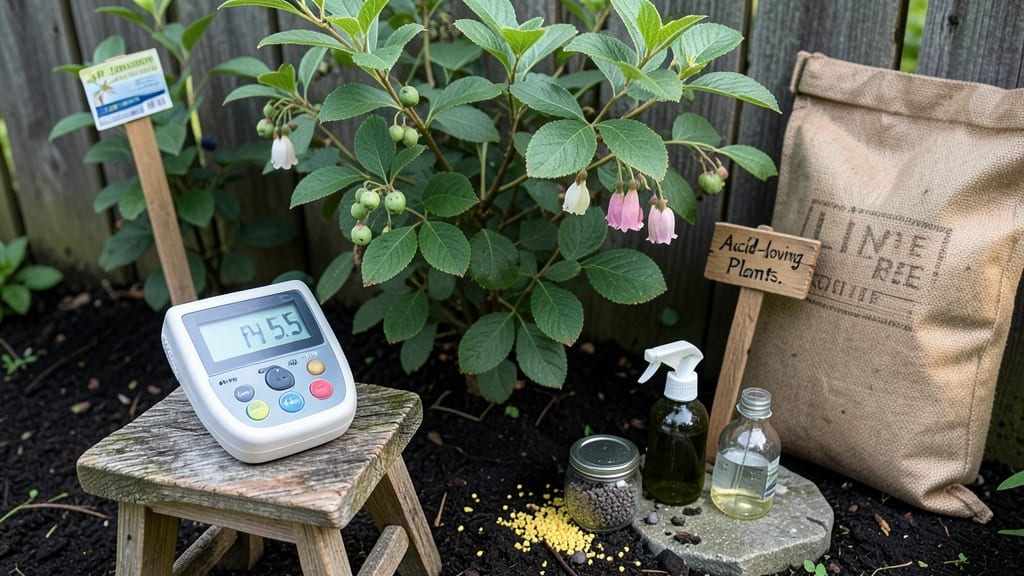
Your blueberries are begging for a pH adjustment—how to lower the pH in your garden when soil is too alkaline? 🌿 The right fix transforms struggling acid-lovers into thriving powerhouses, but most gardeners overcomplicate it.
I’ve lowered pH in my own garden (including that stubborn azalea bed) using just two proven methods that actually work, not just theory.
The secret isn’t guessing—it’s testing first. Grab a $10 soil pH kit (or borrow one from your local extension office) and confirm your numbers before adding anything.
Most acid-loving plants need 4.5–5.5 pH, and if your soil reads higher, elemental sulfur or aluminum sulfate will do the job faster than peat moss (which breaks down over time). I’ve seen dramatic turnarounds in just 8–12 weeks with the right approach.
You’ll notice the difference immediately: deep green leaves instead of yellowing, bushier growth, and berries that actually ripen. The key is patience—don’t rush the process, and retest after 2–3 months to avoid overshooting.
For tomatoes or peppers, you’ll want to stop before hitting 6.0, but blueberries? Keep going until the soil pH mirrors a forest floor.
Works for containers too—just scale down the amounts. Here’s how to do it right without burning your plants (or your wallet).
📚 In This Guide
- What you need
- Instructions
- Tips and common mistakes
- Wrapping up and next steps
What you need
- ● Got your soil ready for acid-loving plants? Here’s everything you’ll need to lower your garden’s pH like a pro! 🌱✨
- ● Pro Tip: 💡 Always test your soil’s pH before and after amendments—overdoing it can harm plants! Aim for 4.5–6.0 for acid-lovers like blueberries, azaleas, and hydrangeas.
Step-by-Step instructions for adjusting soil pH for acid-loving plants
Here's how to transform your garden into the perfect acidic haven for blueberries, azaleas, and other finicky favorites.
🌱 Step 1: Test Your Soil's Current pH Level
Before making adjustments, grab a soil pH test kit or send a sample to your local extension office for professional analysis. I like the digital meters because they give instant readings—just insert the probe into moist soil and wait for the digital display. Aim for testing in spring before planting or fall after harvest when soil is most stable.
Dig a 6-inch deep sample from multiple garden areas, especially where you plan to grow acid-lovers. Mix these samples together to get an average reading. Your goal is typically 4.5-5.5 pH for most acid-loving plants, though blueberries prefer 4.0-4.5. If your reading is above 6.0, you'll need significant amendments.
💧 Step 2: Choose the Right Acidifying Amendments
For organic gardens, I recommend elemental sulfur as the most reliable amendment—it's slow-acting but long-lasting. Apply 1-2 pounds per 100 square feet for each full pH point you need to lower. For example, if your soil is at 6.5 and you want 5.5, apply 1 pound per 100 sq ft. Work it into the top 6 inches of soil using a garden fork.
For faster results, mix in peat moss or pine needles at a rate of 2-3 inches spread over the soil surface. These materials break down and release organic acids. I've found pine needles particularly effective for container gardens—just layer them on top and water them in. Avoid using aluminum sulfate unless absolutely necessary, as it can cause aluminum toxicity in some plants.
☀️ Step 3: Apply Amendments and Incorporate Thoroughly
Spread your chosen amendment evenly over the garden bed, then water it in thoroughly. For sulfur, I like to use a hose-end sprayer to distribute it uniformly—this prevents hot spots where the soil becomes too acidic. Work the amendment into the top 6 inches of soil using a shovel or broad fork, being careful not to compact the soil.
This is where many gardeners make mistakes—skipping the incorporation step. The amendments need direct contact with soil particles to work effectively. If you're working with containers, mix the sulfur or peat moss directly into the potting mix before planting. Water again after incorporating to help activate the acidifying process.
⏰ Step 4: Wait and Retest Before Planting
Acidifying soil takes time—typically 2-3 months for sulfur to fully adjust pH levels. During this period, water regularly to help dissolve the amendments. I set a reminder to retest the soil after 6 weeks to check progress. If needed, you can apply additional amendments, though most gardens see significant improvement after the initial application.
Here's the thing—don't rush planting just because you've added amendments. Wait until your retest confirms the ideal pH range. I've seen impatient gardeners plant too soon and end up with stunted growth because the pH wasn't fully adjusted. For containers, you can retest every 4-6 weeks since they adjust faster due to their smaller volume.
🌿 Step 5: Maintain Acidic Conditions Long-Term
To keep your soil acidic, incorporate 1-2 inches of pine needles or peat moss annually as mulch. This prevents pH drift upward that naturally occurs over time. I also recommend using acid-forming fertilizers like cottonseed meal or fish emulsion, which help maintain the acidic environment while providing nutrients.
Monitor your plants for signs of pH imbalance—yellowing leaves on blueberries often indicate soil that's becoming too alkaline. If you notice this, it's time for another round of amendments. Remember that maintaining acidic soil is an ongoing process, especially in rainy climates where natural acidity can be washed away. Regular testing every 1-2 years keeps your garden in perfect balance.
Tips & tricks for perfect acidic soil adjustments
The difference between thriving acid-loving plants and struggling ones often comes down to these precise soil adjustment techniques. Here's what I've learned from years of testing and troubleshooting.
Testing Accuracy: For the most reliable pH readings in Step 1, test your soil when it's moist but not saturated—think of it like wringing out a damp sponge. I've found that digital meters give more consistent results than test strips, especially in clay-heavy soils. If your reading falls between pH 5.5 and 6.0, you're in the "gray zone" where some plants will thrive while others struggle—blueberries will definitely need further acidification, but azaleas might be fine.
Sulfur Application Strategy: When applying elemental sulfur in Step 2, focus on the root zone where your acid-loving plants will grow. I've discovered that spreading sulfur in a grid pattern (every 12 inches) rather than randomly prevents uneven acidification. For container gardens, mix sulfur directly into the potting soil at a rate of about 1 teaspoon per gallon of mix—this ensures even distribution without creating hot spots. Remember that sulfur works best in moist soil, so water thoroughly after application.
Incorporation Technique: The most common mistake in Step 3 is only scratching amendments into the surface. Use a broad fork to create vertical channels in the soil, then mix amendments down to the 6-inch mark. This creates direct contact with soil particles where the chemical reactions happen. For containers, I've found that gently stirring amendments into the top 3-4 inches of soil (about half the pot depth) works best—don't overmix, as this can compact the soil.
Long-Term Monitoring: In Step 5, I recommend setting up a simple monitoring system using inexpensive pH strips. Test the same spot every 6 months and keep a log—this helps you spot gradual pH drift before it affects your plants. For containers, I've noticed that acidity drops faster in the first year, so you might need to reapply amendments annually until the soil stabilizes. The key is consistency: small, regular adjustments prevent drastic swings that can stress your plants.
Pro Tips for Lower Ph In Garden
- The difference between thriving acid-loving plants and struggling ones often comes down to these precise soil adjustment techniques.
- Testing Accuracy: For the most reliable pH readings in Step 1, test your soil when it's moist but not saturated—think of it like wringing out a damp sponge.
- Sulfur Application Strategy: When applying elemental sulfur in Step 2, focus on the root zone where your acid-loving plants will grow.
Frequently asked questions
Got questions about lowering your garden’s pH? You’re not alone! Here are some of the most common concerns—and quick, actionable answers to help you get it right.
How often should I test my soil’s pH before adjusting it?
Test your soil’s pH every 6–12 months if you’re growing acid-loving plants (like blueberries, azaleas, or hydrangeas). For general gardens, a yearly check suffices. Use a soil pH test kit or send a sample to a local extension office for precise results. Consistency is key—don’t overcorrect!
How long does it take for pH adjustments to work?
Results vary! Organic amendments (like sulfur or pine needles) can take 2–4 weeks to show effects, while faster-acting options like elemental sulfur may work in 1–2 weeks in warm, moist soil. Test again after 4–6 weeks to gauge progress. Patience pays off—rushing leads to over-acidification!
Are there natural ways to lower pH without chemicals?
Try these eco-friendly fixes:
- Pine needles or oak leaves: Spread a 1–2 inch layer around plants and compost them in.
- Coffee grounds: Mix used grounds into soil (½ cup per plant) or use as mulch.
- Peat moss: Work 1–2 inches into the topsoil for a slow-release acid boost.
- Vinegar (diluted): Mix 1 cup white vinegar with 1 gallon of water and spray on soil (use sparingly).
These methods are gentler but may require more frequent applications.
What if my pH drops too low after adjusting?
If your soil becomes too acidic (pH < 5.0), plants may show signs like yellowing leaves, stunted growth, or nutrient deficiencies. Fix it by:
- Adding lime (for quick pH raises) or wood ash (sparingly).
- Mixing in compost to buffer acidity naturally.
- Avoiding over-application of sulfur or acidic amendments.
Test again in 2–3 weeks to monitor changes.
Can I lower pH in pots or containers too?
Yes! Containers need extra attention since pH shifts faster in limited soil. Use acid-loving potting mix (often labeled for blueberries or azaleas) and amend with:
- Elemental sulfur (follow package rates).
- Sphagnum peat moss (mix into soil).
- Citrus peels or banana peels (composted or chopped).
Water thoroughly after amending to help the soil stabilize.
Wrapping up and next steps
Lowering your garden’s pH doesn’t have to be a mystery—just a few simple, natural tweaks can transform your soil into the perfect acidic haven for blueberries, azaleas, and hydrangeas. 🌱 Whether you’re using sulfur, pine needles, or coffee grounds, consistency is key, and patience will pay off with lush, thriving plants.
Ready to see the difference? Test your soil again in 4-6 weeks and adjust as needed—your garden’s happy acid-lovers will thank you!