
How To
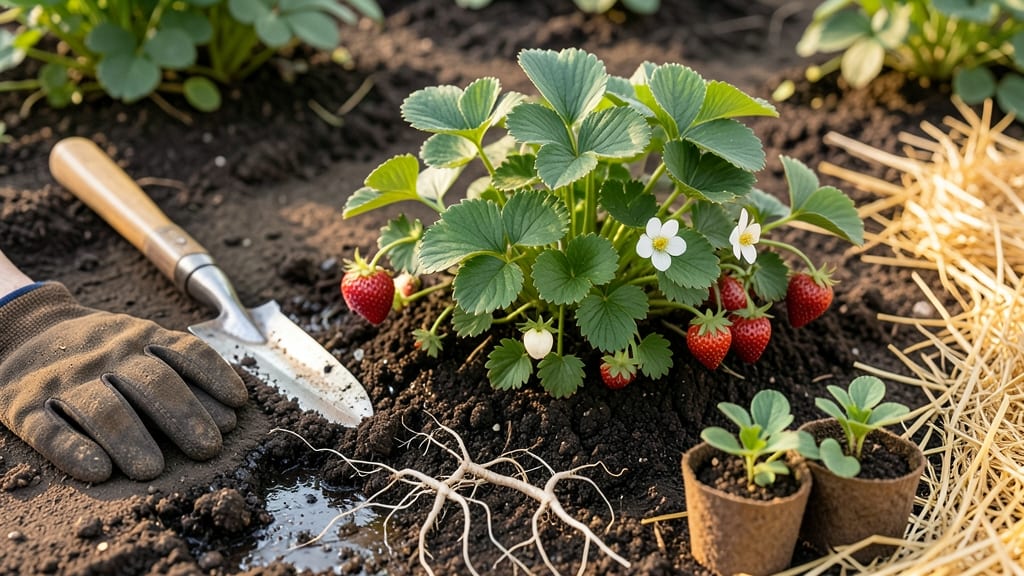
Creating a strawberry bed that produces fruit for years starts with the soil. 🌱 The secret isn't just planting—it's building a nutrient-rich foundation that keeps plants thriving through multiple harvest seasons. My first attempt failed because I rushed the prep, but this layered approach changed everything.
You'll need a sunny spot with at least 6 hours of direct light, well-draining soil, and a few simple supplies: compost, mulch, and strawberry plants (June-bearing or everbearing varieties work best). The real magic happens in the soil layers—each one serves a purpose, from moisture retention to root support.
After just 4-6 weeks of proper setup, you'll see strong new growth, and by next spring, you'll have a bed that produces pounds of berries with minimal effort. The key is keeping the soil loose, the plants spaced correctly, and the weeds out—once established, these beds practically care for themselves.
This method works in containers too, making it perfect for small spaces or urban gardens. Whether you're growing for fresh eating or selling at market, the layered soil approach delivers consistent, high-quality fruit year after year. Let's get started with the foundation.
📚 In This Guide
- What you need
- Instructions
- Tips and common mistakes
- Wrapping up and next steps
What you need
- ● Strawberry plants: 10–20 bare-root or potted plants (depending on bed size; choose disease-resistant varieties like Albion or Seascape for best results).
- ● Well-draining soil: 1–2 cubic yards of loamy, slightly acidic soil (pH 5.5–6.8). Mix in compost (2–3 inches) for nutrients.
- ● Organic mulch: 2–3 inches of straw or pine needles (avoid cedar mulch—it’s toxic to strawberries!).
- ● Fertilizer: Balanced organic fertilizer (10-10-10 or fish emulsion) or slow-release granules (follow package rates).
- ● Drip irrigation or soaker hose: 50–100 feet (adjust based on bed size) to deliver 1–1.5 inches of water weekly.
- ○ Garden twine or landscape fabric: 1–2 rolls (optional but helpful for weed control).
- ● Garden fork or tiller: For aerating soil (rent one if needed!).
- ● Garden gloves: A pair to protect your hands from thorns and dirt.
- ● Pruners or shears: Sharp, clean pair for trimming runners.
- ● Rake: To level soil and smooth mulch.
- ● Measuring tape or string: For marking bed dimensions (aim for 4x8 feet for a starter bed).
- ● Wheelbarrow: For hauling soil, mulch, and tools.
- ● Row covers: Frost cloth to extend the growing season.
- ● Strawberry trellis or cages: For varieties like Alpine strawberries that climb.
- ● Soil pH test kit: To check acidity before planting (aim for 5.5–6.8).
- ● Epsom salt: A sprinkle (1 tbsp per plant) boosts magnesium for juicier berries.
- ● Bird netting: To protect ripe strawberries from hungry critters!
Step-by-Step instructions for building a thriving strawberry bed
Here’s my foolproof method for creating a strawberry bed that delivers sweet fruit year after year—no guesswork, just layered soil science.
🌱 Step 1: Choose the Perfect Location and Clear the Space
Strawberries thrive in 6-10 hours of sunlight daily and need good air circulation to prevent disease. I always pick a spot with morning sun and afternoon shade in hot climates—this keeps the berries sweeter and the plants from overheating. Clear the area of weeds, rocks, and debris down to 6 inches deep.
Use a garden fork to loosen the soil without turning it over (strawberries hate compacted roots). If your soil drains poorly, test it by digging a 12-inch hole and filling it with water—if it doesn’t drain within 4 hours, you’ll need to amend it. Mark the bed’s edges with stakes or string to keep the space tidy during construction.
🪴 Step 2: Build the Soil Layers for Optimal Growth
Strawberries need a 12-inch deep planting bed with perfect drainage and nutrient balance. Start with a 3-inch layer of coarse sand or perlite at the bottom to prevent waterlogging. This is critical—soggy roots rot quickly, and strawberries won’t recover.
Next, add a 4-inch layer of composted manure or well-aged compost (chicken or cow manure works best). Mix in a handful of balanced organic fertilizer (10-10-10) to give plants a slow-release nutrient boost. Top this with 5 inches of high-quality garden soil, sifting it to remove clumps. Avoid garden soil from your yard—it’s often too dense and lacks the organic matter strawberries crave.
☀️ Step 3: Plant Bare-Root Strawberries at the Right Depth
Set bare-root plants 12-18 inches apart in rows 24 inches apart to allow for airflow and easy harvesting. Soak the roots in water for 10-15 minutes before planting to rehydrate them—this reduces transplant shock. Dig a hole just deep enough so the crown (where roots meet the stem) sits ½ inch below soil level.
Spread the roots outward gently and cover them with soil, pressing lightly to eliminate air pockets. Water deeply until the soil 2 inches down feels moist. Mulch with 2 inches of straw or pine needles to retain moisture and suppress weeds. Avoid wood chips—they can introduce disease and rob nitrogen from the soil.
💧 Step 4: Water and Maintain for Continuous Harvests
Water newly planted strawberries every 2-3 days until they establish roots (3-4 weeks). You’ll know they’re settled when new leaves emerge and the plants stop wilting in the afternoon heat. After establishment, water 1 inch per week, increasing to 1.5 inches during fruiting.
Fertilize again in 6 weeks with a low-nitrogen, high-phosphorus formula (5-10-10) to encourage flowering and fruiting. Remove any weeds immediately—they compete for nutrients and harbor pests. In late summer, cut back old leaves to 2 inches above the crown to rejuvenate the plant for next year’s harvest.
⏰ Step 5: Extend the Season with Simple Care
To keep producing berries beyond the first year, remove all old leaves in early spring and add a fresh 1-inch layer of compost around the plants. This replenishes nutrients and prevents soil depletion. In late summer, apply a mulch layer to insulate roots from winter frosts—strawberries are perennial and will reward you with fruit for years if cared for properly.
Watch for pests like slugs and birds—use row covers in early season or diatomaceous earth to protect young plants. Harvest berries when they’re fully red and slightly soft to the touch. The first year’s yield may be small, but each subsequent year, your bed will produce 2-3 times more fruit with minimal effort.
Tips & tricks for perfect strawberry beds
Here's what nobody tells you about creating strawberry beds that produce like a dream—these are the secrets that separate good beds from extraordinary ones.
Soil Layering Precision: When building your layered foundation in Step 2, think of it like lasagna—each layer has a purpose. The 3-4 inches of coarse sand or perlite should be spread evenly first to prevent compaction. I use a rake to create slight ridges in the sand layer before adding compost; this creates tiny air pockets that roots will love. For the 2-3 inches of compost, mix in a handful of mycorrhizal fungi powder if you can find it—this invisible helper boosts root growth by up to 40%. The top layer of 4-6 inches of garden soil should be sifted to remove any rocks larger than a dime, or they'll create root barriers.
Crown Planting Technique: The crown placement in Step 3 is where most beginners go wrong. I've seen people bury crowns too deep (root rot) or leave them exposed (sunburn). The trick is to press the crown just until it's level with the soil—you should see the top of the crown peeking out slightly. After planting, give the soil a gentle squeeze; it should hold together but not feel hard. This ensures good root-to-soil contact without suffocating the plant. I also recommend planting on a cloudy day—less stress on tender roots.
Mulching Strategy: That 2-3 inches of straw mulch in Step 4 isn't just for looks—it's a living blanket. Spread it in a loose, even layer, leaving that 1-2 inch space around crowns to prevent rot. I like to use straw because it breaks down slowly, but if you use pine needles (great for acid-loving plants), mix them with compost first—they're too acidic alone. In summer, this mulch layer can keep soil 10°F cooler than bare soil, which is crucial for strawberries that hate heat stress.
Fertilizer Timing: The 4-6 week wait before fertilizing in Step 4 is intentional—it gives roots time to establish without competing with sudden nutrient surges. When you do fertilize, use that balanced 10-10-10 at half-strength and water it in immediately. I've seen people burn roots by applying fertilizer to dry soil. For ongoing maintenance, switch to a low-nitrogen fertilizer (5-10-10) after the first year—too much nitrogen makes plants focus on leaves instead of fruit. The key is feeding roots, not foliage.
Pro Tips for Make A Strawberry Bed
- Here's what nobody tells you about creating strawberry beds that produce like a dream—these are the secrets that sepa...
- Soil Layering Precision: When building your layered foundation in Step 2, think of it like lasagna—each layer has a p...
- Crown Planting Technique: The crown placement in Step 3 is where most beginners go wrong. I've seen people bury crown...
Frequently asked questions
Got questions about creating your dream strawberry bed? You’re not alone! Here are answers to the most common queries—so you can grow lush, bountiful strawberries with confidence.
What’s the best time of year to plant a strawberry bed?
The ideal time depends on your climate! In cool regions, plant in early spring (4-6 weeks before the last frost) or fall (6-8 weeks before frost). In warmer zones, opt for late fall or winter to avoid summer heat stress. June-bearing varieties thrive with early spring planting, while everbearing and day-neutral types adapt better to fall or spring.
Can I use regular garden soil, or do I need special soil for strawberries?
Strawberries love well-draining, slightly acidic soil (pH 5.5–6.8). While you can amend regular soil with compost and organic matter, a custom strawberry mix (50% peat moss/compost, 30% perlite/sand, 20% topsoil) ensures optimal aeration and drainage. Avoid heavy clay or soggy soil—strawberries hate wet feet!
How often should I water my strawberry bed, and what’s the best method?
Consistency is key! Water deeply 1–2 times per week (more in extreme heat) to keep soil 1–2 inches moist. Use a drip irrigation system or soaker hose to avoid wetting leaves (prevents fungal diseases like gray mold). Early morning watering is best—never overhead spray in the evening.
What can I plant alongside strawberries to improve growth?
Strawberries love companion plants! Try:
- Basil (repels pests like thrips)
- Spinach or lettuce (shade-sensitive crops benefit from strawberry canopies)
- Borage (attracts pollinators and deters hornworms)
- Avoid planting near potatoes, tomatoes, or peppers—they share diseases.
Pro tip: Mulch with straw (not hay—it can harbor weeds) to retain moisture and suppress weeds!
My strawberries aren’t fruiting—what’s wrong?
Common culprits include:
- Insufficient sunlight (strawberries need 6+ hours of direct sun)
- Over-fertilizing with nitrogen (leads to leafy growth, not fruit)
- Lack of pollinators (hand-pollinate with a paintbrush if bees are scarce)
- Age of plants (June-bearing varieties fruit best in years 2–3)
Try balanced fertilizer (10-10-10) at planting and switch to low-nitrogen (5-10-10) when flowers appear.
Wrapping up and next steps
Creating your own strawberry bed is a rewarding journey that blends creativity with practical gardening skills! 🌱 With the right soil layers, sunlight, and care, you’ll enjoy year-round harvests of sweet, juicy strawberries—whether you’re a beginner or a seasoned gardener.
Remember, the key lies in preparing nutrient-rich soil, choosing the right varieties, and staying consistent with maintenance.
Now that you’re armed with the secrets, it’s time to roll up your sleeves and transform your garden! Start small if needed, and soon you’ll be savoring homegrown strawberries straight from the vine. Happy planting—and may your strawberries be plentiful! 🍓✨