
Tools
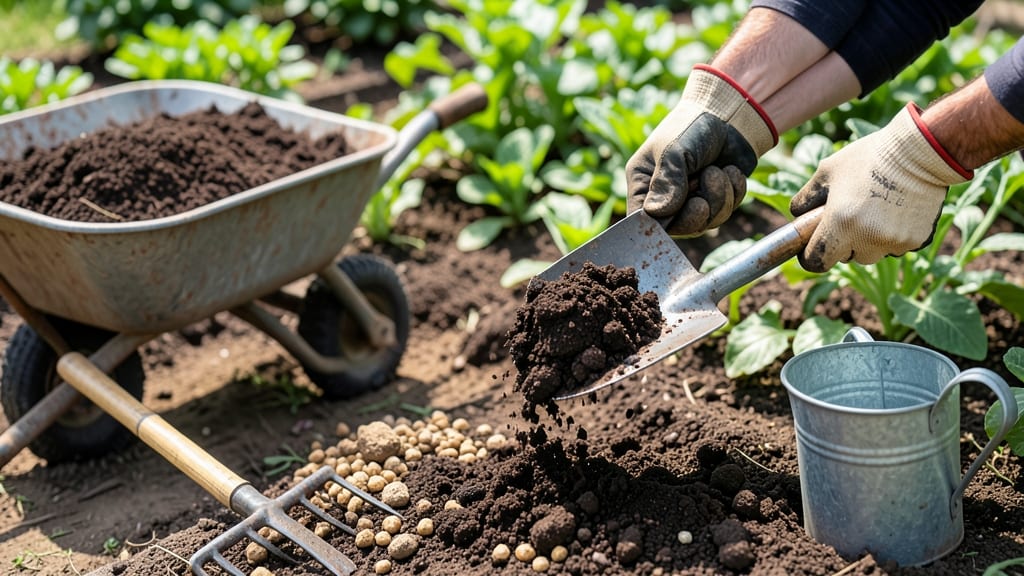
How to apply manure to your garden feels like giving your soil a spa day—it’s rich, it’s alive, and it works wonders. 🌱 The key isn’t just dumping it anywhere; it’s about timing, type, and how you layer it so your plants actually benefit (not burn). I’ve turned my soil from tired to thriving using these tricks, and I’ll show you how to do it right without the guesswork.
First, you need to know your manure types: composted is the gentle, ready-to-use option, while fresh is potent but needs aging—think of it like steeping tea. Spread it 2-3 inches thick in early spring or fall, then lightly till it into the top 6 inches of soil.
Top-dressing around plants works too, but avoid piling it against stems to prevent rot. And always wear gloves—some manure carries surprises you don’t want on your hands.
What you’ll end up with is soil so fertile, your plants will practically glow with health. Roots dive deeper, flowers bloom brighter, and vegetables grow stronger—no more sad, stunted growth.
The secret is patience: let the manure break down for at least a month before planting, and you’ll see the difference in just a few weeks.
This method works for veggie gardens, flower beds, and even lawns—just adjust the thickness based on what you’re growing. And if you mess up? Don’t stress. Over-application just means you’ll compost it again next season. Let’s get your soil working smarter, not harder.
📚 In This Guide
- What you need
- Instructions
- Tips and common mistakes
- Wrapping up and next steps
What you need
- ● Manure: Composted manure (aged 6–12 months) – 1–2 cubic yards per 100 sq. ft. (adjust based on soil type and plant needs).
- ● Fresh manure (uncomposted) – Only use if mixed with straw or wood chips (1:1 ratio) to prevent burning plants.
- ● Garden tools: Garden fork or spade – for turning soil and mixing manure.
- ● Garden rake – to spread manure evenly and smooth the surface.
- ● Gloves (heavy-duty) – to protect your hands from rough textures.
- ○ Soil test kit (optional but recommended) – to check nutrient levels before applying manure.
- ● Water source (hose or watering can) – to hydrate the soil before and after application.
- ● Compost activator (e.g., kelp meal or alfalfa pellets) – speeds up decomposition if using fresh manure.
- ● Mulch (straw, leaves, or wood chips) – 1–2 inches thick to retain moisture and regulate temperature.
- ● Broadcast spreader – for large gardens to distribute manure evenly.
- ● pH testing kit – ensures your soil’s acidity/alkalinity is balanced for manure application.
- ● Wheelbarrow or bucket – for transporting manure (aim for at least 2–3 cubic feet capacity).
Step-by-Step instructions for applying manure to garden
Here's how I transform my soil from average to nutrient-rich using manure—timing and layering make all the difference.
🌱 Step 1: Choose the Right Manure and Age It Properly
Fresh manure burns plants by releasing too much nitrogen at once. I always use well-aged manure—at least 6 months old for cow or horse manure, 3 months for chicken or rabbit. You'll know it's ready when it smells earthy, not pungent, and crumbles easily when squeezed.
Spread a ½-inch layer of aged manure over the garden bed. For composted manure, you can use up to 1 inch since it's already broken down. Avoid manure from carnivorous animals (like cats or dogs)—it can introduce harmful pathogens to your edible plants.
🌿 Step 2: Work It Into the Soil at the Right Time
Apply manure in early spring, about 4-6 weeks before planting, or in late summer for fall crops. This gives nutrients time to integrate without competing with active plants. Dig the manure into the top 6-8 inches of soil using a broadfork or garden trowel.
Don't overdo it—I've seen beginners add too much, which can create a nitrogen spike that burns roots. A general rule: 1-2 inches of aged manure per square yard is plenty for most vegetables. For heavy feeders like tomatoes or corn, you can double that amount.
💧 Step 3: Water Thoroughly After Application
After spreading and incorporating the manure, water the area deeply to help nutrients dissolve and move into the soil. You'll see the soil darken slightly as the manure breaks down, and it should feel rich and crumbly when you squeeze a handful.
Keep the soil moist for the next 1-2 weeks—this encourages beneficial microbes to colonize and start decomposing the manure. Avoid heavy watering immediately after application, as this can wash nutrients away before they integrate.
⏰ Step 4: Wait Before Planting
Give the soil 2-4 weeks to settle after manure application before planting. You'll know it's ready when the soil smells sweet and earthy, not sour or ammonia-like. This waiting period ensures nutrients are available when your plants need them.
For quick results, I top-dress existing plants with a thin layer of manure (¼ inch) and water it in. This works well for established gardens but won't replace the full soil boost of a deeper application.
☀️ Step 5: Monitor and Reapply as Needed
Healthy soil from manure application will show improved structure—it should hold moisture better and crumble easily when dry. If your plants show signs of nutrient deficiency (like yellowing leaves), it's time to reapply a lighter layer of manure in early spring.
I like to rotate manure types—one year cow, the next horse or chicken—to balance different nutrient profiles. Just remember: less is more. Over-fertilizing leads to wasted nutrients and potential plant stress.
Tips & tricks for perfect soil enrichment with manure
Transforming your garden soil takes patience and precision—here's what I've learned after years of trial and error to get the most out of your manure application.
Timing is Everything: The 4-6 week window before planting isn't arbitrary—it gives microbes time to break down the manure into plant-available nutrients. I've noticed that if I apply too early (like winter), nutrients leach away with rain. If too late (within 2 weeks of planting), roots can get burned by concentrated nitrogen. Mark your calendar 4-6 weeks before your last frost date for spring planting.
Layering Technique: When working manure into the top 6-8 inches of soil (Step 2), focus on mixing it thoroughly with the existing soil rather than just piling it on top. I use a broadfork to gently loosen the soil first, then work the manure in like you're giving the earth a deep massage. This creates a nutrient-rich zone where roots can access the goodness without competing with weeds.
Moisture Management: Keeping soil moist for 1-2 weeks after application (Step 3) is crucial—it's like giving your manure a spa treatment. I set up a drip irrigation system on a timer for this period because consistent moisture prevents nutrients from washing away while encouraging microbial activity. Avoid heavy watering right after application though; it can create anaerobic pockets where harmful gases form.
Visual Cues for Readiness: In Step 4, when waiting 2-4 weeks before planting, look for three key signs: the soil should smell sweet and earthy (not ammonia-like), it should crumble easily when dry, and you should see earthworms moving through it. These are your indicators that the manure has fully integrated. I've learned to trust my nose more than the calendar—if it smells right, it's ready!
Pro Tips for Apply Manure To Garden
- Transforming your garden soil takes patience and precision—here's what I've learned after years of trial and error to...
- Timing is Everything: The 4-6 week window before planting isn't arbitrary—it gives microbes time to break down the ma...
- Layering Technique: When working manure into the top 6-8 inches of soil (Step 2), focus on mixing it thoroughly with ...
Frequently asked questions
Got questions about manure application? You’re not alone! Here are some of the most common concerns—and straightforward answers—to help you garden like a pro.
Can I use fresh manure directly in my garden?
Nope! Fresh manure can burn plants due to high ammonia levels and may harbor harmful pathogens. Always compost it first (3–6 months for cow/chicken manure, 6–12 months for horse manure) or age it in a pile for at least 3 months before applying. For quick results, opt for well-aged or commercially composted manure.
When is the best time to apply manure to my garden?
The golden rule: Apply in fall or early spring (4–6 weeks before planting). This gives microbes time to break it down. Avoid applying right before planting—it can deplete soil nitrogen too fast. For summer gardens, use a light layer (½ inch) and water it in to prevent nutrient loss.
How much manure should I use per square foot?
Start with 1–2 inches of composted manure per 100 sq ft for general soil improvement. For heavy feeders like tomatoes or peppers, apply 2–3 inches and mix it into the top 6–12 inches of soil. Pro tip: Too much can compact soil—mix with compost or peat moss to balance it out!
What’s the difference between cow, chicken, and horse manure?
| Type | N-P-K Ratio (approx.) | Best For | Caution |
|---|---|---|---|
| Cow | 0.5-1-0.5 | General soil building, veggies | Low odor, but needs composting |
| Chicken | 1.5-1-1 (high nitrogen) | Leafy greens, compost tea | Burn risk—use sparingly (1 part to 20 parts soil) |
| Horse | 1-0.5-0.5 | Heavy clay soils, perennials | May contain weed seeds—compost thoroughly |
My plants look wilted after applying manure. What went wrong?
This usually means too much fresh manure or over-application. Flush the soil with water to dilute ammonia, and avoid fertilizing for 4–6 weeks. For future applications, work it into the soil (don’t just top-dress) and use well-aged or composted manure. If using chicken manure, dilute it further—it’s the strongest!
Wrapping up and next steps
Applying manure to your garden is a game-changer for soil health and plant growth—just
Ready to take the next step? Test your soil to fine-tune your approach, or explore organic composting methods to maximize nutrient benefits. Happy gardening!