
Picking
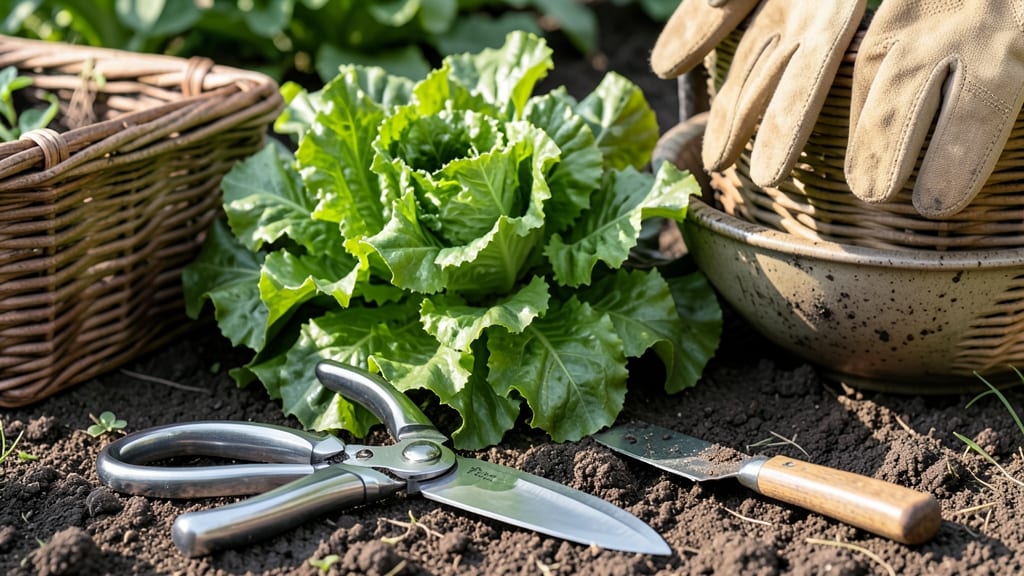
Your salad greens are ready—now don’t ruin them with the wrong cut. ✂️ Harvesting at the right time and with the right technique keeps your greens tender, productive, and coming back stronger than before.
I’ve learned the hard way that a single wrong snip can mean wilted leaves by lunch, so let’s get this right.
Start with clean, sharp scissors (or a knife) and harvest in the morning when leaves are crisp. For cut-and-come-again greens like lettuce, snip just above the lowest set of leaves—this encourages regrowth.
For full harvests, like when bolting, cut the entire plant at the base and replant seeds if you want more.
After harvesting, rinse leaves gently, pat dry, and store in a damp paper towel in the fridge for up to a week. The key to long-term success? Don’t take more than one-third of the plant at once—greens are resilient, but over-harvesting kills them for good.
This method works for any salad green—spinach, arugula, kale, you name it. A little care now means fresh greens all season long, and that’s a win for your wallet and your salad bowl.
📚 In This Guide
- What you need
- Instructions
- Tips and common mistakes
- Wrapping up and next steps
What you need
- ● Harvesting tools: Sharp pruning shears or harvesting scissors (6-inch blades work best for precision). Pro tip: 💡 Avoid dull blades—they crush stems and damage plants!
- ● OR a clean, sharp knife (for larger batches, like kale or spinach).
- ● Containers: Large bowls or baskets (sturdy enough to hold greens without crushing).
- ○ Optional: Mesh produce bags (for airflow during transport).
- ● Water source: A spray bottle (for misting greens post-harvest) or a bucket with water.
- ● Cleaning supplies: Cool water (for rinsing).
- ○ Optional: Salad spinner (to remove excess water quickly).
- ● Mature salad greens (check plant labels for harvest-ready signs, like 4–6 weeks for leaf lettuce or 30+ days for spinach).
- ● Morning sunlight (greens are crispest and most hydrated before 10 AM).
- ● A clear day (avoid harvesting after rain or when plants are wet to prevent disease).
- ● Gloves (to protect hands from prickly stems like arugula or stinging nettles).
- ● Food-safe sanitizer (to wipe tools before/after use).
- ● Labeling tags (if harvesting multiple varieties—mark containers to avoid mix-ups!).
- ● Ice pack (for long trips to keep greens fresh).
Step-by-Step instructions for harvesting salad greens
Morning dew clings to the leaves—that’s when greens taste sweetest and stay crispest.
✂️ Step 1: Gather Your Tools and Check the Weather
Start with a pair of clean, sharp scissors or pruning shears—dull blades crush stems and bruise leaves, making them wilt faster. I always sterilize my tools with rubbing alcohol before cutting; even a tiny speck of bacteria can invite rot in freshly harvested greens. Check the forecast too—harvest on a cool morning after dew has evaporated but before midday heat. Greens harvested in the afternoon wilt faster and lose their crisp texture.
Wear gloves if your garden has thorns or rough edges—some varieties like arugula or kale can scratch easily. I keep a small basket lined with a damp towel nearby to hold the harvest; this prevents leaves from drying out while you work. The towel also catches stray leaves that might fall during cutting, so nothing goes to waste.
🌿 Step 2: Identify the Right Leaves to Cut
Never harvest more than one-third of the plant at a time, or you’ll stunt its growth. Focus on the outer leaves first—these are mature and ready for eating, while the inner leaves stay tender for future harvests. For loose-leaf greens like spinach or lettuce, snip just above a set of leaves where the stem meets the base. This encourages the plant to branch out and produce more leaves.
Watch for yellowing or damaged leaves—these are past their prime and should be removed entirely. I always cut at a 45-degree angle about ½ inch above the next set of leaves; this small detail prevents water from pooling on the stem and causing rot. If you’re harvesting baby greens, like microgreens or young arugula, use scissors to snip the entire plant just above the soil line.
⏰ Step 3: Harvest at the Perfect Time for Maximum Flavor
The best time to harvest is when the soil is cool and moist—usually early morning—but avoid harvesting if frost is in the forecast. Frost makes greens bitter and slimy, even if they look intact. Instead, harvest in the late afternoon if you must, but expect them to wilt faster. For heat-tolerant greens like Swiss chard or malabar spinach, wait until late afternoon when temperatures drop slightly.
Taste-test a leaf before harvesting the whole plant. The flavor should be bright and slightly peppery (for greens like arugula) or mildly sweet (for lettuce). If leaves taste bitter, they’re overmature—harvest them immediately and use them in cooked dishes where bitterness blends in. For peak freshness, rinse greens in cool water right after cutting and pat them dry with a clean towel before storing.
🪴 Step 4: Store Harvested Greens Properly
Place harvested greens in an open container or loosely wrapped in a damp paper towel inside a plastic bag. Air circulation is key—greens stored in airtight containers sweat and develop mold within 24 hours. I like using glass containers with a lid for short-term storage (up to 5 days in the fridge). For longer storage, wash, dry, and wrap greens in a damp towel, then place them in a zip-top bag with a few small holes punched in the top.
Store greens in the crisper drawer of your fridge, where humidity is highest. Avoid washing greens until you’re ready to eat them—excess moisture speeds up spoilage. If you notice wilting or yellowing within a few days, the greens are past their prime. Use them immediately in salads, smoothies, or cooked dishes to salvage their flavor.
✂️ Step 5: Maintain Your Plants After Harvesting
After harvesting, water the plants lightly if the soil feels dry to the touch. Avoid overwatering—soggy soil invites fungal diseases like powdery mildew. I like to mulch around the base with a thin layer of straw or grass clippings to retain moisture and keep weeds at bay. This simple step extends the life of your salad greens by 1-2 weeks, giving you more harvests before replanting.
Fertilize lightly with a balanced liquid fertilizer (like 10-10-10) every 2-3 weeks during the growing season. Over-fertilizing leads to bitter leaves, so dilute the fertilizer to half-strength if your greens are already lush. Keep an eye out for pests like aphids or slugs—they love fresh salad greens and can decimate a plant overnight. Remove affected leaves immediately and treat with neem oil if needed.
Tips & tricks for harvesting salad greens at their peak
These little-known details will transform your harvest from good to spectacularly fresh.
Tool Prep Matters: Beyond just sharpening your scissors, I've found that wiping them down with a vinegar solution (1:1 ratio) before sterilizing with rubbing alcohol removes any residual oils that can dull the blade faster. The 45-degree angle cut in Step 2 works best when your scissors are clean—dried-on sap from previous harvests can actually make the cut less precise. I keep a small container of vinegar spray near my garden tools for quick cleanups between harvests.
The 24-Hour Storage Secret: While the instructions mention 24 hours as the maximum freshness window for improperly stored greens, I've discovered a simple trick to extend this: place a paper towel in your storage container before adding the greens. This absorbs excess moisture that would otherwise cause mold. The damp towel method in Step 4 works wonders, but for longer storage (up to 7 days), I use two paper towels—one dry on top and one slightly damp underneath the greens. This creates a microclimate that maintains crispness without promoting bacterial growth.
Visual Harvest Cues: In Step 3, when taste-testing leaves, look for these visual clues alongside flavor: vibrant greens should have a slight gloss from morning dew (but not be wet), and the veins should appear bright green rather than yellowing. For heat-tolerant varieties like Swiss chard, the leaves should have a slight curl at the edges—this indicates they've reached their ideal maturity without becoming bitter. I've learned to harvest when about 80% of the leaves show these characteristics, leaving some younger ones for future harvests.
Pest Prevention Strategy: The neem oil recommendation in Step 5 is excellent, but I've found an even more effective approach: sprinkle a thin layer of diatomaceous earth around the base of your plants after harvesting. This natural powder disrupts the exoskeletons of soft-bodied pests like aphids and slugs while being completely harmless to humans and beneficial insects. Reapply after rain or every 2-3 weeks during the growing season. The key is to keep it dry—moisture reduces its effectiveness.
Pro Tips for Harvest Salad Greens
- These little-known details will transform your harvest from good to spectacularly fresh.
- The 45-degree angle cut in Step 2 works best when your scissors are clean—dried-on sap from previous harvests can actually make the cut less precise.
- This absorbs excess moisture that would otherwise cause mold.
Frequently asked questions
Got questions about harvesting your salad greens? You’re not alone! Here are some of the most common queries—plus quick, actionable answers to keep your harvest thriving.
When is the best time of day to harvest salad greens?
The golden window is early morning, after dew dries but before the heat of midday. Greens like spinach and arugula are crispest then, with the highest nutrient density. If you must harvest later, choose cooler evenings to avoid wilting. Pro tip: Harvest after rain—greens are juicier and more flavorful!
Can I use my kitchen scissors to harvest salad greens?
Yes, but sterilize them first! Kitchen scissors can harbor bacteria, so wipe them with rubbing alcohol before use. For large batches, invest in clean, sharp garden shears (or even a serrated knife) to avoid crushing stems. Never harvest with dirty tools—it risks disease in your garden.
How do I harvest salad greens without killing the plant?
Use the cut-and-come-again method: Snip leaves just above the soil line (or 1–2 inches above the base) to encourage regrowth. Avoid pulling entire plants—this stresses roots. For bolt-resistant varieties (like leaf lettuce), leave the central growth point intact. Water well post-harvest to speed recovery.
What do I do if my salad greens taste bitter?
Bitterness often signals stress—check these fixes:
- Heat or drought: Harvest in cooler weather or shade greens during peak sun.
- Over-maturity: Pick younger leaves (inner ones) for milder flavor.
- Nutrient deficiency: Add compost or a balanced fertilizer (high in nitrogen).
Can I harvest salad greens after rain or when it’s humid?
Harvesting after rain is ideal—greens are hydrated and flavorful! However, avoid harvesting if:
- Soil is muddy (wait 1–2 hours for it to dry).
- Leaves are soggy (risk of fungal issues like downy mildew).
Wrapping up and next steps
Harvesting your salad greens doesn’t have to be complicated—just follow the right timing, tools, and techniques to keep them fresh and flavorful.
Whether you’re snipping leaves in the morning or prepping for a week of meals, these steps ensure you get the most out of your garden. Now that you’re equipped with the know-how, why not take the next step?
🌱 Your Next Move:
- Start small—try harvesting just a few leaves at a time to build confidence.
- Experiment with storage methods to extend freshness (like the pro tips you’ve learned!).
- Share your greens with friends or neighbors—fresh salads make great gifts!
You’ve got this! Happy harvesting—your taste buds (and dinner table) will thank you. 🥗✨