
Size
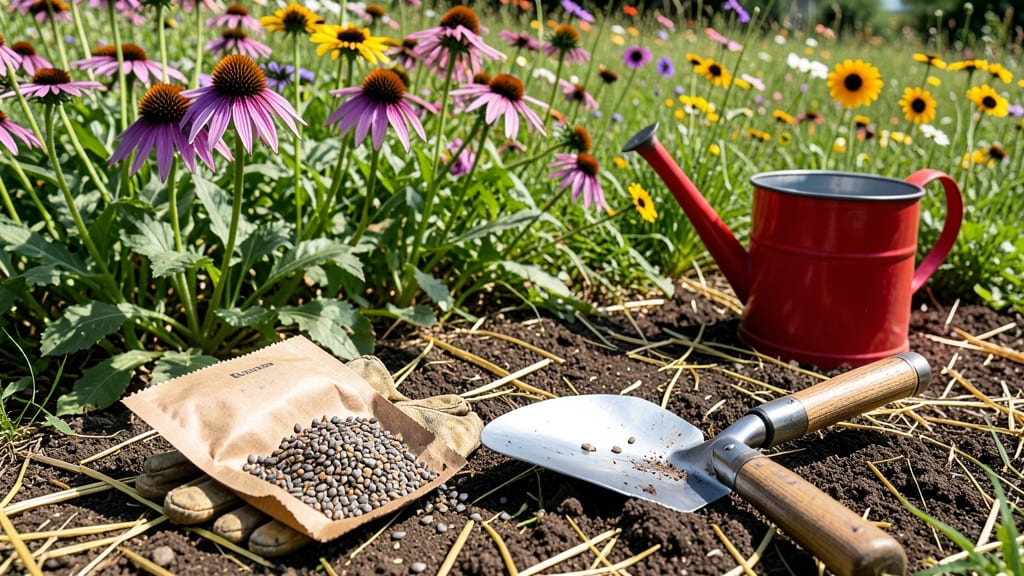
How to grow a wildflower patch in your backyard could buzz with life by next spring. 🌼 Wildflower patches transform neglected corners into vibrant pollinator havens, and the best part? They thrive with minimal effort once established. I’ve turned three bare spots into thriving meadows—each attracting hummingbirds, bees, and butterflies within just two seasons.
The secret isn’t fancy tools or rare seeds—it’s preparing the soil right and choosing the right mix of native wildflowers for your climate. Skip the tilling (wildflowers hate it) and focus on clearing weeds, loosening the top 2 inches of soil, and scattering seeds in late summer or early fall.
Most wildflower blends include built-in pollinator favorites like milkweed, black-eyed Susans, and coneflowers.
By summer’s end, you’ll watch delicate stems push through the soil, then explode into color by next spring. The patch will need little watering after the first year—rainfall keeps them happy—and they’ll outcompete weeds once established.
My patch in Zone 7 now requires zero maintenance, just pure joy as monarchs and bumblebees visit daily.
Perfect for sun-loving spaces, wildflowers adapt to poor soil and drought once rooted. Whether you’re reviving a tired lawn or filling a rocky slope, this project delivers instant wildlife value with almost no upkeep. Let’s get those seeds in the ground!
📚 In This Guide
- What you need
- Instructions
- Tips and common mistakes
- Wrapping up and next steps
What you need
- ● Wildflower seeds: Choose native species (e.g., Black-eyed Susan, Coneflower, or Milkweed). Aim for 1–2 lbs per 100 sq ft.
- ● Soil: Loamy, well-draining topsoil (avoid heavy clay). 1–2 cubic yards for a 10x10 ft patch.
- ● Compost: Organic matter to enrich soil. 1–2 bags (2–3 cu ft each).
- ○ Mulch (optional): Straw or wood chips to retain moisture. 1–2 bags (2 cu ft each).
- ● Garden fork or tiller: For aerating soil (rent if needed).
- ● Rake: To level and smooth the area.
- ● Garden hose or sprinkler: For watering.
- ● Gloves & knee pads: For comfort (trust us, they’re a game-changer!).
- ○ String & stakes (optional): To mark borders if designing a shaped patch.
- ● Sunlight: At least 6 hours of direct sun daily (most wildflowers thrive in full sun).
- ● Location: Flat or gently sloped ground (avoid low spots where water pools).
- ● Water access: A nearby hose or natural water source.
- ● Patience: Wildflowers may take 2–3 weeks to germinate!
Step-by-step instructions for creating your wildflower patch
Here’s how to transform any sunny spot into a thriving pollinator oasis—no green thumb required.
🌱 Step 1: Select and Prepare the Perfect Location
Wildflowers thrive in full sun, so choose a site that gets at least 6 hours of direct sunlight daily. Avoid low-lying areas where water pools—wildflowers hate soggy roots. I like to test the spot by observing how dry the soil stays after a week of no rain. If it’s damp, opt for a slightly elevated area or one with better drainage.
Clear the area of weeds and debris, then loosen the top 4-6 inches of soil with a garden fork or tiller. This breaks up compacted layers so wildflower roots can establish easily. If your soil is heavy clay, mix in 2-3 inches of compost to improve texture and fertility. The goal is to create a loose, crumbly bed that mimics natural conditions.
🌿 Step 2: Choose and Plant the Right Wildflower Mix
Pick a pre-mixed wildflower seed blend suited to your climate and region—native mixes support local pollinators best. Scatter seeds evenly over the prepared soil, aiming for about 1-2 pounds of seed per 1,000 square feet. I like to use a push broom or rake to distribute seeds lightly, ensuring they make good contact with the soil without burying them too deep.
Gently press the seeds into the soil with a board or your hands—just enough to ensure they stay in place. Avoid covering them with soil; most wildflower seeds need light to germinate. Water the area lightly but thoroughly, keeping the soil consistently moist (but not soggy) until germination occurs. You’ll see the first sprouts in 7-21 days, depending on your climate and the seed mix.
☀️ Step 3: Maintain and Enjoy Your Pollinator Paradise
Once seedlings emerge, reduce watering to once a week unless your area experiences a drought. Wildflowers are drought-tolerant once established, but consistent moisture during their first growing season helps them root deeply. Avoid fertilizers—wildflowers thrive in lean soil and compete poorly with weeds if given too many nutrients.
Let the flowers go to seed at the end of the season. Cut back the dead growth in late fall or early winter, but leave some seed heads for birds and bees. Each year, your patch will spread naturally, filling in gaps and creating a self-sustaining ecosystem. Within 2-3 seasons, you’ll have a lush, buzzing meadow that requires almost no maintenance.
Tips & tricks for perfect wildflower patch growth
Transforming your yard into a thriving wildflower haven is simpler than you think—here's how to avoid common pitfalls and maximize success.
Location is Everything: That 6-hour sunlight requirement isn't just a suggestion—it's non-negotiable for most wildflower varieties. I've seen patches fail spectacularly when planted in partial shade. If your yard has limited sun, consider container gardening with sun-loving varieties like black-eyed Susans or coneflowers. For shadier spots, opt for native woodland flowers like trillium or wild columbine.
Soil Prep Secret: The soil test I mentioned isn't just about drainage—it's about creating the perfect environment for seeds to germinate. After mixing in that 2-3 inches of compost, I like to add a thin layer of mulch (like straw) to retain moisture while preventing soil compaction. This two-step approach gives seeds their best chance to establish roots quickly without competing with weeds.
Planting Precision: When scattering seeds, think "lightly but evenly"—you want them just visible on the surface, not buried. I use a simple trick: mix seeds with a small amount of sand first, then spread the mixture. This helps with even distribution and makes it easier to see where you've planted. Pressing seeds with a board (not your foot!) ensures good soil contact without damaging delicate seedlings.
Watering Wisdom: Those critical 2-3 weeks of consistent moisture are your window to success. I set up a gentle drip irrigation system for my patches—it delivers just the right amount without disturbing seeds. If you don't have irrigation, water in the morning so foliage has time to dry, preventing fungal issues. Once you see those first green shoots (usually within 7-14 days), you can gradually reduce watering frequency.
Pro Tips for Grow A Wildflower Patch
- Transforming your yard into a thriving wildflower haven is simpler than you think—here's how to avoid common pitfalls and maximize success.
- Location is Everything: That 6-hour sunlight requirement isn't just a suggestion—it's non-negotiable for most wildflower varieties.
- Soil Prep Secret: The soil test I mentioned isn't just about drainage—it's about creating the perfect environment for seeds to germinate.
Frequently asked questions
Got questions about creating your own wildflower patch?
You’re not alone! Here are answers to the most common queries to help you grow a thriving pollinator paradise with confidence.
When is the best time to plant wildflower seeds?
The ideal time depends on your climate, but late summer or early fall is often best—seeds germinate in cooler weather and establish roots before winter. In warmer regions, spring planting (after the last frost) works too. Avoid planting in peak summer heat, as seeds may dry out before sprouting.
Will wildflowers attract bees, butterflies, or other pests?
Wildflowers are magnets for pollinators like bees, butterflies, and hummingbirds—great for biodiversity! While some may draw occasional pests (like aphids), most wildflowers are low-maintenance and benefit ecosystems far more than they harm. Choose native species to minimize unwanted visitors.
How much water do wildflowers need once established?
Once rooted, wildflowers are drought-tolerant! Water deeply once a week during the first growing season to help roots establish. After that, rainfall usually suffices—overwatering can drown seeds or encourage weeds. Mulch lightly to retain moisture without smothering sprouts.
Can I grow wildflowers in containers or small spaces?
Use shallow containers, window boxes, or even old boots for wildflowers like cosmos, bachelor’s buttons, or alyssum. Choose compact varieties and ensure good drainage. Small patches still support pollinators—just plant in sunny spots and refresh soil annually.
What do I do if my wildflowers don’t sprout?
Don’t panic! Try these fixes:
- Check seed viability: Test a few seeds in damp paper towels—if they don’t sprout in a week, they may be old.
- Adjust timing: Some seeds need cold stratification (freeze seeds in a bag for 4–6 weeks before planting).
- Improve soil contact: Lightly scratch seeds into soil (many need light to germinate).
- Be patient: Some wildflowers take weeks to months to emerge—don’t give up!
Wrapping up and next steps
Growing a wildflower patch is a rewarding way to support pollinators, boost biodiversity, and create a stunning, low-maintenance garden! 🌸 By choosing the right location, selecting native seeds, and preparing your soil, you’ll soon have a thriving ecosystem that hums with life.
Start small—even a 3x3-foot patch makes a difference—and watch your garden transform into a vibrant haven for bees, butterflies, and birds.
Ready to take the next step? Sketch your patch’s layout, pick your favorite wildflower varieties, and order seeds today! Your future pollinator paradise awaits—let’s get growing! 🌱