
Tools
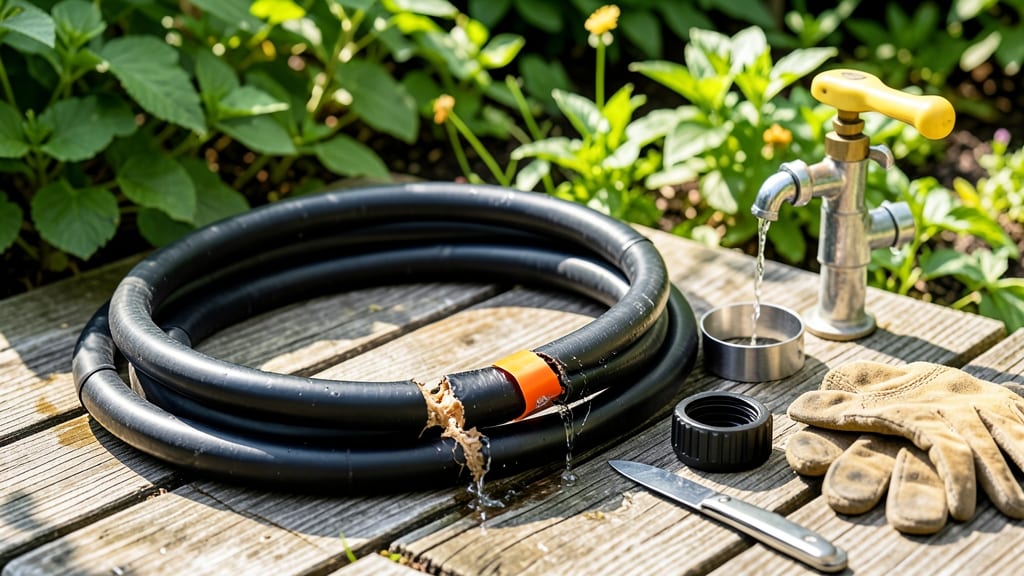
That how to fix a leaky water hose hissing sound means water—and money—vanishing right in front of you. 💦 A leaky hose isn’t just annoying; it wastes up to 6,300 gallons per year if left unchecked.
The good news? Most fixes take less than 10 minutes and cost pennies, not dollars.
Start by turning off the water and tracing the leak to the source—it’s usually at connectors, fittings, or tiny cracks in the hose material. Grab a pair of pliers, a replacement washer (if needed), and some hose repair tape or epoxy.
The right tools make all the difference between a temporary patch and a permanent fix.
With the right technique, you’ll restore full pressure and stop that frustrating waste. Your plants will thank you for the steady flow, and your water bill will too. Let’s get that hose back in working order—no more drips, just reliable irrigation.
Prevention is just as important as the fix. Inspect your hose before each season, store it properly when not in use, and avoid kinking it. A little maintenance now means fewer interruptions later—your garden will stay hydrated without the hassle.
📚 In This Guide
- What you need
- Instructions
- Tips and common mistakes
- Wrapping up and next steps
What you need
- ● Adjustable wrench (8–10 inches) – For tightening fittings securely.
- ● Hose repair clamp (1–2) – Pre-made rubber patches with metal bands for quick fixes.
- ● Hose repair tape (1–2 rolls) – Vinyl or rubber tape (like Flexzall) for small leaks.
- ● PVC primer & cement (if replacing fittings) – For a permanent fix on threaded leaks.
- ● Replacement hose coupling (1) – If the leak is at a connection point (check your hose’s size, e.g., ½” or ¾”).
- ● Rag or towel – To clean surfaces and wipe up spills.
- ● Bucket or towel – To catch water while working.
- ● Safety glasses – Protect your eyes from debris or pressure bursts!
- ● Hose end cap – If the leak is at the end of the hose.
- ● Plumber’s tape (Teflon tape) – For extra sealing on threaded connections.
- ● Epoxy or waterproof sealant – For stubborn cracks (e.g., J-B Weld).
- ● New hose section – If the damage is extensive (match the length and size of your existing hose).
- ● Flashlight – To inspect hard-to-see areas in low light.
Step-by-Step instructions for fixing a leaky water hose
Here’s how to stop that annoying drip in minutes—no tools required for most fixes.
💧 Step 1: Identify the Leak Type and Location
Turn on the hose and examine the entire length for water escaping. Most leaks fall into three categories: threaded connections (where the hose attaches to faucet or nozzle), cracks along the hose body, or frayed rubber at the ends. Run your fingers along the hose—you’ll feel damp spots or a slight bulge where water escapes.
If the leak is at a connection, note whether it’s the male thread (screw-on end) or female thread (where the hose attaches to the faucet). For body leaks, check if the rubber is split or simply softened from age. This helps you choose the right fix without wasting time on the wrong solution.
✂️ Step 2: Apply a Temporary Fix for Threaded Leaks
For leaks at threaded connections, shut off the water and unscrew the leaking section. Wrap two layers of plumber’s tape (Teflon tape) clockwise around the male thread—this seals the gap instantly. Reattach the hose and test with water. If the leak persists, the thread may be stripped, and you’ll need a hose repair clamp or replacement part.
Here’s the thing—don’t overtighten after applying tape. A snug fit is enough; forcing it can strip the threads further. If the hose is old, consider replacing the entire connection assembly, as repeated repairs weaken the metal over time.
🪴 Step 3: Seal Body Leaks with a Repair Clamp
For cracks or splits in the hose body, you’ll need a hose repair clamp (available at hardware stores for under $5). Clean the damaged area with rubbing alcohol and dry it thoroughly. Slide the clamp over the leak, positioning it so the rubber gasket covers the hole entirely. Tighten the clamp evenly with a screwdriver until the leak stops—you’ll hear a faint click when it’s secure.
If the hose is severely damaged (multiple cracks or brittle rubber), a clamp is a short-term fix. Replace the hose entirely for long-term use, as weak spots can worsen over time. I’ve seen gardeners patch the same hose three times before it finally gave out—don’t let that be you.
🔧 Step 4: Reinforce Frayed Ends with Epoxy or Rubber Cement
If the leak is at the hose’s end where it attaches to the nozzle or faucet, the rubber may be frayed or cracked. Clean the area with rubbing alcohol, then apply a waterproof epoxy or rubber cement directly to the damaged section. Let it dry for 10-15 minutes before reattaching the hose. For extra durability, wrap the repaired area with duct tape (as a temporary backup) or electrical tape for a cleaner look.
This fix works best for small tears, not large holes. If the end is completely deteriorated, cut it off with a sharp knife and reattach a new section using a hose repair coupling (a small metal connector with threads on both ends). It’s a bit more involved but lasts longer than tape alone.
☀️ Step 5: Test and Maintain for Long-Term Use
Turn the water back on and check for leaks. Run the hose at full pressure for 30 seconds—this simulates real use and helps spot hidden drips. If the fix holds, you’re good to go. For threaded connections, recheck the tape after 24 hours to ensure it hasn’t loosened. If the leak returns, the threads may need replacing.
To prevent future leaks, store your hose coiled loosely (not kinked) and avoid dragging it across rough surfaces. Every 1-2 years, inspect the entire length for wear, especially after winter storage. A little maintenance now saves you from dealing with a burst hose mid-watering season.
Tips & tricks for quick hose repairs
A few smart moves can turn a frustrating leak into a fast, foolproof fix—without needing a plumber. Here’s what I’ve learned from patching hoses in my own yard (and fixing my neighbor’s burst one at 2 a.m.).
Leak Location Matters: In Step 1, when you’re identifying the leak, pay special attention to the connection points. I’ve seen leaks at the male thread that looked like body cracks—always run your fingers along the entire length, not just where you think it’s leaking. A damp spot might be hiding behind a kink or bend in the hose. The key is to feel for that slight bulge or cool area where water’s escaping.
Tape Direction is Critical: When applying plumber’s tape in Step 2, wrapping it clockwise around the male thread is non-negotiable. Counterclockwise? You’ll undo your own work as you tighten. Think of it like screwing on a lightbulb—always follow the thread direction. And here’s the thing: two layers is the sweet spot. One layer might not seal properly, but three can make the connection too tight and strip the threads.
Clamp Placement Precision: For body leaks in Step 3, positioning the repair clamp correctly makes all the difference. The rubber gasket needs to cover the entire crack—no gaps! I’ve seen people place the clamp right over the leak but miss the edges. Test the fit by pressing the clamp gently: if it wobbles, it’s not tight enough. That faint click when you tighten it evenly? That’s your confirmation the leak is sealed.
Epoxy Drying Time: In Step 4, those 10-15 minutes of drying time for epoxy or rubber cement feel like forever when you’re eager to use your hose. But rushing it? You’ll end up with a leak again. Set a timer and use the time to clean up any excess water or debris around the repair area. Pro tip: If you’re in a hurry, use rubber cement instead of epoxy—it dries faster and still holds up well for hose repairs.
Pro Tips for Fix A Leaky Water Hose
- A few smart moves can turn a frustrating leak into a fast, foolproof fix—without needing a plumber.
- Leak Location Matters: In Step 1, when you’re identifying the leak, pay special attention to the connection points.
- Tape Direction is Critical: When applying plumber’s tape in Step 2, wrapping it clockwise around the male thread is non-negotiable.
Frequently asked questions
Got questions about fixing a leaky water hose? You’re not alone! Here are some of the most common concerns—and quick answers to get you back to hassle-free watering.
How do I know if my hose is leaking internally or externally?
A external leak is easy to spot—water drips or pools near fittings, connectors, or along the hose’s length. An internal leak (like a burst or split inside) may show up as weak pressure, water spraying from the end when the hose is off, or a soggy patch in the lawn. Test by turning off the water and checking for damp spots along the hose.
Can I fix a leaky hose without turning off the water supply?
For minor leaks (like a loose connector), you can often tighten or replace a coupling with the water running—but be cautious! If the leak is severe (e.g., a split or burst), always shut off the water first to avoid flooding or injury. Use a wrench or pliers for stubborn fittings, but grip gently to avoid crushing the hose.
What’s the best temporary fix for a burst hose?
If you’re in a pinch, wrap the leak with duct tape or a hose repair clamp (like a rubber patch with screws) as a short-term solution. For a permanent fix, cut out the damaged section and splice in a new piece using a hose repair kit or heat-shrink tubing. Avoid super glue—it’s not waterproof long-term!
Will fixing a leaky hose improve my water pressure?
A leak acts like a pressure valve, sapping water flow. Once sealed, you’ll notice instantly stronger pressure at the nozzle. If pressure is still weak after fixing the leak, check for clogs in the hose (flush with a garden hose attachment) or restricted fittings that may need cleaning or replacement.
Is it cheaper to repair or replace a leaky hose?
It depends! If the leak is in a small section (under 3 feet) and the hose is otherwise in good shape, repairing it (with a patch or splice) costs $5–$15. For older, brittle, or extensively damaged hoses, replacing it (typically $20–$50) might save you long-term hassles. Pro tip: 100-foot hoses are often the most cost-effective for large yards.
Wrapping up and next steps
A leaky water hose doesn’t have to be a hassle—with the right tools and a little patience, you can restore your garden’s water pressure in no time! 💧 Whether it’s a simple clamp, a quick splice, or a full replacement, these fixes will keep your hose in top shape for seasons to come.
Now that you’re equipped with the know-how, grab your tools and tackle that leak like a pro. And if you’re feeling extra handy, why not upgrade your hose setup for even better durability? Happy gardening! 🌱