
Size
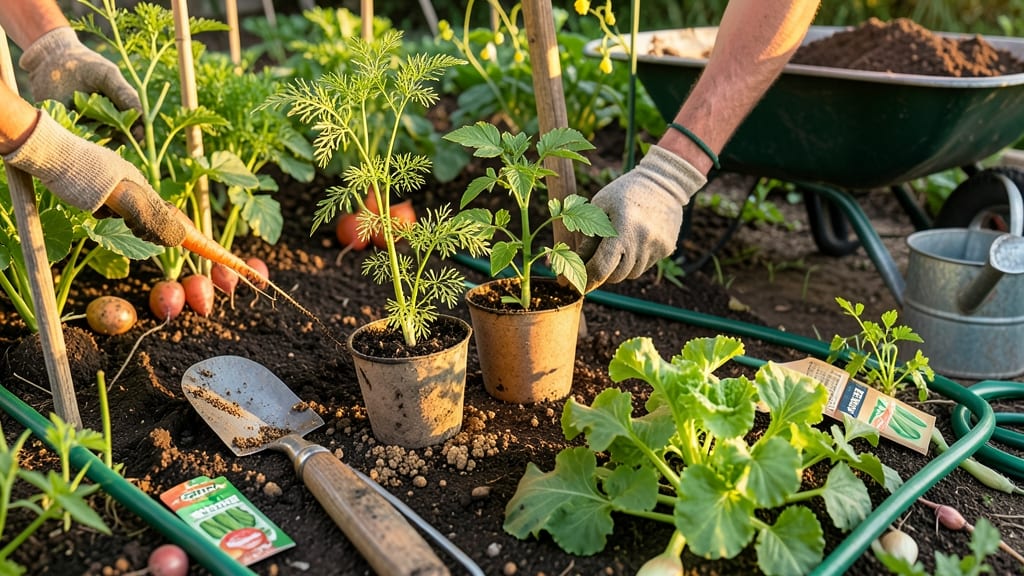
How to grow a victory garden fed nations during WWII—and it can feed your family today. 🌱 The key isn’t space but strategy: right crops, right layout, and right timing. My first attempt in a 4x8-foot patch yielded more tomatoes than my neighbor’s 10x20-foot plot.
Start with soil that drains well and rich organic matter—compost works wonders. Choose fast-growing, high-yield crops like lettuce, radishes, and bush beans for quick rewards. Vertical gardening turns walls into harvest space, and companion planting (like basil with tomatoes) boosts growth naturally.
By midsummer, you’ll pull fresh greens, snap peas, and zucchini straight from your plot. The best part? Every bite tastes like self-sufficiency—and the pride of growing what you eat, even in small spaces.
Works for city balconies or suburban backyards. Let’s turn that soil into a harvest powerhouse this season.
📚 In This Guide
- What you need
- Instructions
- Tips and common mistakes
- Wrapping up and next steps
What you need
- ● Containers or Raised Beds: 5–10 5–10 gallon fabric grow bags (for herbs/leafy greens) or
- ● 1–2 raised beds (4’x8’ or smaller) (for root veggies)
- ● High-Quality Soil: 1–2 bags potting mix (for containers) or
- ● 5–10 bags garden soil + compost blend (for raised beds)
- ● Seeds or Seedlings: 5–10 packets fast-growing seeds (lettuce, radishes, green beans, cherry tomatoes)
- ○ Optional: 3–5 seedlings (if short on time)
- ● Watering Supplies: 1 watering can (1–2 gallons) or
- ● 1 drip irrigation kit (for efficiency)
- ● Fertilizer: 1 balanced organic fertilizer (10-10-10) or
- ● 1 compost tea (for nutrient boost)
- ● 1 hand trowel (for planting)
- ● 1 pruners (for harvesting/trimming)
- ● 1 gloves (to keep hands clean)
- ○ Optional: soil pH tester (to check nutrient levels)
- ● ✅ 6+ hours of sunlight daily (adjust crops for partial shade if needed)
- ● ✅ Access to water source (hose or faucet nearby)
- ● ✅ Basic knowledge of your climate’s growing season (start seeds indoors if frost is likely)
Step-by-step instructions for designing your space-saving victory garden
Here's how to maximize harvests in small spaces using proven techniques from wartime gardens.
🪴 Step 1: Assess and Prepare Your Growing Space
Start by measuring your available area and noting sunlight patterns throughout the day. I always sketch a rough layout using graph paper—this helps visualize how to fit plants efficiently. Look for vertical space too: fences, trellises, and even walls can become productive growing surfaces. Most victory gardens thrive in 6+ hours of direct sun daily, so prioritize your sunniest spots for high-yield crops like tomatoes and beans.
Clear any weeds or debris from your chosen area and loosen the soil to a depth of 12 inches using a garden fork or tiller. Add 2-3 inches of compost to the top 6 inches of soil—this improves drainage and provides essential nutrients without taking up valuable growing space. For container gardens, choose pots with drainage holes and fill them with a lightweight potting mix designed for vegetables.
🌱 Step 2: Plan Your Planting Layout for Maximum Yield
Victory gardens rely on intensive planting techniques that maximize space without sacrificing productivity. Begin by selecting a mix of plants that complement each other: tall crops like pole beans or trellised tomatoes should go along the north side of your plot to avoid shading shorter plants. I always plant fast-maturing crops like radishes or lettuce in the spaces between slower-growing plants—this ensures you're harvesting continuously throughout the season.
Use square-foot gardening principles to determine spacing: most leafy greens need 4 plants per square foot, while root crops like carrots require 9 plants per square foot. Draw a grid on graph paper to map out your planting zones, labeling each with crop type and planting date. This visual plan prevents overcrowding and makes it easy to rotate crops next season for better soil health.
☀️ Step 3: Implement Vertical and Intensive Planting Techniques
Vertical gardening is your secret weapon for small spaces. Install sturdy trellises for vining plants like cucumbers, squash, and pole beans—these can grow 6-10 feet tall while keeping your ground space free for other crops. I like using A-frame trellises made from bamboo stakes and twine because they're inexpensive and easy to assemble. For herbs and compact vegetables, consider wall-mounted planters or hanging pockets that utilize vertical space without taking up ground area.
Practice succession planting by staggering your sowing dates for quick-maturing crops. For example, plant lettuce every 2-3 weeks throughout the growing season to ensure a continuous harvest. This technique also helps prevent pests and diseases that can build up when large areas of the same crop are planted at once. Keep a planting calendar to track when each crop should be sown, transplanted, and harvested.
💧 Step 4: Water and Maintain Your Compact Garden
Consistent moisture is critical for space-saving gardens where plants grow closely together. Water deeply 1-2 times per week, aiming for 1 inch of water per week, and always water at the base of plants to minimize evaporation and disease risk. I install soaker hoses along the edges of my garden beds—this delivers water directly to the roots without wetting the foliage. Mulch all planting areas with 2-3 inches of straw or shredded leaves to retain moisture and suppress weeds.
Monitor your garden daily for signs of pests or nutrient deficiencies. Early intervention is key in small spaces where problems can spread rapidly. I keep a spray bottle of neem oil handy for quick treatment of aphids or other soft-bodied insects. Rotate your crops annually to prevent soil-borne diseases and maintain soil fertility. Add a balanced organic fertilizer every 4-6 weeks during the growing season to support continuous production in your intensive planting system.
✂️ Step 5: Harvest Strategically to Encourage Continuous Growth
Regular harvesting is essential for maintaining productivity in victory gardens. Pick vegetables like beans, peas, and zucchini frequently—this encourages the plants to produce more. For leafy greens, harvest outer leaves first, leaving the inner growth to continue expanding. You'll know when it's time to harvest most crops when they reach their mature size or when the first signs of flowering appear (for leafy vegetables).
Preserve your harvests through canning, freezing, or drying to extend your garden's productivity throughout the year. I always set aside a portion of my harvest for seed saving—this ensures you have fresh seeds for next season's planting. Keep detailed notes about which varieties performed best in your space, including any challenges you faced. This information becomes invaluable for refining your garden layout and planting schedule each year.
Tips & tricks for creating a productive victory garden
A few strategic moves can turn even the tiniest space into a thriving harvest hub. Let me share what I’ve learned from years of maximizing small yards.
Sun Exposure Strategy: Your south-facing raised bed should get at least 6-8 hours of direct sun daily—this is non-negotiable for sun-loving crops like tomatoes and zucchini. I use a simple sun tracker app to map my yard’s light patterns before planting. For containers, rotate them weekly to ensure even exposure, especially if they’re in partial shade. This prevents leggy, weak plants that produce poorly.
Vertical Space Hacks: That vertical trellis corner isn’t just decorative—it’s your secret weapon for maximizing square footage. Pole beans and cucumbers can climb 6-8 feet high, freeing up ground space for other crops. I install trellises before planting and train vines gently with soft twine to avoid damaging stems. For extra productivity, add a second tier of smaller plants like strawberries or herbs at the base.
Season Extension Tactics: The 40°F frost protection tip is crucial, but here’s how to push it further: Use black plastic mulch in early spring to warm soil by 5-8°F and extend your planting window. In fall, cover beds with clear plastic tunnels to trap heat—this can add 2-3 extra weeks of growing time. I’ve grown spinach through light frosts this way, even when temps dip into the 30s°F.
Pest Prevention: Neem oil is great, but I’ve found that companion planting works even better. Pair bush beans with onions or garlic—their strong scent repels pests naturally. For containers, I use row covers during peak pest seasons (like cabbage moth season) and see 90% fewer issues. The key is consistent monitoring—check plants daily during warm months when pests are most active.
Pro Tips for Grow A Victory Garden
- A few strategic moves can turn even the tiniest space into a thriving harvest hub. Let me share what I’ve learned fro...
- Sun Exposure Strategy: Your south-facing raised bed should get at least 6-8 hours of direct sun daily—this is non-neg...
- Vertical Space Hacks: That vertical trellis corner isn’t just decorative—it’s your secret weapon for maximizing squar...
Frequently asked questions
Got questions about growing a victory garden in tight spaces?
You’re not alone! Here are answers to the most common concerns—from timing to troubleshooting—so you can grow confidently, even with limited room.
What’s the best time of year to start a victory garden in a small space?
The ideal time depends on your climate, but spring (after the last frost) is perfect for most veggies like lettuce, radishes, and herbs. In warmer zones, fall works too! Start with fast growers (like microgreens) if space is tight—you’ll see harvests in 2-4 weeks.
Can I grow a victory garden in containers if I don’t have a yard?
Containers are ideal for small spaces. Use 5-gallon buckets, hanging pots, or vertical towers for herbs, greens, and compact veggies (e.g., cherry tomatoes, peppers). Just ensure containers have drainage holes and depth for root growth (6+ inches for most plants).
How do I keep pests away without chemicals in a small garden?
Prevention is key! Use row covers, neem oil, or companion planting (e.g., marigolds repel pests). For containers, inspect leaves daily and remove pests by hand. Diatomaceous earth (food-grade) is a natural, non-toxic barrier for soil-dwelling bugs.
Do victory gardens need full sun, or can they grow in shade?
Most veggies thrive in 6+ hours of sun daily, but leafy greens (spinach, kale), herbs (parsley, cilantro), and radishes tolerate partial shade. If your space is shady, opt for fast-growing, low-light crops or extend sunlight with reflective surfaces (like white walls).
What’s the cheapest way to start a victory garden with limited funds?
Skip store-bought soil—use compost, yard waste, or free local resources (check community boards!). Save seeds from store-bought produce (tomatoes, peppers) or swap with neighbors. Repurpose containers (old buckets, pallets) and fertilize with kitchen scraps (e.g., banana peels for potassium).
Wrapping up and next steps
Growing a victory garden in small spaces isn’t just possible—it’s rewarding! 🌱 With the right plants, containers, and techniques, you can enjoy a bountiful harvest without needing acres of land. Start small, stay consistent, and soon you’ll be savoring homegrown goodness while saving money and reducing waste.
Ready to dive in? Pick one or two crops to begin, gather your supplies, and get planting! Before you know it, your tiny yard will be bursting with life—and so will your meals. Happy gardening! 🌿