
Pests
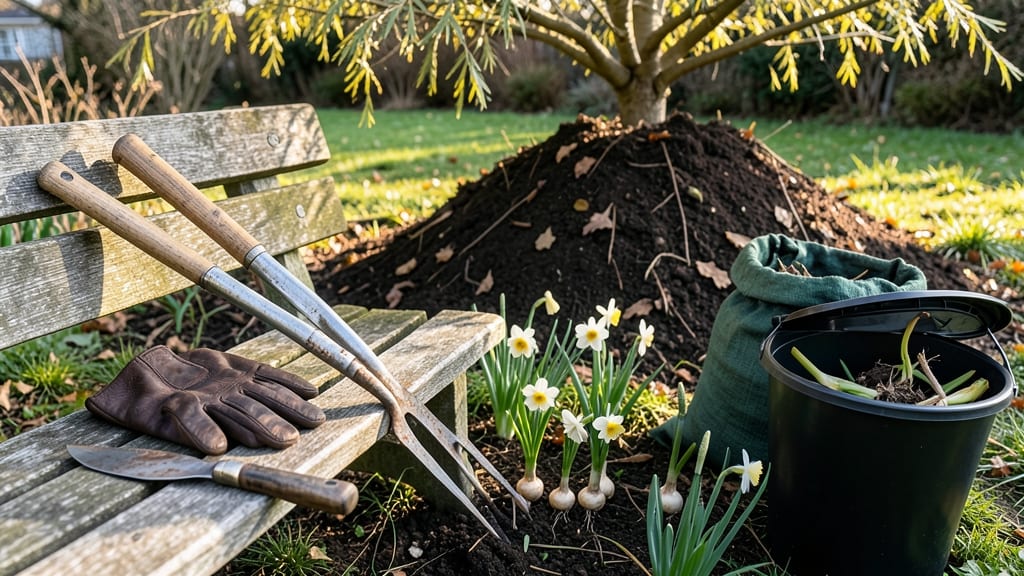
How to get rid of daffodils that refuse to leave your garden? 🌱 I’ve wrestled with stubborn clumps that multiply faster than weeds—until I discovered this hot water trick that kills bulbs in minutes without chemicals. The problem isn’t just their relentless spread; they can crowd out favorite perennials or clash with your design vision. Digging them up only works temporarily unless you destroy the bulbs. My go-to method? Boiling water poured directly into the hole after removal—it cooks the bulb’s energy reserves, stopping regrowth for good. You’ll reclaim space in weeks, not years, and the process is eco-friendly. No harsh sprays, just physics and patience. The best part? That same spot can host new plants by spring, free from daffodil dominance. Works for any garden size, from small borders to sprawling lawns. Let’s tackle this once and for all—no more unwanted yellow blooms taking over.
📚 In This Guide
- What you need
- Instructions
- Tips and common mistakes
- Wrapping up and next steps
What you need
- ● Heavy-duty gloves (2 pairs): Protect your hands from sharp bulb edges and sap. Opt for nitrile-coated gloves for extra durability.
- ● Garden fork or digging spade (1): A sturdy, long-handled fork (18–24 inches) works best for prying out bulbs without breaking them.
- ● 5-gallon bucket or wheelbarrow (1): For collecting dug-up bulbs and debris. A lidded bucket prevents accidental regrowth.
- ● Boiling water (1–2 gallons): The star of the show! Use freshly boiled water (212°F/100°C) to kill bulbs instantly.
- ● Measuring cup or pitcher (1): To ensure you’re using the right amount of water for soaking (if needed).
- ● Trash bags or compost bin (2–3): For disposing of bulbs and garden waste. Check local regulations—some areas prohibit composting invasive plants.
- ○ Hose with nozzle (optional but handy): For rinsing tools and clearing soil afterward.
- ● Garden kneeler or pad: Saves your knees during long digging sessions.
- ● Pruners or shears: For snipping back foliage before digging (helps reduce sap mess).
- ● Vinegar or salt spray (1 gallon water + 1 cup vinegar/salt): Spray remaining soil to deter regrowth (use cautiously near other plants).
- ● Label or marker: If you’re replanting other bulbs, mark their locations to avoid accidentally removing them!
Step-by-Step instructions for eradicating daffodils with hot water
Here's the fast, chemical-free method I've used to banish unwanted daffodils from my garden beds.
🔥 Step 1: Water the Area Thoroughly the Day Before
Soak the entire daffodil patch with 1-2 gallons of water per square yard the evening before treatment. This ensures the soil is saturated and the bulbs are plump, making them more vulnerable to the hot water treatment. You'll know it's ready when the surface feels damp but not soggy—like a wrung-out sponge.
I like to water in the late afternoon so the ground stays moist overnight. If your soil drains extremely fast, add a layer of plastic sheeting to slow evaporation. The goal is bulbs that are fully hydrated but not waterlogged.
🔥 Step 2: Boil a Large Pot of Water
Use a 5-gallon pot or larger to create enough volume for effective treatment. Bring the water to a full rolling boil—you want it at 212°F to kill bulb tissue instantly. I use an old stock pot from my kitchen because the volume matters more than aesthetics here.
While waiting, identify the daffodil clumps. Look for the fan-shaped leaves radiating from the base—these mark where the bulbs lie just beneath the surface. The hot water needs to penetrate at least 4-6 inches deep to reach the bulbs effectively.
💧 Step 3: Pour Boiling Water Directly Over the Bulbs
Carefully pour the boiling water directly over the daffodil clumps, aiming for the base where leaves meet soil. Use the full 5 gallons per square yard to ensure complete coverage. You'll see the leaves wilt immediately as the heat penetrates the system.
Work in sections if needed, but don't dilute the water—each pour should be fresh from boiling. The steam will rise visibly as it kills the foliage and penetrates downward. Repeat the treatment 2-3 days later to ensure any surviving bulb tissue is completely destroyed.
✂️ Step 4: Remove and Dispose of Dead Foliage
After 5-7 days, when the leaves turn completely brown and crispy, dig around the area to loosen the soil. The bulbs should feel soft and mushy when probed—this confirms they're dead. Pull up any remaining foliage and roots, then dispose of them in the trash (not compost).
I like to work the area with a garden fork afterward to break up any remaining bulb fragments. This prevents regrowth from small pieces that might have survived. The treated area will look barren, but it's now ready for new plantings.
🌱 Step 5: Prevent Regrowth with Mulch or New Plantings
Cover the treated area with 3-4 inches of mulch or plant new ground covers immediately. This blocks light from any potential bulb fragments that might try to sprout. I've found that dense mulch or low-growing perennials work best for keeping daffodils from returning.
For extra insurance, I water the area lightly after planting to help new growth establish. The key is consistency—check the area monthly for the first year for any signs of new shoots, and treat those immediately with the same hot water method if needed.
Tips & tricks for perfectly eradicating daffodils
This method works best when you pay attention to the details—trust me, I've tried the shortcuts, and they don't work. Here's what I've learned after years of testing this hot water technique.
Timing is Everything: The 24-hour soak in Step 1 is non-negotiable. I've tried rushing it with just 12 hours, and while the soil felt damp, the bulbs weren't plump enough for the hot water to work effectively. If you're in a hurry, start the process two days early—it's better than having to repeat the treatment. The overnight window ensures maximum bulb vulnerability.
Water Temperature Matters: That 212°F boiling point in Step 2 isn't just arbitrary—it's the exact temperature needed to kill bulb tissue instantly. I use a candy thermometer to verify my water reaches this temperature before pouring. If you're using a stove, let the water boil vigorously for at least 3 minutes before using it to ensure consistent heat throughout the pot.
Targeted Application: When pouring in Step 3, focus on the base of the daffodil clumps where leaves meet soil. I've found that using a watering can with a narrow spout gives me better control than trying to pour directly from a pot. This precision ensures the hot water penetrates where it matters most—the bulb location. The wilted leaves are your visual confirmation that you're hitting the right spots.
Follow-Up Treatment: The 2-3 day repeat treatment in Step 3 is crucial for complete eradication. I've seen daffodils make a comeback when people skip this step, especially in cooler weather. Mark your calendar or set a phone reminder—those surviving bulb fragments can be stubborn. The second treatment ensures any dormant tissue is completely destroyed.
Pro Tips for Get Rid Of Daffodils
- This method works best when you pay attention to the details—trust me, I've tried the shortcuts, and they don't work....
- Timing is Everything: The 24-hour soak in Step 1 is non-negotiable. I've tried rushing it with just 12 hours, and whi...
- Water Temperature Matters: That 212°F boiling point in Step 2 isn't just arbitrary—it's the exact temperature needed ...
Frequently asked questions
Got questions about removing daffodils without leaving a trace? Here are some common concerns—and their answers—to help you tackle this task like a pro!
When is the best time to remove daffodils?
The ideal time to eliminate daffodils is right after they bloom (late spring) or in early fall before new growth appears. This ensures you catch the bulbs before they spread further. Avoid removing them in winter, as dormant bulbs can regrow more aggressively in spring.
Will hot water really kill the bulbs permanently?
Yes! Soaking daffodil bulbs in 200°F water for 10–15 minutes effectively kills them by denaturing proteins in the bulb’s cells. For extra assurance, repeat the process or add a few drops of vinegar or dish soap to break down cell membranes. Just be cautious—hot water can damage nearby plants or soil.
What if I don’t want to use hot water? Are there alternatives?
Try these chemical-free methods:
- Dig and dispose: Unearth the entire bulb (including roots) and trash it in sealed bags. Avoid composting, as daffodil bulbs can survive.
- Solarization: Cover the area with clear plastic for 4–6 weeks in summer to bake bulbs in trapped heat.
- Vinegar spray: Mix 1 part white vinegar with 1 part water and spray directly on leaves (avoid desirable plants). Repeat weekly until yellow.
Why do daffodils keep coming back even after removal?
Daffodils are tenacious—they spread via underground rhizomes and bulb offsets. To prevent regrowth:
- Inspect the soil for tiny bulblets and remove them.
- Monitor the area for new shoots in spring and pull them early.
- Consider a mulch barrier (like cardboard) to block sunlight and smother regrowth.
Is it safe to compost daffodil bulbs?
No!
Daffodil bulbs (and their toxic sap) can survive composting and reinfest your garden. Instead, double-bag them in trash or dispose of them in yard waste. If you’re unsure, check local regulations—some areas prohibit composting invasive plants.
Wrapping up and next steps
Getting rid of daffodils doesn’t have to be a daunting task—with the right method, like a hot water soak, you can disable those stubborn bulbs in minutes! Whether you’re reclaiming space, preventing regrowth, or simply tidying up, this approach is fast, effective, and eco-friendly. 🌱✨
Now that you’re armed with the knowledge, grab your gear and get started! Once those daffodils are gone, consider replanting with something new—maybe a low-maintenance ground cover or vibrant annuals to brighten up your space. Happy gardening! 🌸💪