
How To
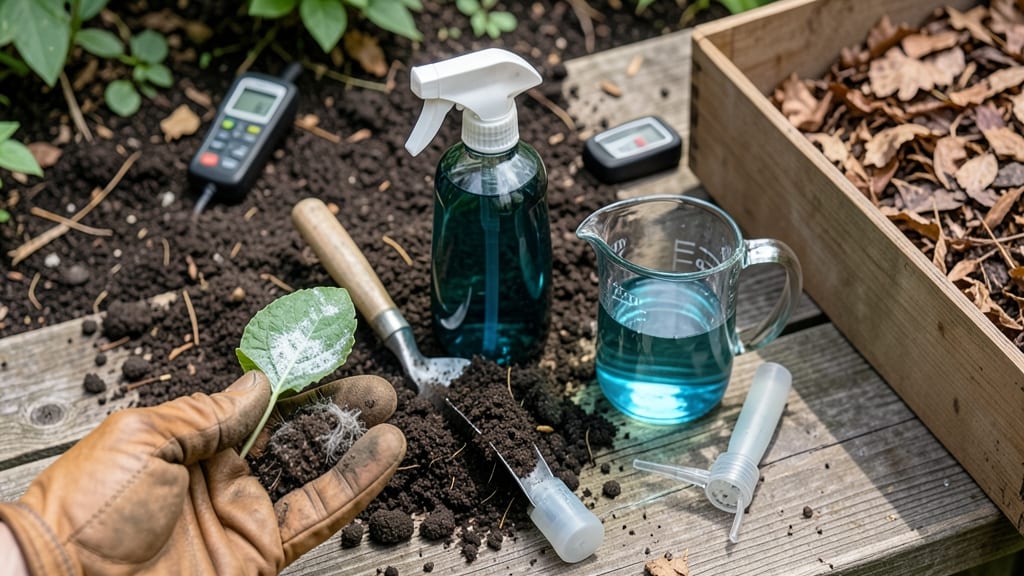
How to disinfect soil from fungus can turn your garden from lush to lifeless overnight. 🌱 The hydrogen peroxide soak method saved my struggling tomato beds last summer—no harsh chemicals needed. This simple, organic approach kills fungal spores while keeping your soil structure intact, so you can replant safely in just days.
You only need 3% hydrogen peroxide, a sprayer or watering can, and a sunny day. Mix equal parts peroxide and water, then drench your soil until it's thoroughly wet. Let it sit for 24-48 hours while the bubbles do the work—no tilling required.
The process is safe for plants and pets once fully dry, but wear gloves just in case.
📚 In This Guide
- What you need
- Instructions
- Tips and common mistakes
- Wrapping up and next steps
What you need
- ● 3% hydrogen peroxide solution – 1 part hydrogen peroxide to 10 parts water (e.g., 1 cup H₂O₂ + 10 cups water for ~1 gallon). Never use higher concentrations—it can harm plants and soil microbes.
- ● Spray bottle or watering can – For even distribution (5–10 gallons capacity, depending on soil volume).
- ● Garden trowel or shovel – To loosen soil before soaking.
- ● Garden hose with nozzle – For rinsing soil afterward.
- ● Plastic sheeting or tarp – 6–10 mil thickness, large enough to cover your soil bed (e.g., 4’x8’ for raised beds).
- ● Gloves (nitrile or rubber) – Protects hands from irritation.
- ○ pH test kit (optional but helpful) – To check soil pH before/after treatment (ideal range: 6.0–7.0).
- ● Soil moisture meter – Ensures soil is damp but not soggy before treatment.
- ● Compost or organic matter – For replenishing beneficial microbes after disinfection.
- ● Fungicide (copper-based or neem oil) – For stubborn fungus (use after hydrogen peroxide soak).
- ● Fan or dehumidifier – Speeds up drying if treating in a greenhouse.
Step-by-Step instructions for disinfecting soil with hydrogen peroxide
Fungus in your garden beds can ruin plants before they even sprout. Here's how to sterilize soil safely and effectively using hydrogen peroxide.
💧 Step 1: Test Soil Moisture and Prepare the Area
Start by checking if your soil is dry enough to handle the hydrogen peroxide solution. Stick your finger about 2 inches deep—if it feels bone-dry, give it a light misting with plain water first. The goal is damp, not soggy, soil. This ensures the peroxide soaks in evenly without pooling on the surface.
Clear the area of any plants, rocks, or debris. You want full access to the soil's surface. I like to lay down a tarp around the edges to contain any runoff, especially if you're treating raised beds. This keeps the process tidy and prevents accidental exposure to pets or kids playing nearby.
☀️ Step 2: Mix the Hydrogen Peroxide Solution
For every 1 gallon of water, mix in 1 cup of 3% hydrogen peroxide. This ratio is strong enough to kill fungus spores but gentle enough to avoid harming beneficial soil microbes. Stir well until the solution looks uniformly cloudy—no streaks or separation.
I use a spray bottle for smaller areas or a watering can with a fine rose attachment for larger beds. The key is even distribution. Test the spray pattern on a small patch first to ensure it covers without oversaturating. You'll know it's right when the soil looks uniformly damp but not dripping.
🌱 Step 3: Apply the Solution and Let It Work
Apply the solution directly to the soil surface, working in sections if needed. Water until the top 4-6 inches of soil are thoroughly moistened. You'll see the peroxide fizz slightly as it reacts with organic matter—that's normal and a sign it's actively disinfecting.
Cover the treated area with a clear plastic sheet or tarp to trap heat and moisture. Secure the edges with rocks or soil to prevent wind from blowing it away. Leave it like this for 24-48 hours. The longer you wait, the more effective the treatment, but don't exceed 48 hours or you risk burning plant roots if you replant too soon.
🌿 Step 4: Rinse and Amend the Soil
After the waiting period, remove the plastic and rinse the soil with plain water to dilute any remaining peroxide. Use a gentle stream to avoid eroding the soil structure. You'll know it's rinsed enough when the water running off looks clear, not cloudy or bubbly.
Now's the time to add back any beneficial amendments. Mix in 2 inches of compost and a handful of mycorrhizal fungi or beneficial bacteria to restore the soil's natural balance. This step is crucial—sterile soil is like a blank canvas, and you want to repopulate it with helpful microbes before planting.
⏰ Step 5: Wait Before Replanting
Hold off on planting for at least 5-7 days after rinsing. This gives the soil time to settle and for any residual peroxide to dissipate completely. You'll notice the soil feels lighter and fluffier after the treatment—this is a good sign the fungus is gone and the structure is improving.
Before replanting, do a quick check: press your finger into the soil. If it crumbles easily and doesn't stick to your skin, it's ready. If it feels gummy or compacted, let it dry out a bit more. This final step ensures your new plants get off to a healthy start in fungus-free soil.
Tips & tricks for effective soil sterilization with hydrogen peroxide
Here's what I've learned after treating multiple garden beds—these tricks make all the difference between a half-hearted attempt and a truly sterilized growing space.
Soil Moisture Secret: In Step 1, that 2-inch moisture check is non-negotiable. Bone-dry soil won't absorb the solution properly, while soggy soil creates runoff that wastes your mixture. I've seen people skip this and end up with patchy treatment—don't make that mistake. If your soil feels like sandpaper, give it just enough water to make it feel like a damp sponge, not a wet towel.
Solution Application Technique: When applying the 1 gallon to 1 cup ratio in Step 2, work in overlapping 12-inch sections. This prevents dry spots where fungus might linger. I use a spray bottle for containers and a watering can with a fine rose for garden beds. The key is to see the solution disappear into the soil rather than pooling on top—this tells you it's penetrating deeply where fungus hides.
Fizz Observation: That bubbling action in Step 3 isn't just for show—it's your confirmation the peroxide is actively working. If you don't see fizzing after 5 minutes, you might need to reapply in those spots. In my experience, the most stubborn fungal spots are where the solution didn't penetrate fully, so pay extra attention to those areas.
Timing Strategy: For the 24-48 hour soak in Step 3, I've found that 36 hours gives the best balance between fungus elimination and soil safety. If you're treating a large area, start with 24 hours first, then reassess before extending. You'll know it's working when you see the soil color lighten slightly—this indicates the organic matter is breaking down, which is exactly what we want for sterilization.
Pro Tips for Disinfect Soil From Fungus
- Here's what I've learned after treating multiple garden beds—these tricks make all the difference between a half-hearted attempt and a truly sterilized growing space.
- Soil Moisture Secret: In Step 1, that 2-inch moisture check is non-negotiable.
- Solution Application Technique: When applying the 1 gallon to 1 cup ratio in Step 2, work in overlapping 12-inch sections.
Frequently asked questions
Got questions about disinfecting soil from fungus? You’re not alone—soil sterilization can feel tricky! Here are some of the most common concerns and straightforward answers to help you tackle fungus like a pro.
How long does it take for hydrogen peroxide to kill fungus in soil?
Hydrogen peroxide (3%) typically works within 24–48 hours when applied correctly. For deeper fungal issues, soak the soil for up to 72 hours and repeat if needed. Always rinse thoroughly before replanting to avoid residue buying up nutrients.
Is hydrogen peroxide safe for all plants?
Yes, but rinse the soil well after treatment—residue can harm seedlings or sensitive plants. For organic gardens, opt for a 1:10 dilution (1 part 3% H₂O₂ to 10 parts water) to minimize risks. Avoid using it on acid-loving plants like blueberries or azaleas, as it can alter pH.
Can I disinfect soil without chemicals?
Try these natural alternatives:
- Baking soda: Mix 1 tbsp per gallon of water, spray on soil, and let sit for 24 hours.
- Neem oil: A fungicidal option—spray diluted oil (1 tbsp/quart water) and repeat weekly.
- Solarization: Cover soil with clear plastic for 4–6 weeks in hot sun to bake out pathogens.
What’s the best time of year to treat fungal soil?
The ideal window is late winter or early spring (before planting) or fall (after harvest). Avoid treating in extreme heat (over 90°F), as hydrogen peroxide degrades faster. Cool, 60–75°F temps work best for even distribution.
My plants keep getting fungus—what am I missing?
Fungus often returns due to poor drainage, overwatering, or organic buildup. Troubleshoot with these steps:
- Test soil pH—fungus thrives in acidic or alkaline extremes (aim for 6.0–7.0).
- Improve airflow by spacing plants and removing debris.
- Rotate crops yearly to break fungal cycles.
- Add compost or perlite to lighten heavy, compacted soil.
Pro Tip:
Monitor moisture levels
after treatment—fungus loves damp conditions. Use drip irrigation instead of overhead watering to keep foliage dry, and avoid watering late in the day to prevent overnight sogginess.
Wrapping up and next steps
Disinfecting your soil from fungus doesn’t have to be a daunting task—with the right tools like hydrogen peroxide and a little patience, you can restore a healthy growing environment for your plants. 🌱 Remember, consistency is key: test your soil, apply treatments carefully, and monitor progress to ensure long-term success.
Ready to take action? Start small—treat one section of your garden at a time—and soon, you’ll have fungus-free soil that’s ready for your next planting adventure! 🚀