
Landscaping
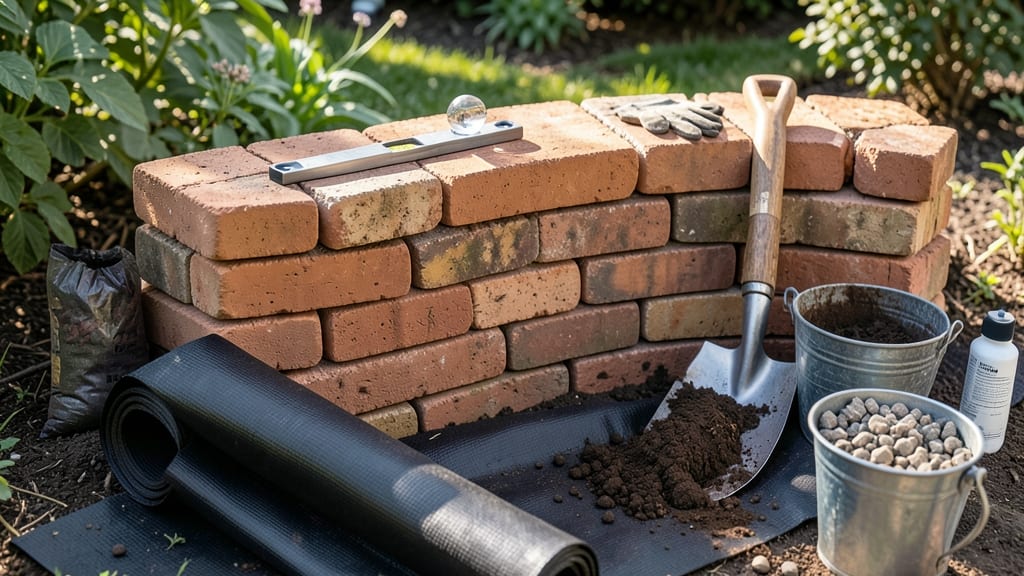
Building a brick planter that lasts through seasons starts with the right foundation. ✨ I’ve learned the hard way—skipping the gravel base means cracks and shifting over time, but doing it right creates a raised bed that stays sturdy for years.
The secret lies in balancing aesthetics with functional drainage, so your plants thrive without soggy roots.
You’ll need basic tools—a trowel, level, rubber mallet, and gloves—and materials like bricks, landscape fabric, and gravel for drainage. Most projects take a weekend, but the payoff is immediate: a clean, elevated space that elevates any garden.
The key is using bricks with consistent thickness (like standard cinder blocks) for even edges and professional-looking results.
By the end, you’ll have a raised bed with built-in drainage that keeps soil healthy and weeds at bay. The finished look? A timeless, rustic charm that frames your plants beautifully. Plus, the height makes harvesting easier—no more bending over for hours.
Works for everything from herbs to tomatoes, and you can customize the size to fit your space. Let’s get those bricks laid!
📚 In This Guide
- What you need
- Instructions
- Tips and common mistakes
- Wrapping up and next steps
What you need
- ● Brick – 100-150 bricks (depending on planter size; use concrete blocks for extra stability if needed). Opt for solid clay bricks or pavers for longevity.
- ● Gravel – 2-3 bags (50 lbs each) for drainage and base layer.
- ● Landscape fabric – 1 roll to prevent soil from mixing with gravel.
- ● Soil mix – 2-3 cubic feet of high-quality garden soil or potting mix (add compost for nutrient-rich planting!).
- ● Sand – 1-2 bags (40 lbs each) for mortar mix (if using mortar) or leveling.
- ○ Cement mix – 1 bag (40 lbs) (optional, for a permanent structure; skip if using adhesive or dry-stacking).
- ○ Waterproof membrane – 1 roll (optional, for extra moisture protection).
- ● Wheelbarrow or bucket for mixing mortar/sand.
- ● Trowel (for spreading mortar) and brick jointer (for finishing joints).
- ● Level (2-ft) to ensure your planter stays perfectly even.
- ● Rubber mallet for gentle brick adjustments.
- ● Safety gloves and eye protection (because DIY safety first!).
- ● String line and stakes (to mark layout before building).
- ● Shovel or mattok for digging the base.
- ● Measuring tape and chalk line for precision.
- ● Brick adhesive (instead of mortar for a cleaner look).
- ● Drainage pipe (4-inch PVC, cut to size) for advanced drainage systems.
- ● Edging stones or metal flashing to cap the sides neatly.
- ● Landscape paint (for a pop of color on bricks).
- ● Knee pads (because let’s be real, you’ll be kneeling a lot!).
Step-by-step instructions for building a brick planter
Here's how I build sturdy, long-lasting raised beds that stay level and drain perfectly every time.
🪴 Step 1: Choose and Prepare Your Site
Pick a flat, stable location with 6+ hours of sun for your planter. Clear all grass, weeds, and debris from a 12-inch radius around where you'll build. I like to lay out the dimensions with landscape fabric first—this prevents weeds from creeping up through the bricks later. Use a tape measure to mark the corners and stretch string lines for perfect alignment.
Check for level by placing a 2x4 across the marked area—any slope over 1 inch per 8 feet will cause drainage issues. If needed, add or remove soil until the surface is perfectly level. This is your foundation, so don't skip it. Uneven beds lead to water pooling and root rot down the road.
🪴 Step 2: Build the Base Layer
Start by laying a 4-inch layer of compacted gravel over the prepared site. This creates the drainage layer that prevents soggy soil. Use a plate compactor or tamper to press it down firmly—you want it as dense as possible. I like to work in 2-foot sections to keep things manageable.
Next, cut a 2-inch layer of landscape fabric to fit the base dimensions. This keeps the gravel from mixing with your soil later. Overlap edges by 6 inches and secure with landscape staples. The fabric should extend 2 inches up the sides—this prevents soil from spilling into the gravel over time.
🪴 Step 3: Assemble the Brick Walls
Begin with the corners—lay bricks in a running bond pattern (staggered like brick walls) using masonry adhesive instead of mortar for flexibility. Leave a ½-inch gap between bricks for drainage. I use a rubber mallet to tap bricks into place gently—never force them, or you'll crack the bricks.
After the first course, check for level every 4 bricks. Adjust by placing small shims under low spots. For extra stability, I bury the bottom course 2 inches deep into the gravel. This keeps the planter from shifting over time. As you build up, alternate the starting brick in each course to maintain the running bond pattern.
💧 Step 4: Add Soil and Final Touches
Fill the planter with a mix of 60% topsoil, 30% compost, and 10% perlite. I use a shovel to distribute the soil evenly, tamping lightly every 2 inches to eliminate air pockets. Leave a ½-inch gap at the top for watering—this prevents soil from spilling out when you water.
For built-in drainage, I install a 4-inch PVC pipe with holes drilled in it along one side of the gravel base before adding soil. Cover the pipe with landscape fabric to keep debris out. This hidden system ensures excess water drains away while keeping roots moist. Finish by adding a 1-inch layer of mulch on top to retain moisture and suppress weeds.
✂️ Step 5: Reinforce and Maintain
To prevent cracking, I install galvanized metal edging along the top inside edge of the bricks. This gives plants something to grip and keeps the soil contained. Water the planter thoroughly after filling, then let it settle for 24 hours before planting. This prevents soil from shifting when you add plants.
Check the planter's stability after the first heavy rain. If bricks shift, add more adhesive between courses. For long-term care, top off with fresh mulch annually and replace any damaged bricks immediately. A well-built brick planter lasts 10+ years with minimal maintenance—just keep the drainage clear and the soil rich.
Tips & tricks for perfect brick planters
Took me years of trial and error to perfect these brick planters—here's what actually makes them last.
Site Prep is Non-Negotiable: That 12-inch radius clearance isn't just about weeds—it's about preventing moisture buildup against the bricks. I've seen planters crack after winter because of ice expansion in the surrounding soil. Use a string line to mark your dimensions and double-check with a level before you start laying gravel. A perfectly flat base prevents all future drainage headaches.
Gravel Compaction Matters More Than You Think: Don't just dump that 4-inch gravel layer—compact it in 2-foot sections with a plate compactor. I learned this the hard way when my first planter sagged after heavy rains. The gravel should feel solid enough that it barely gives when you press down with your boot. This creates the proper drainage channel that keeps roots happy.
Brick Pattern Secret: The running bond pattern isn't just for looks—it's structural. Start each course with a half-brick cut from the previous course's end. This interlocking pattern distributes weight evenly and prevents the walls from bowing outward over time. I've seen planters collapse when builders skipped this step and used a stacked pattern instead.
Soil Layering Hack: When filling with your 60-30-10 soil mix, tamp every 2 inches with the back of your shovel. This prevents air pockets that can cause uneven settling. The ½-inch gap at the top isn't just for aesthetics—it gives you room to add more soil later without overflowing. Pro tip: Use a level to check the soil's surface after filling to ensure it's perfectly even before adding mulch.
Pro Tips for Build Brick Planter
- Took me years of trial and error to perfect these brick planters—here's what actually makes them last.
- Site Prep is Non-Negotiable: That 12-inch radius clearance isn't just about weeds—it's about preventing moisture buil...
- Gravel Compaction Matters More Than You Think: Don't just dump that 4-inch gravel layer—compact it in 2-foot sections...
Frequently asked questions
Got questions about building your brick planter? You’re not alone! Here are some of the most common queries—and their straightforward answers—to help you get started with confidence.
What’s the best type of brick to use for a planter?
For durability and drainage, concrete or clay bricks are top choices. Concrete bricks resist weathering and moisture, while clay bricks offer a rustic look but may need sealing. Avoid sand-lime bricks—they’re prone to cracking when wet. Pro tip: Check your bricks for chipping or cracks before building!
How long does it take to build a brick planter?
For a small to medium planter (3’x4’), expect 4–8 hours if you’re working solo. Break it into sessions: Lay the base in a morning, stack bricks the next day, and finish with drainage/soil. Rush it? Don’t! A hasty build risks instability or leaks. Plan for 2–3 days for a larger or more complex design.
Do I need a drainage system, or will bricks handle it?
Bricks do allow water to escape, but adding a drainage layer (like gravel or perforated pipe) prevents root rot and soil erosion. Skip it? Your plants may suffer in heavy rain. Best practice: Use a 2–3 inch gravel layer at the bottom before adding soil. For extra insurance, add a landscape fabric to keep soil from clogging the drainage.
Can I build a brick planter without mortar?
Yes! Dry-stacking bricks is easier and reversible, but it’s less stable for tall planters (over 12” high). For height or windy areas, use concrete adhesive or masonry mortar between courses. Need a temporary fix? Stack bricks in herringbone or staggered patterns to improve grip and reduce shifting.
What tools do I really need beyond bricks and mortar?
Essentials: trowel, level, rubber mallet, wheelbarrow, and gloves. Optional but handy: string line (for straight edges), safety glasses, and a circular saw (if cutting bricks). Skip the power tools? A handsaw and chisel work for basic cuts. Rent a plate compactor if you’re tamping the base for extra stability.
Will a brick planter freeze in winter, damaging plants?
Bricks do conduct cold, but the risk is minimal if your planter is well-drained and filled with insulating soil. For cold climates, add mulch (straw or leaves) on top in winter. Pro move: Plant cold-hardy annuals or perennials (like pansies or sedum) to thrive year-round. Avoid soggy soil—it worsens freeze damage.
Wrapping up and next steps
Building a brick planter is a rewarding project that adds charm and functionality to your garden! With just a few materials and some elbow grease, you’ve created a durable, stylish raised bed that will elevate your gardening game. 🌱✨
Now that you’re ready to plant, why not take it a step further? Try adding herbs, flowers, or veggies for a thriving, low-maintenance garden. Happy planting—your green space is about to get even greener! 🌿