
Pruning
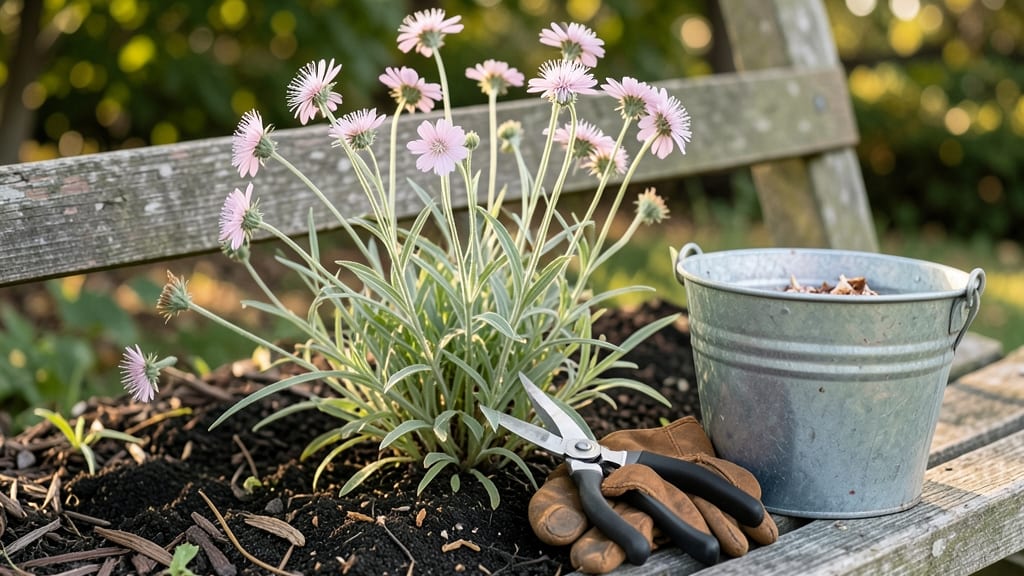
How to deadhead Gaura could be the trick to making your plants bloom nonstop. 🌸 I’ve transformed my once-sparse whirling butterflies into a cloud of pink and white blooms by mastering this one simple technique—no fancy tools or gardening degree required.
The secret? Deadheading isn’t about chopping everything off—it’s about encouraging new growth by removing spent blooms at the base. Do this every 2-3 weeks from spring through fall, and you’ll see fresh flowers pushing through within days.
Even my first attempt (which I nearly over-pruned) taught me the magic of patience and precision.
You’ll end up with taller, bushier plants that bloom longer, and the air will fill with that delicate, sweet fragrance all season. The best part? It takes less than 10 minutes per plant—perfect for busy gardeners who still want a showstopping display.
Works for both Oenothera lindheimeri and hybrid varieties, and even helps prevent leggy growth. Here’s exactly how to do it without a single guess—no more wondering if you’re cutting too much or too little.
📚 In This Guide
- What you need
- Instructions
- Tips and common mistakes
- Wrapping up and next steps
What you need
- ● Pruning shears or sharp scissors: Choose bypass pruners (clean cuts!) or small garden shears with a 4-inch blade for precision. Sterilize with rubbing alcohol before use to prevent disease.
- ○ Gloves (optional but recommended): Lightweight gardening gloves with nitrile-coated palms to protect from thorns and dirt.
- ● Bucket or trash bag: A 5-gallon bucket or sturdy bag to collect spent blooms and debris.
- ● Garden kneeler or stool: If your gaura is tall (2–3 feet), a foldable kneeler or low stool saves your back!
- ● Hand lens or magnifying glass: For spotting hidden buds or pests on stems.
- ● Pruning saw (for stubborn stems): A folding pruning saw for thick, woody growth (rare in gaura but handy for overgrown plants).
- ● Compost bin: Toss deadheaded blooms here—they’ll break down into nutrient-rich soil!
- ● Spray bottle with water: A quick mist to revitalize stems after pruning (especially in hot climates).
Step-by-Step instructions for deadheading gaura
Here's the straightforward method I use to keep my gaura blooming all season long—no fancy tools or complicated steps.
✂️ Step 1: Identify and Locate Spent Blooms
Gaura's delicate, airy flowers form clusters on stems that can grow 2-3 feet tall. Look for spent blooms that have turned brown or lost their petals—these are ready for removal. I like to start in the morning when flowers are fully open, making it easier to spot faded ones.
Run your fingers gently along each stem to feel for the small, woody seed pods forming at the base of each bloom. These pods indicate a spent flower. You'll notice healthy blooms still have vibrant petals, while faded ones look papery and brittle.
✂️ Step 2: Make the Clean Cut
Use clean, sharp pruners or your fingers to pinch off the spent bloom just above the first set of healthy leaves below the flower cluster. This encourages new growth from that node. I avoid cutting into green stems—just a clean snip at the base of the bloom cluster is all it takes.
If you're working with a large plant, take your time and work in sections. Gaura's stems can be numerous, so I often divide the plant into quadrants and focus on one area at a time. This prevents accidental damage to fresh blooms while you're working.
✂️ Step 3: Encourage Continuous Blooming
After removing the spent blooms, step back and observe the plant's structure. Gaura naturally produces flowers along its stems, so by consistently removing faded blooms, you're signaling the plant to produce more. I find that deadheading every 7-10 days keeps my gaura in peak condition throughout the growing season.
Don't worry about removing every single spent bloom—focus on the most noticeable ones first. The key is consistency. You'll see new buds forming within 1-2 weeks of regular deadheading, especially if the plant is getting full sun (6+ hours daily) and well-draining soil.
🌿 Step 4: Maintain Plant Health Post-Deadheading
After deadheading, give your gaura a light watering if the soil feels dry to the touch. Gaura is drought-tolerant once established, but it appreciates a drink after the stress of pruning. I water at the base rather than overhead to prevent fungal issues.
Keep an eye out for any leggy stems that develop after deadheading. If a stem grows too tall and becomes bare at the bottom, you can trim it back by about 1/3 to encourage bushier growth. This also prevents the plant from becoming top-heavy and flopping over.
⏰ Step 5: Seasonal Adjustments
In late summer, as temperatures rise, gaura may slow its blooming. This is normal—it's conserving energy for the next season. Reduce deadheading frequency but continue removing spent blooms to maintain the plant's shape and encourage any remaining flowers.
By early fall, when nights grow cooler, you can stop deadheading entirely. Gaura's seed pods add winter interest to the garden, and the plant benefits from resting. In spring, you'll be rewarded with fresh new growth and a burst of blooms.
Tips & tricks for perfect gaura deadheading
Keeping your gaura blooming beautifully takes just a few simple tricks—here's how to make every snip count for maximum results.
Timing Secret: Morning is the ideal time to deadhead gaura because the flowers are fully open, making it easier to distinguish between vibrant blooms and spent ones. I've noticed that afternoon deadheading can sometimes include flowers that haven't quite finished blooming, which means you might accidentally remove potential future flowers. The morning light also helps you spot those subtle color changes that indicate a bloom is ready for removal.
Technique Tip: When making your clean cut in Step 2, focus on pinching just above the first set of healthy leaves below the bloom cluster. This is where new growth will emerge. I've found that using your fingers works just as well as pruners for gaura's delicate stems—just be gentle to avoid damaging the plant. For larger plants, working in quadrants prevents accidental damage to fresh blooms while you're concentrating on one section at a time.
Seasonal Strategy: The 7-10 day deadheading schedule in Step 3 is perfect for maintaining continuous blooming, but don't be afraid to adjust slightly based on your climate. In hotter summer months, you might find you need to deadhead every 5-7 days as the plant responds to the heat with rapid growth. Conversely, in cooler spring or fall periods, you can extend to every 10-14 days. The key is to always check for those woody seed pods forming at the base of blooms.
Visual Cue: After deadheading, look for new buds forming within 1-2 weeks as your reward for consistent care. These buds will appear as small, tight clusters at the stem junctions. I've seen gaura plants that were nearly bare after winter completely transform into lush, flowering bushes just by maintaining this regular deadheading schedule. The plant's natural growth pattern means you'll often see multiple blooms developing along each stem after you remove the spent ones.
Pro Tips for Deadhead Gaura
- Keeping your gaura blooming beautifully takes just a few simple tricks—here's how to make every snip count for maximu...
- Timing Secret: Morning is the ideal time to deadhead gaura because the flowers are fully open, making it easier to di...
- Technique Tip: When making your clean cut in Step 2, focus on pinching just above the first set of healthy leaves bel...
Frequently asked questions
Got questions about keeping your gaura blooming beautifully? Here are some of the most common ones—plus quick answers to help you deadhead like a pro!
When is the best time to deadhead gaura?
Deadhead gaura throughout the blooming season—typically from early spring until the first frost. Focus on spent flowers after they fade (usually every 1–2 weeks), but avoid pruning in extreme heat or cold to prevent stress. Early morning is ideal for snipping, as the stems are firm and less prone to tearing.
Do I need special tools to deadhead gaura?
Nope! While clean, sharp pruning shears are best, you can use anything sterile and sharp, like nail clippers or even your fingers (for small stems). Just avoid dull tools—they can crush stems and invite disease. A small pair of scissors works in a pinch too!
What if my gaura stops blooming after deadheading?
If blooms taper off, check for these issues:
- Over-pruning: Never cut more than 1/3 of the plant at once.
- Underwatering: Gaura thrives in dry conditions—water deeply but infrequently.
- Nutrient deficiency: Feed with a balanced fertilizer in early spring.
- Leggy growth: Trim back all stems by 1/2 in early spring to encourage bushier blooms.
Can I deadhead gaura in rain or after heavy watering?
Wait until the soil is slightly dry (1–2 days after rain) to deadhead. Wet stems are harder to grip, and snipping them can spread disease. If you must prune after watering, use sterilized tools and avoid cutting into soggy soil to prevent rot.
What if my gaura looks sad after deadheading?
Don’t panic! Gaura is tough and often looks worse before it bounces back. If stems appear wilted:
- Give it time—new growth usually emerges in 1–2 weeks.
- Skip fertilizing for 2–3 weeks to avoid stressing the plant.
- Ensure it’s in full sun (6+ hours/day) and well-draining soil.
Wrapping up and next steps
Deadheading your gaura is a simple yet rewarding task that keeps your garden thriving and stunning! 🌸 With just a few snips, you’ll encourage more blooms, healthier growth, and a neat appearance—all while saving time.
Now that you’re armed with the right techniques, grab those pruners and give your gaura the TLC it deserves.
Ready to take it further? Try experimenting with different pruning schedules to see what works best for your climate and plant variety. Happy gardening! 🌿