
Flowers
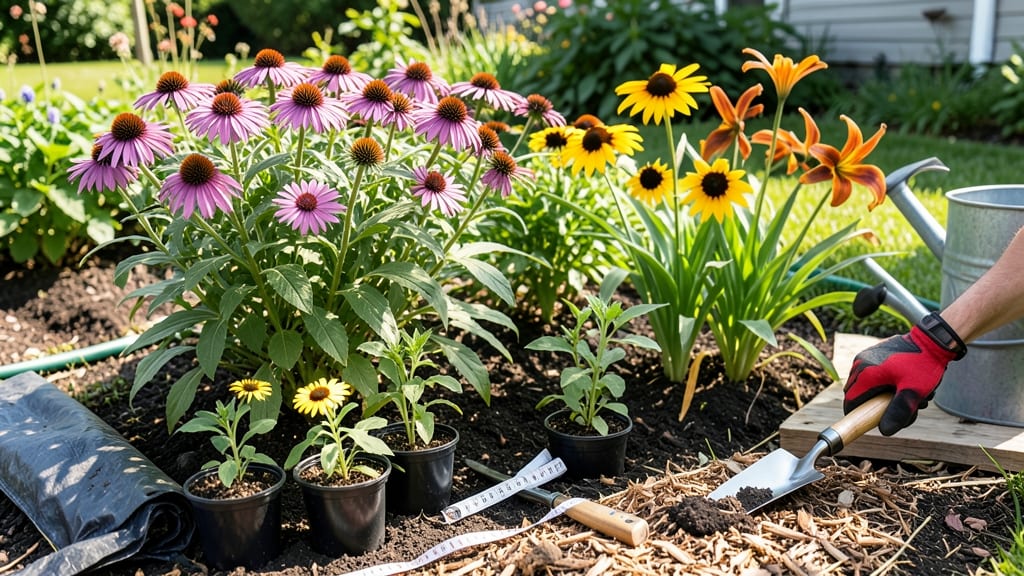
Creating a new flower bed transforms a blank space into a vibrant, year-round showstopper. 🌼 The secret isn’t just picking pretty plants—it’s building soil that keeps them thriving through heat, rain, and even winter.
I’ve designed dozens of beds, and the ones that last start with this simple soil layering trick that costs almost nothing but delivers everything.
First, mark your bed shape with spray paint or a garden hose—keep it simple, like a rectangle or kidney shape, for easier maintenance. Then dig out the turf (save it for lawn repairs elsewhere) and loosen the soil to a depth of 12-15 inches.
The magic happens in the layers: start with 2-3 inches of coarse sand or gravel for drainage, then mix in composted manure or aged compost (about 3-4 inches), and top with 2 inches of finished compost. This combo prevents soggy roots while feeding plants for years.
By the time you’re done, you’ll have a bed where plants grow like they’re on a permanent vacation—lush, colorful, and low-maintenance. The right plants make all the difference: group 3-5 sun-loving perennials together, add 1-2 seasonal annuals for pops of color, and tuck in 1-2 ground covers to fill gaps.
Mulch with 2-3 inches of shredded bark or wood chips to lock in moisture and keep weeds at bay.
Here’s the best part: this method works for any size bed, from a tiny 4x4-foot patch to a sprawling 10x15-foot garden. The key is patience—your first year will be about establishing roots, but by year two, you’ll have a blooming masterpiece that neighbors will ask about. Ready to dig in?
📚 In This Guide
- What you need
- Instructions
- Tips and common mistakes
- Wrapping up and next steps
What you need
- ● Measuring tape – 25-foot roll for precise dimensions.
- ● Garden spade or shovel – Heavy-duty, 12-18" blade for digging.
- ● Garden fork – Sturdy, 10-12" tines for aerating soil.
- ● Wheelbarrow or large bucket – 3-5 cubic feet capacity for hauling soil and amendments.
- ● Garden hose with spray nozzle – For watering and cleaning tools.
- ● String or stakes – 10-20 feet of twine + 4-6 wooden stakes to mark boundaries.
- ● Garden gloves – Heavy-duty, waterproof for comfort and protection.
- ○ Knee pads or cushion – Optional but highly recommended for comfort!
- ● Mulch – 2-3 inches of shredded bark, pine straw, or cocoa hulls to retain moisture.
- ● Edging tools – Plastic, metal, or stone edges to define your flower bed.
- ● Soil test kit – To check pH and nutrient levels (e.g., Luster Leaf Rapitest).
- ● Drip irrigation system – For hassle-free watering (e.g., Rain Bird or Orbit).
- ● Plant markers – Stakes or labels for tracking your blooms.
Step-by-Step instructions for creating a new flower bed
Here’s how I build a thriving flower bed that stays lush and blooms all season long.
🪴 Step 1: Mark and Prepare the Bed Layout
Sketch your design on paper first—most flower beds shine with a 3-foot-wide center strip (for taller plants) flanked by 1.5-foot-wide borders (for shorter flowers). Use a garden hose or spray paint to mark the shape directly on the ground. I always step back to check proportions from different angles before digging.
Clear all grass, weeds, and debris from the marked area. If you’re working with turf, consider smothering it with 6-12 sheets of cardboard for 4-6 weeks before planting. This kills grass naturally without chemicals. For stubborn weeds, dig them out by their roots—any pieces left behind will regrow.
🌱 Step 2: Loosen the Soil and Add Organic Matter
Use a shovel or garden fork to break up the soil to a depth of 12 inches. The goal is to create a loose, crumbly texture—think of it like fluffing a pillow for your plants’ roots. If your soil is heavy clay or sandy, mix in 2-3 inches of compost or aged manure to improve drainage and fertility.
For nutrient-dense beds, I like to add a 1-inch layer of worm castings on top of the loosened soil. This boosts microbial activity, which helps roots establish faster. Water the area lightly after amending to help everything settle. Avoid compacting the soil with heavy foot traffic—just walk around the edges.
☀️ Step 3: Layer Soil for Drainage and Plant Health
Start with a 2-inch base layer of coarse sand or small gravel if your area has poor drainage. This prevents waterlogging, which can rot roots. Next, spread 4-6 inches of topsoil mixed with 1-2 inches of compost evenly across the bed. Use a rake to level the surface—it should be smooth but not packed down.
For long-term moisture retention, top with 1 inch of mulch (like shredded bark or straw). This keeps roots cool in summer, retains moisture, and suppresses weeds. Press mulch lightly into the soil edges to prevent it from blowing away. Avoid piling mulch against plant stems—leave a 2-inch gap to prevent rot.
🌿 Step 4: Plant with a Layered Design for Year-Round Interest
Start by planting tallest plants in the back, working toward shorter ones in front. Space perennials 12-18 inches apart and annuals 6-12 inches apart, depending on their mature size. Dig holes twice as wide as the root ball but no deeper—this encourages roots to spread horizontally.
Fill gaps with mulch or soil, then water deeply to settle everything. I like to group plants by sunlight needs (full sun, partial shade, etc.) to ensure they all thrive. Add a few ground covers (like creeping thyme or ajuga) to fill empty spaces and prevent weeds. Water again after planting to help roots establish.
⏰ Step 5: Maintain for Long-Term Blooms
Water 1 inch per week (or more in extreme heat) to keep soil moist but not soggy. Check soil moisture by sticking your finger 1 inch deep—if it’s dry, it’s time to water. Fertilize lightly in spring with a balanced, slow-release fertilizer (like 10-10-10) to encourage steady growth.
Deadhead spent blooms regularly to encourage more flowers, and trim back overgrown foliage in late summer to keep the bed tidy. Every 2-3 years, refresh the mulch and top-dress with 1-2 inches of compost to replenish nutrients. This keeps your flower bed vibrant and low-maintenance for seasons to come.
Tips & tricks for perfect flower bed design
Between us, these little details make the difference between a flower bed that thrives and one that fades after a season.
Design Tip: When sketching your layout in Step 1, consider adding a subtle curve to the edges of your flower bed—it creates a more natural, inviting look while making the most of small spaces. I always use a garden hose to trace the shape before marking, so I can adjust proportions easily. This also helps prevent sharp corners that can look harsh in a garden setting.
Weed Prevention: In Step 1, if you're dealing with turf, lay down those 6-12 sheets of cardboard with the printed side down. This blocks sunlight and kills grass in just 4-6 weeks, but if you're in a hurry, you can wet the cardboard first to speed up the process. Just make sure to overlap the edges by at least 2 inches to prevent weeds from sneaking through.
Soil Layering: For Step 3, if your area has particularly poor drainage, consider adding a 3-inch layer of coarse sand instead of just 2 inches. This gives you extra insurance against waterlogging, which can be especially important in clay-heavy soils. I've found that mixing in perlite (about 1 part perlite to 3 parts sand) can also improve aeration without affecting the overall structure.
Planting Strategy: When you're planting in Step 4, I've found that adding a handful of mycorrhizal fungi to the planting hole can help establish roots faster—especially for perennials. These beneficial fungi form a symbiotic relationship with plant roots, helping them absorb nutrients more efficiently. It's an optional step, but worth considering for long-term plant health.
Pro Tips for Create A New Flower Bed
- Between us, these little details make the difference between a flower bed that thrives and one that fades after a season.
- Design Tip: When sketching your layout in Step 1, consider adding a subtle curve to the edges of your flower bed—it creates a more natural, inviting look while making the most of small spaces.
- Weed Prevention: In Step 1, if you're dealing with turf, lay down those 6-12 sheets of cardboard with the printed side down.
Frequently asked questions
Got questions about crafting your dream flower bed?
Here are answers to the most common concerns—so you can plant with confidence and avoid rookie mistakes!
When is the best time to start a new flower bed?
The ideal time depends on your climate! In most regions, early spring or fall (after the last frost or before the first hard freeze) is perfect—soil is workable, and plants have time to establish roots. Avoid summer heat or winter frost, which can stress new plants.
How long does it take for a flower bed to look established?
With proper care, you’ll see noticeable growth in 4–8 weeks, but full maturity (lush blooms, dense foliage) takes 1–2 seasons. Mulch and regular watering speed up the process—think of it as a slow-cooker for your garden!
Can I use cheap or free materials (like grass clippings or leaves) for mulch?
Yes! Grass clippings, straw, or shredded leaves work as mulch, but avoid thick layers of whole leaves (they mat down). For better results, mix organic matter like compost or aged manure into the soil first—it’s like giving your bed a nutrient-rich foundation.
What do I do if weeds keep popping up after I plant?
Weeds are stubborn, but you’ve got options! Hand-pull them early (when soil is moist), use a mulch blanket (2–3 inches thick) to block sunlight, or apply vinegar-based herbicide (spot-treat only). Pro tip: Pre-emergent herbicide in early spring prevents seeds from sprouting.
Should I mix in fertilizer right away, or wait?
Start with a balanced, slow-release fertilizer (like 10-10-10) at planting time, then top-dress with compost. Over-fertilizing can burn roots—think of it as a light snack, not a feast. After 6–8 weeks, add a bloom booster (high in phosphorus) for vibrant flowers.
What if my area gets heavy rain or drought?
Prepare for extremes! Amend soil with sand or perlite for drainage (if clay-heavy) or peat moss for water retention. Install a drip irrigation system or soaker hoses to deliver consistent moisture—even 1 inch per week keeps roots happy.
Still stuck? Drop your question in the comments—we’re here to help your flower bed thrive!
Wrapping up and next steps
Creating a new flower bed is a rewarding project that brings beauty and life to your outdoor space! 🌸 By following the layered soil secrets we’ve shared—from choosing the right location to selecting the perfect plants—you’ll set the stage for year-round blooms and a thriving garden.
Remember, the key is patience and preparation; your hard work will pay off with vibrant colors and a flourishing landscape.
Now that you’re ready to dig in, take the next step! Start by sketching your design, gathering your tools, and scheduling a day to transform that empty space into a stunning flower bed. Happy gardening—your future blooms will thank you! 🌱✨