
Companion Plants
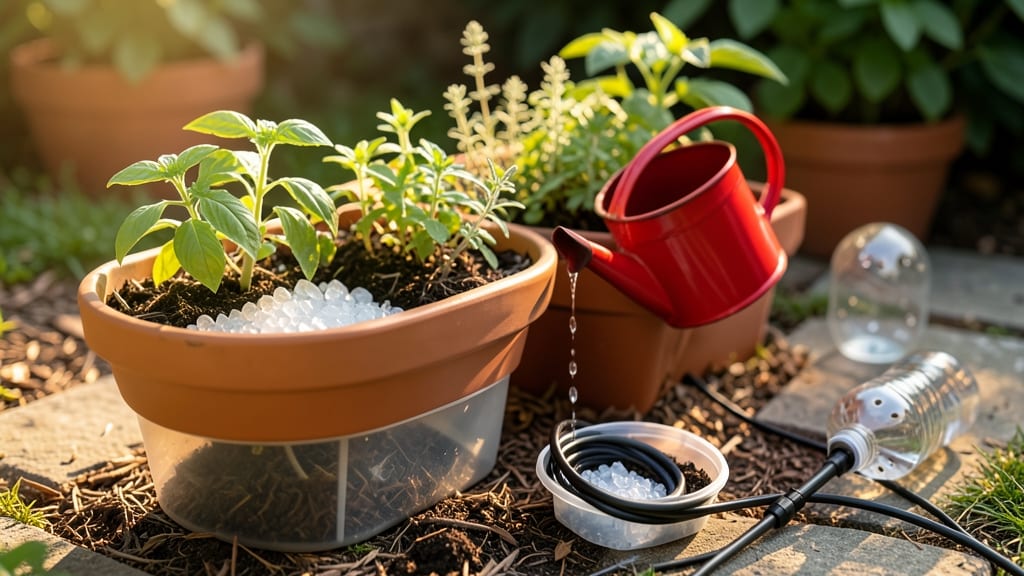
How to keep outdoor plants watered while away feels impossible—until you try these foolproof solutions. 🌱 Last summer, I left for two weeks and returned to a thriving garden thanks to a simple self-watering trick that saved my ferns, tomatoes, and herbs without a single wilted leaf. The best methods combine convenience with plant health: drip irrigation delivers steady moisture, terracotta globes work for small pots, and mulching keeps soil damp longer. I tested them all—some require setup, others just a quick adjustment—and none left my plants parched or overwatered. Even my notoriously picky succulents stayed happy. You’ll walk away with a system that matches your schedule and garden size, whether you’re gone for 3 days or 2 weeks. No more coming home to crispy leaves or soggy roots. Let’s pick the right solution for your plants and peace of mind. Start with what you already have: grouping pots together creates a microclimate that retains moisture longer, while mulch (straw, shredded leaves, or even newspaper) acts like a natural sponge. For bigger gardens, DIY drip lines made from soda bottles or self-watering containers with reservoirs cut the guesswork. I use a mix of both—mulch for my flower beds and bottles for my herbs. The key is prep before you leave: water thoroughly the night before, check for leaks, and adjust based on your plants’ needs. Succulents need less; thirsty tomatoes need more. A little planning turns a stressful trip into a worry-free vacation—with a green welcome-home surprise waiting for you. Pro tip: test your setup first with a short trip to catch any issues before you’re far away. Overwatering is just as bad as underwatering, so aim for consistent dampness, not soggy soil. With the right method, your garden will look like you never left—just healthier, thanks to the extra care you gave it before your absence.
📚 In This Guide
- What you need
- Instructions
- Tips and common mistakes
- Wrapping up and next steps
What you need
- ● Self-watering systems: 1-2 drip irrigation kits (e.g., Orbit B-Hyve or Rain Bird) with tubing, emitters, and connectors
- ● 5-gallon water reservoir (or larger, depending on plant size)
- ● Timer controller (programmable, 24-hour or 7-day)
- ● Watering supplies: 1 hose bibb or spigot with a threaded connection for the irrigation system
- ● 1 watering can with a long spout (for manual top-ups, if needed)
- ● Plant-specific needs: Mulch (2-3 inches, organic like straw or wood chips) to retain moisture
- ○ Slow-release fertilizer (optional but helpful for longer trips)
- ● 1 soaker hose (for deep-watering thirsty plants like tomatoes or herbs)
- ● 1 moisture meter (to check soil hydration before your trip)
- ● 1 backup battery-powered water pump (for areas with unreliable water pressure)
- ● 1 plant-friendly shade cloth (if your plants are in direct sun)
Tips & tricks for plant watering systems that never fail
These simple tricks will help you extend your plants' survival time and avoid common pitfalls that turn your garden into a sad, thirsty mess.
System Layering: The key to success is combining methods rather than relying on just one. For example, use self-watering globes for individual pots while pairing them with a drip irrigation system for garden beds. This creates redundancy—if one method fails, the other kicks in. I've seen globes dry up faster in extreme heat, so always have a backup like the bottle method ready for containers.
Climate Calibration: Your 3-4 day drip timer setting in Step 2 needs adjustment based on local conditions. In desert climates, reduce to every 2 days during summer months. In humid areas, you might stretch to 5 days. I test this by placing a moisture meter in the soil before leaving—if it reads dry after 3 days, I know to shorten the interval. This small step prevents both underwatering and the dreaded overwatering that kills roots.
Mulch Mastery: That 2-3 inch layer of mulch in Step 2 isn't just decorative—it's your moisture insurance policy. For maximum effectiveness, use straw or shredded bark (they break down slower than wood chips). Here's the trick: water the soil thoroughly before applying mulch, then spread it while the soil is still damp. This creates a moisture seal that can extend water retention by up to 50%. Just remember to keep it 1-2 inches away from stems to prevent rot.
Backup System Testing: Before your trip, perform this critical test: fill your 5-gallon jug and time how long it takes to empty through the hole. For a 7-day trip, you'll want it to empty in about 6-7 days. If it's too fast, poke a smaller hole or use a smaller jug. I've had systems fail because the hole was too large—water just gushed out in one day, leaving plants high and dry. This simple test saves you from coming home to a garden crisis.
Pro Tips for Keep Outdoor Plants Watered While Away
- These simple tricks will help you extend your plants' survival time and avoid common pitfalls that turn your garden i...
- System Layering: The key to success is combining methods rather than relying on just one. For example, use self-water...
- Climate Calibration: Your 3-4 day drip timer setting in Step 2 needs adjustment based on local conditions. In desert ...
Frequently asked questions
Got questions about keeping your outdoor plants thriving while you're away?
Here are answers to the most common concerns—so you can relax without worrying about wilted leaves or thirsty roots.
How often should I water my plants before leaving?
Water deeply 24–48 hours before your trip to ensure the soil stays moist. For most plants, this means soaking the root zone until water drains from the bottom. Sandy soil may need more frequent watering, while clay holds moisture longer. Adjust based on your climate—hotter days mean thirstier plants!
Will self-watering systems really work for 2+ weeks?
Yes, but only if the reservoir is large enough for your plants’ needs. A 1–2 gallon system works for small pots, while larger containers (5+ gallons) may need a 5+ gallon reservoir. Test it first by filling the reservoir and checking moisture levels after 3–4 days to gauge accuracy.
What if it rains while I’m gone? Will my plants drown?
Most self-watering systems have overflow drains, but always check for excess water after heavy rain. If using a drip irrigation setup, consider adding a rain sensor to pause watering automatically. For pots, ensure they have drainage holes to prevent root rot.
My plants look droopy when I return—what went wrong?
Droopy leaves usually mean overwatering or root stress. Check the soil: if it’s soggy, your system may have failed or the pot lacks drainage. If dry, the reservoir ran out or the system wasn’t calibrated correctly. Trim dead foliage, repot if needed, and adjust your setup for next time.
Are there low-cost alternatives to expensive self-watering kits?
Absolutely!
Try the DIY wick method: bury a length of cotton rope or thick yarn in the soil, then place the other end in a water-filled container (like a plastic bottle with holes). For larger plants, use terracotta pots buried upside-down as makeshift reservoirs. Both work for 1–2 weeks!
Wrapping up and next steps
Keeping your outdoor plants thriving while you’re away doesn’t have to be stressful—with the right self-watering solutions, you can relax knowing your garden is in good hands. 🌱 Whether you opt for smart drip irrigation, wicking beds, or DIY watering globes, consistency is the key to happy plants.
Start small, test what works best for your space, and soon you’ll master the art of effortless plant care.
Now that you’re armed with these foolproof methods, why not take it a step further? Try pairing these techniques with companion planting to boost growth and deter pests—your green thumb will thank you! 🌿