
Flowers
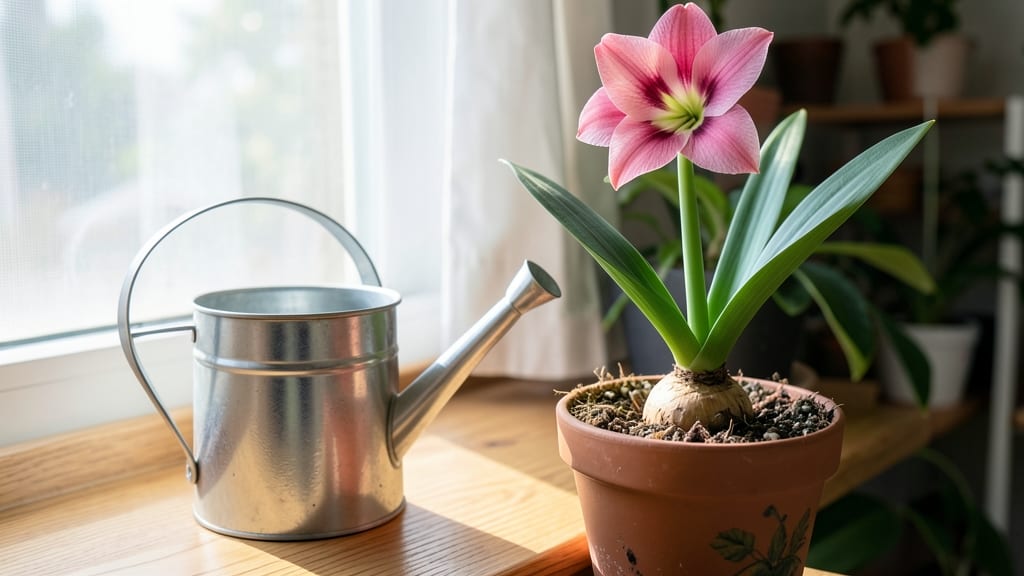
Caring for amaryllis flowers feels like nurturing a little tropical drama in your home. 🌱 I’ve learned the secret to keeping them blooming year after year—it’s not as tricky as it seems, but there are a few key moves that make all the difference.
Most people stop caring after the flowers fade, but that’s when the real magic happens if you know what to do next.
The right balance of light, water, and soil keeps your amaryllis thriving. Too much water drowns the bulb, while too little makes it shrivel. I’ve found that a well-draining potting mix and letting the top inch dry out between waterings is the sweet spot.
Place it near a bright window (but not scorching direct sun) for those bold, showstopping blooms.
After the flowers fade, don’t toss the bulb—give it a break. Let the foliage yellow naturally, then trim it back and store the bulb in a cool, dry spot for a few months.
When you repot it in spring, you’ll be rewarded with fresh growth and another stunning bloom cycle. It’s like a gift that keeps giving.
Even the most stubborn amaryllis can bounce back with the right care. If your plant looks sad, don’t panic—just adjust the light, water, or soil, and it’ll often perk right up. The key is patience and consistency, and soon you’ll have a houseplant that’s the star of every room.
📚 In This Guide
- What you need
- Instructions
- Tips and common mistakes
- Wrapping up and next steps
What you need
- ● 1-2 amaryllis bulbs – Choose healthy, firm bulbs (2-4 inches in diameter) with no soft spots or mold.
- ● 6-8 inch pot – A container with drainage holes (terracotta or ceramic works best).
- ● Well-draining potting mix – A blend of cactus/succulent soil (60%) and perlite or pumice (40%) for aeration.
- ○ Peat moss or coconut coir (optional) – Helps retain moisture without suffocating roots.
- ● Garden trowel or spoon – For planting and repotting.
- ● Watering can with a narrow spout – Ensures precise watering without over-saturating the soil.
- ● Misting bottle – For humidity control (especially in dry climates).
- ● Fertilizer (balanced 10-10-10 or bulb-specific) – Diluted to half-strength for feeding.
- ● Bright, indirect light source – A sunny windowsill or grow light (6-8 hours of light/day).
- ○ Thermometer (optional) – To monitor ideal temps (65–75°F during growth, 50–60°F for dormancy).
- ● A patience for the 6–8 week wait between planting and blooming!
- ● Consistency – Amaryllis thrives on routine watering and light exposure.
- ● Space for dormancy – A cool, dark spot (like a closet) for 8–10 weeks after blooming.
Step-by-Step instructions for growing amaryllis flowers
Here's how I keep my amaryllis blooming reliably year after year with just a few simple routines.
🪴 Step 1: Choose the Right Light and Position
Amaryllis thrive in bright, indirect light—think east-facing windows or a spot near a south window that doesn't get scorching afternoon sun. I place mine about 3 feet from the window so they get plenty of light without leaf burn. You'll notice the leaves start to yellow or stretch toward the light if they're not happy with their spot.
Once the flower stalk emerges, move the pot to a cooler location (around 65-70°F) to help the bloom last longer. The cooler temperature slows the plant's growth, making the flower stand taller and showier. If your home stays consistently warm, a shaded outdoor spot works well during the day.
💧 Step 2: Water Correctly Through Each Growth Stage
During active growth (spring through summer), water your amaryllis when the top 2 inches of soil feel dry. Stick your finger in the soil—if it's damp, wait another day. Overwatering is the #1 killer of amaryllis, so I always check before adding more. You'll see the leaves start to droop slightly if they're thirsty, but they perk up quickly after a drink.
Once the flower stalk appears, reduce watering slightly. The plant is now focusing its energy on blooming, not leaf growth. After the bloom fades, let the soil dry out completely between waterings. This resting period is crucial for next year's flowers.
☀️ Step 3: Feed During Active Growth Only
I use a balanced liquid fertilizer (10-10-10) diluted to half strength every 2 weeks starting in early spring when new growth appears. You'll notice the leaves growing faster and staying a vibrant green. Stop fertilizing once the flower stalk emerges—too much nitrogen now will make the plant focus on leaves instead of blooms.
After the flowers fade, don't fertilize again until you see new leaf growth in spring. The plant needs this break to recharge. I also add a slow-release bulb fertilizer to the soil in spring for an extra boost without the risk of overfeeding.
✂️ Step 4: Care for Blooms and Prepare for Rest
When your amaryllis blooms, cut the stalk just above the bulb once the flowers fade completely. This redirects the plant's energy back to the bulb for next year's growth. Don't remove the leaves yet—they're still photosynthesizing and storing energy. You'll know it's time to rest when the leaves start turning yellow and brown.
At this point, reduce watering to just enough to keep the bulb from shriveling. Place the pot in a cool, dark spot (around 55-60°F) for 8-10 weeks. This dormancy period is what triggers next year's spectacular blooms. I check on it monthly to make sure the soil isn't completely dry.
🌱 Step 5: Encourage Next Year's Blooms
After the resting period, bring your amaryllis back to bright light and resume watering when the soil feels dry. You'll see new growth within 2-4 weeks. This is your signal to start fertilizing again. The key to year-after-year blooms is maintaining this cycle—rest in winter, grow in spring/summer, repeat.
If your amaryllis isn't blooming, it might need more light or a longer rest period. I've found that sometimes a slight temperature drop (like moving it to a garage for a few weeks) helps trigger flowering when indoor conditions are too consistent. Patience is key—some amaryllis take a year or two to establish before giving their best show.
Tips & tricks for perfect amaryllis care
Here's what nobody tells you about keeping your amaryllis thriving through every season.
The Light Factor: Rotate your amaryllis pot quarter-turn every week to ensure even light exposure. I learned this the hard way after noticing one side of my plant growing toward the window while the other side stayed pale. This simple habit prevents lopsided growth and keeps leaves vibrant. The 3-foot distance from windows mentioned in Step 1 is ideal—closer means risk of leaf burn, farther means weak growth.
Temperature Transition: When moving your amaryllis to the cooler 65-70°F spot after the flower stalk emerges (Step 1), do it gradually over 3-4 days. Sudden temperature drops can stress the plant and cause buds to drop. I place mine near a north-facing window during this transition to maintain gentle light exposure while adjusting to cooler temps.
Watering Wisdom: The "top 2 inches dry" rule in Step 2 works perfectly, but here's the secret: use a moisture meter or your finger to check soil moisture at the bottom of the pot, not just the top. Amaryllis bulbs store water, so surface soil can stay dry while roots remain damp—this is why many people overwater. Let the soil dry completely between waterings during the resting period (Step 4) to prevent bulb rot.
Fertilizer Timing: That 2-week feeding schedule in Step 3 is spot-on, but here's my pro move: alternate between liquid fertilizer and a fish emulsion every 4th feeding for extra phosphorus, which helps bulb development. Stop fertilizing immediately when you see the flower stalk appear—too much nitrogen at this stage will make your plant focus on leaves instead of blooms.
Pro Tips for Care For Amaryllis Flower
- Here's what nobody tells you about keeping your amaryllis thriving through every season.
- The Light Factor: Rotate your amaryllis pot quarter-turn every week to ensure even light exposure.
- Temperature Transition: When moving your amaryllis to the cooler 65-70°F spot after the flower stalk emerges (Step 1), do it gradually over 3-4 days.
Frequently asked questions
about amaryllis care—because even the easiest plants need a little extra love! Here’s what you’ve been wondering:Why isn’t my amaryllis blooming?
If your amaryllis skips blooms, it’s often due to light deprivation or overwatering. Mimic its natural cycle: place it in a dark, cool spot (like a closet) for 6–8 weeks in fall/winter, then move it to bright, indirect light. Avoid drafts or sudden temperature swings—consistency is key!
How long do amaryllis flowers last?
With proper care, amaryllis blooms last 7–10 days per stalk, but the bulb itself can reward you with multiple flowering cycles for years! Deadhead spent blooms (snip stems at the base) to redirect energy to the bulb. Pro tip: Rotate the pot weekly so all sides get even light, encouraging future blooms!
Can I save an amaryllis bulb after it’s done blooming?
After blooming, keep the bulb in soil and reduce watering to once every 2–3 weeks. Place it in a sunny window (or under grow lights) and fertilize lightly in spring/summer. With patience, it’ll re-bloom next season—just like a perennial!
What’s the best soil mix for amaryllis?
Amaryllis bulbs thrive in well-draining, slightly gritty soil. Mix 2 parts potting soil with 1 part perlite or sand to prevent rot. Avoid heavy garden soil—it traps moisture. Bonus: Add a handful of orchid bark for extra aeration if repotting!
How do I fix yellow leaves on my amaryllis?
Yellowing leaves usually signal overwatering or nutrient deficiency. Let the top 2 inches of soil dry out between waterings, and fertilize lightly with a balanced bulb fertilizer (like 10-10-10) every 4–6 weeks in growing season. If only the bottom leaves yellow, it’s natural aging—trim them!
Can I grow amaryllis outdoors?
Only in USDA Zones 9–11! In colder climates, treat it as a temporary outdoor plant: bury the pot in soil, water lightly, and bring it indoors before frost. Warning: Amaryllis hates soggy soil or freezing temps—container growing is safest for most gardeners!
Wrapping up and next steps
Caring for an amaryllis flower is simpler than you think—just a little patience and the right touch! With the right light, water, and soil, you’ll enjoy stunning blooms year after year. Remember, less is more when it comes to watering, and a little dormancy goes a long way.
Now that you’re armed with these tips, why not share your amaryllis love? Gift a bulb to a friend, experiment with different varieties, or even try growing one indoors for a pop of color. Happy gardening—your blooms will thank you! 🌸✨