
How To
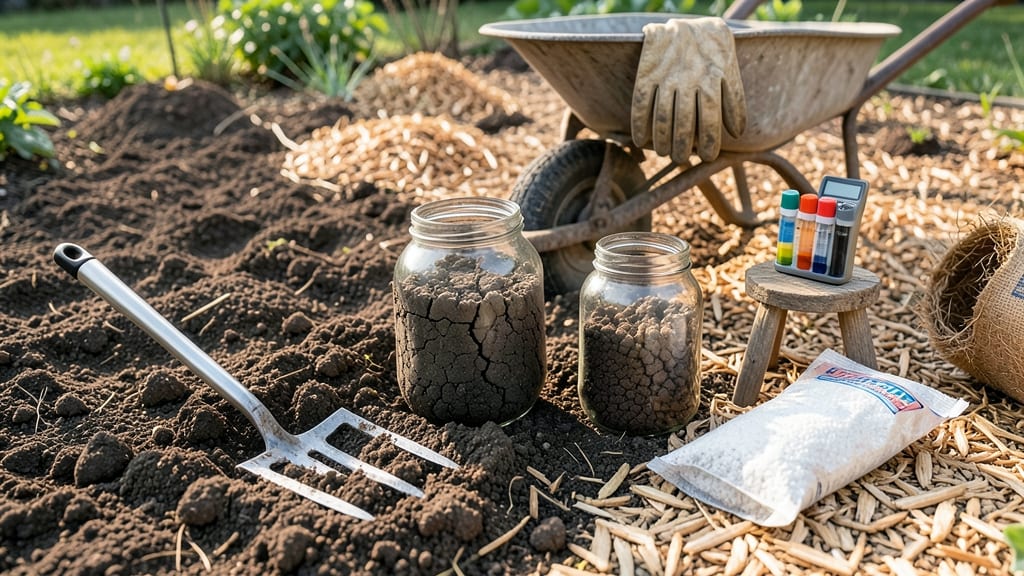
How to amend clay soil for vegetable gardening can feel like gardening with cement blocks—roots suffocate, water pools, and vegetables struggle. 🌱 The good news? With the right amendments, you can transform that heavy earth into fertile, crumbly soil where tomatoes thrive and carrots grow straight. I’ve turned my own stubborn clay plot into a productive vegetable garden using simple, organic methods that work for beginners and pros alike.
The secret isn’t just throwing compost on top—it’s about improving drainage, adding organic matter, and breaking up compaction over time. Start with 2-3 inches of compost mixed into the top 6 inches of soil, then add gypsum (if your soil tests high in sodium) or sulfur (for long-term pH adjustments).
For faster results, till in coarse sand or perlite to create air pockets, but don’t overdo it—too much sand can make soil too loose and unstable.
By spring, you’ll notice roots spreading deeper, water draining instead of pooling, and vegetables growing stronger. The key is patience: clay soil doesn’t change overnight, but with consistent amendments, you’ll see better drainage, richer soil, and fewer pests—plus, the texture will feel like working with butter, not mud.
Even my black thumb saw results after one season.
Pro tip: Test your soil first to check pH and nutrient levels—this tells you exactly what to add. And skip the chemical fixes: organic matter is the only amendment that keeps improving soil year after year. Ready to dig in? Let’s fix that clay for good.
📚 In This Guide
- What you need
- Instructions
- Tips and common mistakes
- Wrapping up and next steps
What you need
- ● Organic matter: Compost (5–10 gallons per 10 sq ft) – homemade or store-bought
- ● Well-rotted manure (5–10 gallons per 10 sq ft) – cow, horse, or chicken (aged 6+ months)
- ● Leaf mold or peat moss (2–3 gallons per 10 sq ft) – for extra moisture retention
- ● Amendments for structure: Coarse sand (5–10 gallons per 10 sq ft) – builder’s sand, not fine beach sand
- ○ Perlite or vermiculite (1–2 gallons per 10 sq ft) – optional but helps with aeration
- ● Tools: Garden fork or broadfork (for deep tilling)
- ● Shovel or spade (for mixing amendments)
- ● Garden rake (to level soil)
- ● Wheelbarrow (for hauling materials)
- ● Gloves (to protect your hands)
- ○ Testing supplies (optional but helpful): pH test kit (to check soil acidity/alkalinity)
- ● Soil moisture meter (to monitor drainage)
- ● 🌱 Test your soil first! A simple pH test (aim for 6.0–7.0 for most veggies) ensures your amendments work best.
- ● 🔥 Work in dry weather. Wet clay sticks to tools and clumps—wait for a dry spell to till.
- ● ✨ Layer amendments deeply. For best results, mix into the top 6–12 inches of soil.
Step-by-Step instructions for amending clay soil for vegetable gardens
Here's the method I rely on to transform heavy clay into a crumbly, nutrient-rich growing medium.
🌱 Step 1: Test Your Soil's Current Condition
Before adding amendments, squeeze a handful of moist soil between your fingers. If it forms a tight, hard ball that cracks when dropped, you're dealing with classic clay. The goal is to break this dense structure while maintaining organic matter. I like to test soil moisture too—clay stays wet for days after rain, which can suffocate roots.
Dig a small hole about 6 inches deep and examine the layers. If the soil feels sticky, compacted, or has a shiny surface when wet, you'll need significant amendments. This step ensures you know exactly what you're working against—clay's density varies by depth, and some layers may need more attention than others.
🪴 Step 2: Spread Organic Matter Evenly Across the Garden Bed
Work 3-4 inches of compost or well-rotted manure into the top 6 inches of soil. I prefer composted cow or horse manure because it breaks down quickly and adds beneficial microbes. Spread it evenly across the bed first, then use a broadfork to loosen the soil without turning it over—this preserves the soil structure while incorporating organic matter.
For stubborn clay, I mix in 1-2 inches of coarse sand (like builder's sand) to improve drainage. Avoid fine sand—it compacts just like clay. Water the bed thoroughly after adding amendments to help them settle and begin breaking down the clay's tight bonds. You'll see improvement immediately as the soil becomes easier to work.
☀️ Step 3: Till or Loosen the Soil Gradually
Use a broadfork or tiller to work the amendments into the soil, but don't overdo it—clay soil is fragile when disturbed. I like to till in sections, about 2 feet at a time, to avoid compacting the entire bed at once. The goal is to create a loose, crumbly texture that holds moisture without becoming waterlogged.
Stop when the soil resembles cake batter—light and airy but still holding together. If it feels like wet sand or stays in clumps, you need more organic matter. Water again after tilling to help the amendments bind with the clay particles. This step is where patience pays off—rushing leads to compaction.
⏰ Step 4: Add Mulch and Monitor Moisture Levels
Top the amended bed with 2-3 inches of straw or wood chips to protect the soil from erosion and retain moisture. Mulch also prevents the clay from re-sealing when it dries. I check soil moisture by pressing my finger 2 inches deep—if it feels damp but not soggy, your amendments are working.
For the first few weeks, water deeply 2-3 times per week to encourage microbial activity that further breaks down the clay. You'll notice the soil becoming darker and fluffier over time. Avoid heavy foot traffic during this period—clay is still vulnerable to compaction until the organic matter fully integrates.
🌿 Step 5: Plant and Maintain for Long-Term Improvement
Once the soil feels loose and crumbly, plant your vegetables. I recommend starting with deep-rooted crops like carrots or potatoes to test drainage—if water pools around roots, you may need to add more sand or gypsum. For shallow-rooted plants like lettuce, the improved texture will be immediately noticeable.
Continue adding 1-2 inches of compost annually to maintain structure and fertility. Over time, your clay soil will transform into a loamy, well-draining medium that holds nutrients without suffocating roots. The key is consistency—clay soil never fully "cures," but with regular amendments, it becomes far more workable.
Tips & tricks for transforming heavy clay soil
These practical insights will help you turn stubborn clay into fertile, workable ground for your vegetable garden.
Precision in Step 1: When testing your clay in Step 1, focus on the 6-inch depth—this is where most root systems will establish. Press the clay with your thumb: if it cracks like pottery when dry and feels slick when wet, you're dealing with classic clay. I've found that dividing your bed into 4-foot squares (as mentioned) makes it easier to distribute amendments evenly, preventing those frustrating missed spots that leave your garden patchy.
Tool Technique in Step 2: The broadfork in Step 2 is your secret weapon for aerating without turning the soil. Work it vertically, wiggling side to side to create those 1-inch gaps between chunks. This mimics natural soil structure better than tilling, which can actually make clay worse by breaking it into smaller, more compacted particles. Confession: I skipped this step for years and wondered why my plants always struggled.
Layering Strategy in Step 3: For the 2-inch compost layer in Step 3, I recommend spreading it first, then adding the 1-inch sand layer on top before mixing. This prevents the sand from sinking too deep and creating a non-porous layer. When mixing into the top 6 inches, think of it like making a layered cake—each ingredient has its place. Overmixing can actually undo all your hard work by destroying the soil's natural structure.
Long-Term Monitoring: The 3-4 month transformation timeline in Step 5 is realistic, but don't wait that long to check your progress. After your first planting, dig a small hole near your test crop and observe the soil structure. If it still feels dense, add another ½-inch layer of compost and perlite. I've seen dramatic improvements in just 6-8 weeks with consistent monitoring and adjustments.
Pro Tips for Amend Clay Soil For Vegetable Gardening
- These practical insights will help you turn stubborn clay into fertile, workable ground for your vegetable garden.
- Precision in Step 1: When testing your clay in Step 1, focus on the 6-inch depth—this is where most root systems will establish.
- Tool Technique in Step 2: The broadfork in Step 2 is your secret weapon for aerating without turning the soil.
Frequently asked questions
Got questions about transforming your heavy clay soil into a veggie garden paradise? You’re not alone! Here are answers to the most common concerns—plus a few pro tips to keep things smooth.
How long does it take to amend clay soil?
Patience is key! With consistent effort—like adding organic matter (compost, manure) and tilling—you’ll see noticeable improvement in 3–6 months. Heavy clay takes time to break down, but annual amendments keep progress steady. Test your soil’s drainage after a few rainfalls to gauge success.
Can I grow vegetables in clay soil without amending it?
Yes, but with adjustments! Clay holds moisture well, so focus on drought-tolerant crops like kale, Swiss chard, or potatoes. Raise beds slightly to improve drainage, and mulch heavily to prevent compaction. Just expect slower growth and potential root issues for delicate plants like tomatoes or carrots.
What’s the best time of year to amend clay soil?
Spring or fall are ideal—when soil is workable but not frozen. Avoid amending right before planting; give organic matter 4–6 weeks to decompose. In warm climates, late winter works too. Pro tip: Test soil moisture before digging—amending dry clay can create a cement-like mess!
What if my soil is too compacted after amending?
Don’t panic! Break up clumps with a broadfork or deep-tine aerator, then mix in coarse sand or perlite (10–20% of the soil volume) to loosen it further. Water deeply to help particles settle, and avoid walking on the bed. For stubborn spots, try gypsum—it won’t alter pH but helps clay fluff up over time.
Are there budget-friendly alternatives to expensive amendments?
Skip pricey soil conditioners and try:
- Leaf mold: Free from fallen leaves (compost them first).
- Wood ash: Adds potassium and breaks up clay (use sparingly—test pH first!).
- Cardboard/paper mulch: Smother weeds and add carbon as it decomposes.
- Local farm manure: Often free or cheap from agricultural extensions.
Wrapping up and next steps
Amending clay soil for your vegetable garden is all about patience, persistence, and a little creativity—but the payoff is huge! By mixing in organic matter, improving drainage, and testing your soil regularly, you’ll create a thriving space where roots can stretch freely and veggies grow strong. 🌱✨
Ready to dig in? Start small with one raised bed or section this season, track your progress, and soon, you’ll be harvesting bountiful, happy plants—proving that even the trickiest soil can become garden gold. What’s your first step? Grab those tools and get growing!