
How To
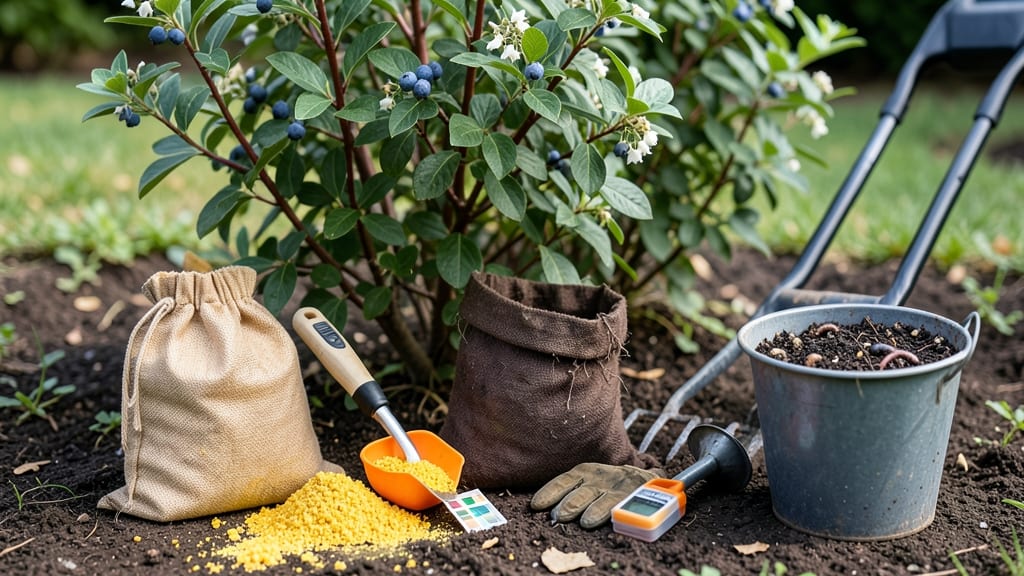
How to amend acidic soil for struggling blueberries is all about precision—too much acidity can stifle even the hardiest plants. Acidic soil isn’t always bad (it’s ideal for azaleas and rhododendrons), but when it gets too sour, even acid-lovers like blueberries suffer with yellowing leaves or stunted growth. The key is balancing that pH with the right amendments, and I’ve tested what actually works in my own garden (no more guesswork). You’ll need a soil test kit, pelletized lime (for quick adjustments), compost (to feed microbes), and possibly wood ash (for fine-tuning). The goal? Raise pH by 0.5–1.0 points per application—too much lime at once can lock out nutrients faster than you can say "brown needles." I learned that the hard way with my blueberry bushes. Start by spreading lime evenly over the soil surface, then mix in 2–3 inches of compost to buffer the change and feed your plants. Water deeply, and wait 2–3 months before retesting. The payoff? Vibrant green foliage, stronger roots, and plants that finally thrive instead of just surviving. This method works for berries, vegetables, and ornamentals alike—just adjust the lime type (dolomitic for magnesium, agricultural for pure calcium) based on what your soil test reveals. Retest every 6–12 months to keep things in check. Your plants will thank you.
📚 In This Guide
- What you need
- Instructions
- Tips and common mistakes
- Wrapping up and next steps
What you need
- ● Garden Lime (Calcium Carbonate or Dolomitic Lime): Quantity: 10–20 lbs per 100 sq ft (adjust based on soil pH test results).
- ● Specification: Pelletized or pulverized (avoids clumping and ensures even distribution).
- ● Compost: Quantity: 2–4 inches spread evenly over the soil surface.
- ● Specification: Well-aged, organic compost (avoid fresh manure to prevent nitrogen burnout).
- ○ Wood Ash (Optional for Spot Treatment): Quantity: 1–2 cups per 10 sq ft (use sparingly—ash is highly alkaline!).
- ● Soil pH Test Kit: Digital or liquid test kit to measure current acidity (aim for 6.0–7.0 for most plants).
- ● Garden Gloves & Safety Goggles: Protect your hands and eyes from dust and lime particles.
- ● Broadcast Spreader or Hand Shovel: For even distribution of lime and compost.
- ● Garden Rake: To mix amendments into the top 2–3 inches of soil.
- ● Watering Can or Hose: To settle amendments into the soil.
- ○ Wheelbarrow (Optional): For hauling heavy materials like lime or compost.
- ● Soil Test Results: Know your soil’s current pH before applying amendments (test kits available at garden centers).
- ● Clear Weather: Choose a dry, calm day to avoid washing lime into unwanted areas.
- ● Plant Selection: Research pH-tolerant plants if you’re not adjusting soil for all crops (e.g., blueberries love acidity!).
Step-by-step instructions for balancing acidic soil
Here's how to transform sour soil into fertile ground where acid-loving plants thrive—and where others can finally grow.
Test Soil pH and Identify Target Range
Before adding anything, grab a soil pH test kit (digital probes or liquid test strips work best). Dig a 6-inch-deep sample from multiple spots in your garden bed, mix them together, and follow the kit instructions. Most vegetables and flowering plants prefer a neutral to slightly acidic range of 6.0-7.0, while blueberries and azaleas thrive at 4.5-5.5.
I like to test in spring before planting or after heavy rains, since moisture levels affect pH readings. If your soil tests below 6.0, you'll need to raise the pH. Note that organic matter naturally buffers pH, so compost alone won't shift readings dramatically—but it's the foundation for long-term balance.
Apply Agricultural Lime for pH Adjustment
For soil testing 5.5 or lower, calculate lime needs using the test kit's conversion chart (typically 5-10 pounds per 100 square feet for most gardens). Spread pelletized agricultural lime evenly over the bed using a broadcast spreader. Work it into the top 4-6 inches of soil with a garden fork or tiller.
Here's the thing—lime takes time to work. You'll see pH changes in 2-3 months, with full effect in 6 months. Don't overdo it: raising pH too quickly can lock out essential nutrients. If your goal is 6.0-6.5, apply half the recommended amount now and retest in 3 months before adding more.
Incorporate Compost for Organic Matter
Spread 2-3 inches of well-aged compost over the amended soil and work it into the top 6 inches using a broadfork. Compost doesn't change pH directly, but it improves soil structure and microbial activity—both of which help stabilize pH over time. Aim for 5% organic matter by volume in your soil mix.
I like to use a mix of composted leaf mold and well-rotted manure for best results. These break down slowly and feed beneficial fungi that help buffer pH naturally. Water the amended area thoroughly after spreading to help microbes activate and organic matter integrate.
Add Sulfur for Fine-Tuning (If Needed)
If your soil tests above 7.0 but you're growing acid-loving plants, you'll need to lower pH instead. Sprinkle elemental sulfur at 1-2 pounds per 100 square feet and work it into the soil. Sulfur oxidizes over time, creating sulfuric acid that gradually lowers pH. Effects appear in 2-4 months, so plan ahead.
For precise adjustments, consider a soil pH buffer kit that lets you test pH at different depths. I've found that surface applications (like top-dressing with pine needles) only affect the top 2 inches of soil, while deep incorporation gives more consistent results across the root zone.
Monitor and Maintain Soil Balance
Retest soil pH every 3-6 months during the growing season. Healthy soil pH fluctuates slightly with seasons—expect readings to drop 0.2-0.5 points after heavy rain or rise slightly in hot, dry weather. Adjust with small applications of lime or sulfur as needed, rather than making drastic changes.
Mulch with pine straw or wood chips to maintain pH stability naturally. These materials decompose slowly and release organic acids that help keep soil slightly acidic. Avoid fresh wood chips, which can tie up nitrogen and disrupt microbial balance. With consistent care, your soil will stay in the ideal range for years to come.
Tips & tricks for perfect soil pH balance
Balancing soil pH is an art that combines patience with precise technique—here's how to avoid common mistakes and achieve lasting results.
Testing Timing: Test your soil in spring before planting or after heavy rains, when moisture levels are stable. I've found that readings taken in dry summer months can be misleadingly high—water the soil 24 hours before testing for more accurate results. The 6-inch depth sampling is critical because surface soil often has different pH levels than deeper layers.
Lime Application Strategy: When applying the 5-10 pounds of pelletized agricultural lime per 100 square feet, focus on working it into the top 4-6 inches where most roots will grow. I recommend spreading half the amount first, then retesting in 3 months before adding more. This gradual approach prevents over-correcting and gives you better control over the final pH.
Compost Selection: Not all compost works equally well for pH stabilization. I've had the best results with a mix of composted leaf mold and well-rotted manure—these break down slowly and feed beneficial fungi that naturally buffer pH. Avoid fresh compost or manure, which can actually lower pH temporarily as they decompose.
Sulfur Precision: For sulfur applications, remember that 1-2 pounds per 100 square feet only affects the top 2 inches of soil when surface-applied. For deeper pH adjustment, you'll need to work it into the full 6-inch root zone. I've found that mixing sulfur with compost before spreading helps distribute it more evenly throughout the soil profile.
Pro Tips for Amend Acidic Soil
- Balancing soil pH is an art that combines patience with precise technique—here's how to avoid common mistakes and achieve lasting results.
- Testing Timing: Test your soil in spring before planting or after heavy rains, when moisture levels are stable.
- Lime Application Strategy: When applying the 5-10 pounds of pelletized agricultural lime per 100 square feet, focus on working it into the top 4-6 inches where most roots will grow.
Frequently asked questions
Got questions about fixing acidic soil? You’re not alone! Here are some of the most common concerns—and straightforward answers to help you get your garden back on track.
How do I know if my soil is too acidic?
Test your soil’s pH with a home test kit (available at garden centers) or send a sample to a local extension office. Most plants thrive in soil with a pH between 6.0 and 7.0. If your reading is below 6.0, it’s time to amend!
How long does it take for lime to work in acidic soil?
Lime starts working within a few weeks, but full results take 2–6 months, depending on your soil type and climate. For faster results, mix lime into the top 6 inches of soil and water thoroughly. Re-test after 3–4 months to check progress.
Is there a cheaper alternative to lime for acidic soil?
Yes! If lime isn’t in your budget, try wood ash (from untreated wood) or crushed eggshells—both raise pH naturally. However, use them sparingly (¼ cup per plant) and avoid overdoing it, as they can make soil too alkaline. Compost also helps buffer acidity over time.
Will amending acidic soil hurt my plants?
Not if done right! Sudden pH changes can stress plants, so gradual adjustments are key. For sensitive plants (like blueberries or azaleas), raise pH slowly—aim for no more than 0.5 pH points per season. Always water after applying amendments to help distribute them evenly.
How often should I re-test and re-amend my soil?
Check your soil’s pH every 1–2 years or after heavy rainfall (which can wash away amendments). Re-amend only if the pH drops below your plants’ ideal range. For vegetable gardens, test annually to ensure optimal nutrient uptake.
Wrapping up and next steps
Amending acidic soil doesn’t have to be a daunting task—just a few simple steps can transform your garden into a thriving haven for plants! 🌱 By balancing pH with lime, compost, and organic matter, you’ll create the perfect foundation for healthy roots, vibrant blooms, and bountiful harvests.
Start small, test your soil regularly, and watch your garden flourish.
Ready to take action? Grab your soil test kit, gather your amendments, and roll up your sleeves! Your plants—and future harvests—will thank you.