
How To
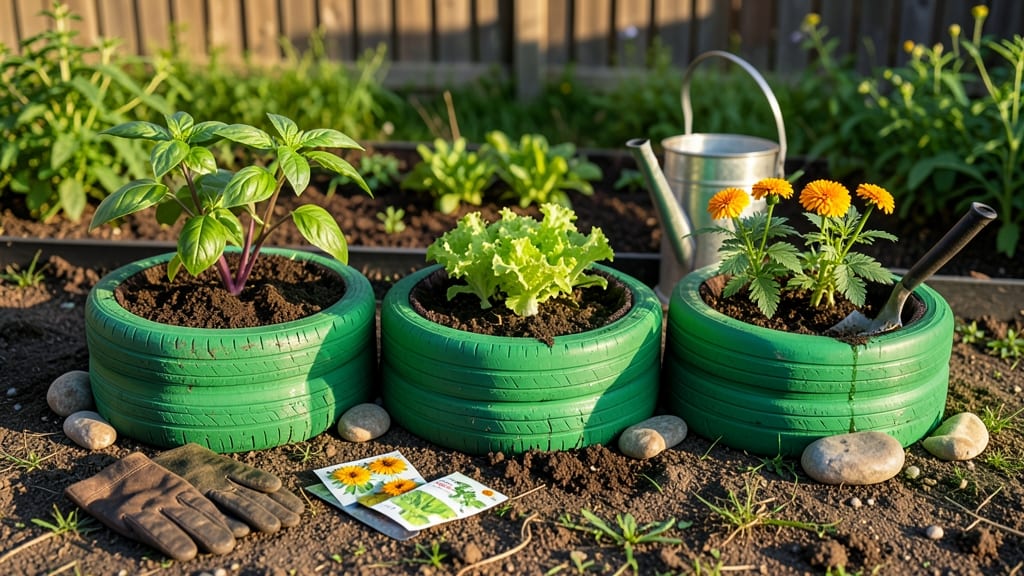
How to make tire planters transforms old tires into lush, upcycled garden beds with just a few tools and an afternoon. 🌱 I’ve turned what would have been trash into thriving homes for climbing vines and herbs—no fancy supplies needed. The best part? These planters last for years, saving money and keeping tires out of landfills.
You’ll need 4-6 tires (cleaned and cut in half), basic gardening soil, drainage materials like rocks or broken pottery, and a drill for ventilation holes. Stability is key—stack tires on a sturdy base or fill them with heavier soil at the bottom.
For herbs like basil or thyme, a single tire works perfectly, while vines like morning glories or cucumbers need the vertical space of stacked units.
Once assembled, your planters will hold moisture better than bare soil while preventing weeds from creeping in. The tire’s natural curvature also helps roots spread outward, creating stronger plants. Plus, you can paint or decorate them to match your garden’s style—just seal the paint first to protect the rubber.
This project works for any outdoor space, from balconies to backyard corners. Start small with one or two tires, and soon you’ll be growing more than you thought possible—all while giving old tires a second life. Ready to get started?
📚 In This Guide
- What you need
- Instructions
- Tips and common mistakes
- Wrapping up and next steps
What you need
Before you start crafting your upcycled tire planters, gather these materials and tools to ensure a smooth and creative process! Whether you're transforming old tires into lush gardens for climbing vines or fragrant herbs, having everything ready will make the project a breeze. Here’s your
Step-by-step instructions for building tire planters
Here's my go-to method for transforming old tires into sturdy, stylish planters that work perfectly for vines or herbs.
🪴 Step 1: Gather and Prepare Your Tires
Start by collecting 4 used vehicle tires—they're free if you ask around auto shops or check Craigslist. Clean them thoroughly with soap and water to remove dirt and grease. I like to scrub with a stiff brush and rinse well, then let them dry completely in the sun. This prevents mold and makes painting easier later.
Use a utility knife to cut the inner wall of each tire about 6 inches deep around the circumference. This creates a clean edge for planting and makes watering simpler. Leave the outer rim intact—it provides structural strength. I mark my cutting line with a pencil first to keep it even.
🎨 Step 2: Paint and Weatherproof the Tires
Apply a coat of outdoor primer to seal the rubber and prevent paint from peeling. Let it dry completely—usually 2-4 hours. Then paint with acrylic exterior paint in bright colors or earthy tones. Two coats work best, with 1 hour of drying time between coats. I always seal the bottom with a third coat since it sits directly on soil.
For extra durability, spray with a clear outdoor sealant after painting. This protects against UV rays and extends the planters' lifespan. Let everything cure for 24 hours before planting. The sealant also helps prevent the rubber from breaking down when exposed to moisture.
🌱 Step 3: Stack and Fill the Planters
Stack the tires in pairs, nesting the smaller one inside the larger. Place them on a sturdy base like cinder blocks or bricks to improve drainage and elevation. Fill the bottom tire with 2-3 inches of broken pottery or gravel to create drainage. Then add 4-6 inches of potting mix on top—this prevents root rot and keeps plants healthy.
For vines, I add a small wooden trellis or bamboo stakes to the side before filling with soil. The stakes should be 12-18 inches tall and secured with twine. For herbs, skip the trellis and plant directly in the soil. The key is to leave 2-3 inches of space at the top for watering.
💧 Step 4: Plant and Maintain Your Tire Garden
Plant climbing vines like morning glories or cucumbers in the top tire, spacing them 6-8 inches apart. For herbs like basil or thyme, place 3-4 plants per tire with 4-6 inches between each. Water deeply right after planting to settle the soil around roots. I like to use a watering can with a narrow spout to direct moisture evenly.
Keep the soil moist but not soggy—tires can trap excess water. Check the top inch of soil daily during hot weather. Fertilize lightly every 4-6 weeks with a balanced organic fertilizer. The tires' dark color absorbs heat, so your plants may grow faster than in traditional planters.
✂️ Step 5: Prune and Extend the Season
Train vines to climb by gently tying them to the trellis with soft twine every 3-4 inches as they grow. Prune leggy growth to encourage bushier plants. For herbs, pinch back the tips to promote fuller growth. I harvest regularly to keep plants productive—this prevents them from flowering too early.
In fall, remove dead plants and refresh the soil with 1-2 inches of compost. Store the planters in a dry place if you live in a cold climate. The tires' weight makes them stable, so they won't tip over in windy conditions. With proper care, these planters last 5-10 years or more.
Tips & tricks for perfect tire planters
Transforming tires into planters is easier than you think—here are my favorite tricks to make the process smoother and your garden more productive.
Cutting Precision: Use a pencil to mark your 6-inch cutting line around the tire's inner wall before making any cuts. This ensures clean, even edges that won't tear when you're planting. I've found that cutting on a flat surface like a workbench makes this step much easier—just flip the tire over after each cut to maintain consistency.
Painting Pro Tips: When applying your two coats of acrylic paint, work in thin layers rather than trying to cover everything at once. The 1-hour drying time between coats is crucial—don't rush it! I like to use a small roller for the inside surfaces and a brush for edges, which gives me better control. For extra durability, consider adding a bit of outdoor varnish to the primer coat before painting.
Drainage Strategy: The 2-3 inches of broken pottery or gravel in the bottom tire is non-negotiable for preventing root rot. If you don't have broken pottery, crushed stone or even large pebbles work just as well. I've seen people use plastic bottle shards too—just make sure they're clean and sharp edges are filed down. This layer should take up about 20% of the tire's total height for optimal drainage.
Plant Selection: For herbs, I recommend choosing compact varieties like thyme or oregano that won't outgrow the space. For vines, morning glories and nasturtiums are excellent choices—they grow quickly and add beautiful color. The 2-3 inches of headspace you leave at the top is perfect for watering without spilling over the sides, especially when using a narrow-spout watering can.
Pro Tips for Make Tire Planters
- Transforming tires into planters is easier than you think—here are my favorite tricks to make the process smoother an...
- Cutting Precision: Use a pencil to mark your 6-inch cutting line around the tire's inner wall before making any cuts....
- Painting Pro Tips: When applying your two coats of acrylic paint, work in thin layers rather than trying to cover eve...
Frequently asked questions
Got questions about turning old tires into thriving planters? You’re not alone! Here are answers to the most common concerns—so you can garden with confidence and creativity.
Can I use any type of tire for planters?
Most tires work, but avoid tires with cracks, rust, or sharp metal edges. Truck or tractor tires are ideal—they’re thick, sturdy, and hold more soil. Just clean them thoroughly with soap and water before repurposing!
When is the best time to plant in tire planters?
Timing depends on your climate! For annuals like herbs or veggies, plant after the last frost (spring) or 6–8 weeks before your first fall frost. Perennials or vines (like ivy or morning glories) can go in early spring or late summer for a head start.
What’s the easiest way to drain tire planters?
Drilling 4–6 drainage holes in the bottom (use a ½-inch drill bit) is key. Line the tire with landscape fabric to prevent soil from washing out. For extra drainage, add a layer of pebbles or broken pottery at the base.
Can I grow vegetables in tire planters?
Shallow-rooted veggies like lettuce, radishes, herbs (basil, thyme), and cherry tomatoes thrive in tires. Deeper-rooted plants (like carrots or potatoes) may need larger tires or multiple layers. Mix in compost for nutrient-rich soil!
What if my plants aren’t growing well in the tire?
Check these fixes:
- Soil issues: Tires can dry out fast—water deeply 2–3x/week and mulch the top.
- Nutrients: Feed with organic fertilizer or compost tea every 4–6 weeks.
- Sunlight: Most herbs/vines need 6+ hours of sun; adjust placement if leaves yellow.
- Pests: Slugs love tires—add copper tape or diatomaceous earth.
How can I make my tire planters look pretty?
Get creative! Paint the tires with non-toxic, weatherproof paint, wrap them in burlap, or stack them vertically with trellises. Add solar-powered lights for a whimsical touch. Bonus: Painted tires hide soil and add curb appeal!
Wrapping up and next steps
Transforming old tires into vibrant tire planters is a creative, eco-friendly way to grow your favorite herbs and climbing vines—plus, it’s easier than you think!
With just a few tools and a little elbow grease, you’ve got a stylish, functional garden solution that’s perfect for small spaces or urban gardening. 🌱✨
Now that you’re armed with all the tips and tricks, why not take the next step? Start small—plant a single tire with your favorite herbs or flowers—and watch your garden grow! Happy planting! 🌿