
How To
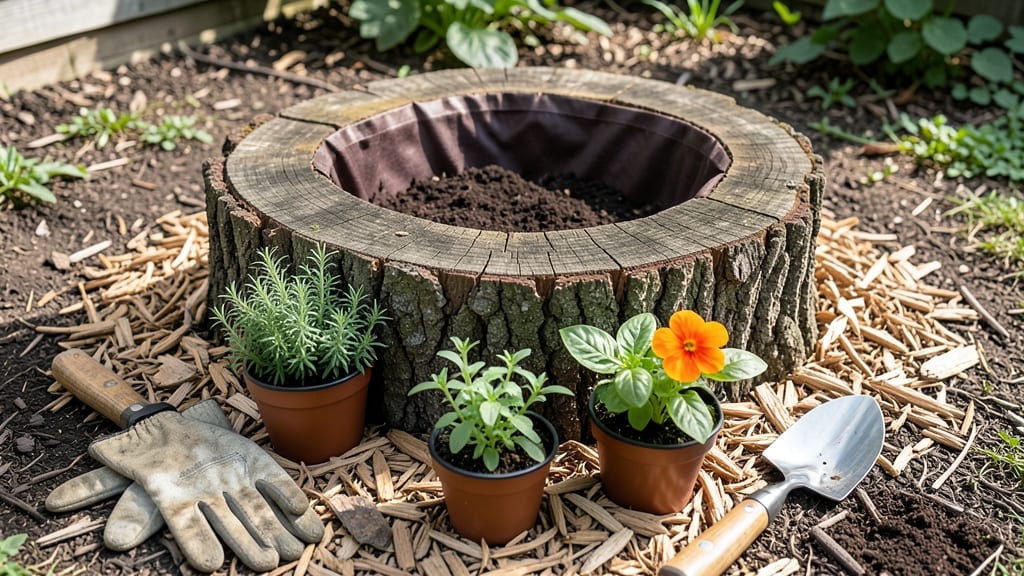
A rotting stump becomes your garden's new centerpiece. 🌿 I've transformed dead wood into thriving planters that save space and add rustic charm—no digging required. The process takes just 30 minutes and turns an eyesore into a functional garden feature.
You'll need basic tools: a drill, screws, landscape fabric, and soil. Safety first—wear gloves and goggles when drilling. For extra flair, paint the stump or line it with moss for a woodland look. The right plants make all the difference: succulents, herbs, or small flowers thrive in these cozy containers.
By the end, you'll have a planter that's both practical and beautiful. It stays in place without sinking, resists pests, and creates a natural-looking focal point. Perfect for patios, garden edges, or even as a whimsical table centerpiece. Works with any stump size and adapts to different styles.
Here's how to bring your woodland garden spot to life!"
📚 In This Guide
- What you need
- Instructions
- Tips and common mistakes
- Wrapping up and next steps
What you need
- ● 1 large tree stump (clean, dry, and free of rot or pests—bonus points if it’s a fallen oak or maple!)
- ● Sandpaper (medium-grit, 80-120, for smoothing rough edges)
- ● Outdoor paint or non-toxic sealant (choose a color that matches your garden vibe!)
- ● Potting soil (well-draining mix, ~5–10 gallons depending on stump size)
- ● Small plants or seeds (succulents, ferns, or wildflowers work great!)
- ● Safety gear: Gloves, goggles, and ear protection (if using power tools)
- ● Drill with hole saw attachment (1–2” diameter, for drainage holes)
- ● Paintbrush or roller (for sealing the stump)
- ● Measuring tape (to check depth and spacing for plants)
- ○ Optional: Stain or wood preservative (if you want extra protection)
- ● Decorative moss or pebbles (to hide the stump’s base)
- ● Miniature fence or trellis (for a whimsical touch)
- ● Solar-powered lights (to highlight your planter at night!)
- ● Watering can or drip irrigation kit (for low-maintenance care)
Step-by-step instructions for creating a stump planter
Turn that old tree stump into a charming, functional planter in just a few simple steps.
🪴 Step 1: Gather Your Materials and Prepare the Stump
Start by finding a clean, dry stump—one that’s free of rot or pests. If it’s fresh, let it sit outside for a few weeks to dry out completely. You’ll need a hand saw, safety gloves, and a wooden spoon or mallet for shaping. For drainage, grab a drill and some 1/4-inch wood screws or plastic mesh to create holes.
Measure the stump’s diameter and depth. Most stumps work well for planters if they’re at least 6 inches deep and 8 inches wide at the top. If the stump is too shallow, you can stack two smaller ones together or use a wooden base to add height. Safety first: Wear gloves and goggles when cutting or drilling.
✂️ Step 2: Drill Drainage Holes and Shape the Planter
Using your drill, create 4-6 drainage holes around the sides of the stump, spaced evenly. These holes prevent water from pooling at the bottom, which can rot roots. If the stump is thick, drill holes about 2-3 inches deep—this ensures excess water escapes without washing out soil.
Next, shape the inside of the stump to create a smooth planting surface. Use your saw to trim any rough edges or uneven spots, then smooth them out with a wooden spoon or mallet. If the stump has deep cracks or crevices, fill them with wood filler or spackle to prevent soil from spilling out. Let it dry completely before moving to the next step.
🌱 Step 3: Line the Stump and Add Soil
To keep soil from washing out through the drainage holes, line the inside of the stump with landscape fabric or plastic mesh. Cut a piece slightly larger than the stump’s interior, fold the edges over the rim, and secure it with staples or small nails. This lining also helps prevent roots from growing into the stump’s crevices over time.
Fill the stump with a well-draining potting mix—avoid garden soil, as it compacts and blocks drainage. Mix in a handful of perlite or sand to improve aeration. Leave about 1 inch of space at the top to prevent soil from spilling when watering. For a 4-inch-wide stump, you’ll need roughly 1 gallon of potting mix. Pat the soil down gently to remove air pockets.
☀️ Step 4: Plant and Maintain Your Stump Garden
Choose plants that thrive in containers and match your stump’s sunlight conditions. Succulents, herbs like thyme or rosemary, and small shrubs like ferns or sedum work beautifully. Dig a hole slightly larger than the root ball, place the plant in, and cover the roots with soil. Press gently to secure it—no need to pack tightly.
Water thoroughly after planting, then let the soil dry slightly between waterings. Stump planters dry out faster than ground-level pots, so check the soil every 2-3 days in hot weather. Mulch the surface with wood chips or straw to retain moisture and suppress weeds. Place your stump planter in a spot where it gets the right amount of light for your plants—most herbs need at least 6 hours of sun, while ferns prefer partial shade.
💧 Step 5: Seasonal Care and Upkeep
In the first few weeks, monitor your plants closely. If leaves yellow or wilt, it’s often a sign of overwatering or poor drainage. Adjust your watering schedule based on the weather—water deeply once a week in cooler months, but every 2 days during heatwaves. Fertilize lightly every 4-6 weeks with a balanced, water-soluble fertilizer to keep plants healthy.
Come winter, move your stump planter to a sheltered spot if you’re in a cold climate. If left outside, wrap the base with burlap or insulation to protect roots from freezing temperatures. In spring, refresh the soil with a top dressing of compost and trim any dead or overgrown foliage. With a little care, your stump planter will stay vibrant for years—adding rustic charm and functionality to your garden!
Tips & tricks for perfect stump planters
Here's what nobody tells you about turning a simple stump into a stunning garden feature.
Stump Selection Wisdom: Look for stumps with a natural bowl shape—they require less shaping and hold soil better. If your stump has a flat top, use a hand saw to carve out a shallow basin about 2-3 inches deep around the edges. This creates extra planting space while maintaining stability. Avoid stumps with deep cracks or large holes—they'll be harder to line and may not hold soil well.
The Drainage Detail: When drilling those 4-6 drainage holes in Step 2, angle them slightly downward toward the outside. This directs water away from the stump's base, preventing rot. For extra insurance, place a small piece of plastic mesh over each hole before adding soil—it'll catch debris while allowing water to escape. I've seen stumps fail when water pools at the bottom, so don't skip this step!
Soil Science: The 1 gallon of potting mix for a 4-inch-wide stump is just a starting point. For larger stumps, calculate roughly 1 gallon per 4 inches of width. Mix in 1 part perlite or sand to 3 parts potting mix—this improves drainage while keeping moisture retention. Pro tip: Add a handful of compost to the mix for extra nutrients, especially if you're planting herbs or vegetables.
Plant Pairing: For a 6-hour sun location, pair herbs like thyme or rosemary with drought-tolerant succulents. The herbs will thrive in the container's well-draining mix while the succulents add visual interest. If your stump gets partial shade, opt for ferns or impatiens—they'll appreciate the moisture retention better than sun-lovers. Remember, container plants often need more frequent watering than ground plants!
Pro Tips for Make A Stump Planter
- Here's what nobody tells you about turning a simple stump into a stunning garden feature.
- Stump Selection Wisdom: Look for stumps with a natural bowl shape—they require less shaping and hold soil better. If ...
- The Drainage Detail: When drilling those 4-6 drainage holes in Step 2, angle them slightly downward toward the outsid...
Frequently asked questions
Got questions about turning a tree stump into a thriving planter? You’re not alone! Here are answers to the most common concerns—so you can DIY with confidence and zero guesswork.
Can I use any tree stump for a planter?
Not all stumps are created equal! Softwoods like pine or cedar rot faster and may need more frequent refreshing. Hardwoods (oak, maple) last longer but can be heavier. Pro tip: If the stump is rotted or hollow, skip it—it won’t hold soil or plants well. Look for a stump that’s solid but decaying (soft to touch but not mushy).
How long does it take to make a stump planter?
Most DIYers finish in 30–60 minutes, depending on stump size and tools. The longest part? Drying time—if you seal it with paint or liner, wait 24 hours before planting. Rush the job? Use a pre-made liner and skip sealing for instant use!
What’s the best time of year to turn a stump into a planter?
Spring or early fall is ideal—soil is workable, and plants can establish roots before extreme weather. Avoid winter (frozen ground) or peak summer (drought stress). Bonus: If you’re in a mild climate, you can plant year-round with the right moisture control!
Is a stump planter cheaper than buying a pot?
Absolutely!
The cost? Just the tools you already own (drill, paint, liner) + a free stump. A comparable ceramic pot costs $20–$50+. Plus, your stump planter is unique, eco-friendly, and doubles as decor. Win-win!
Will pests or mold be a problem?
Pests like ants or termites might visit, but a sealed stump (with paint or liner) deters them. For mold/mildew: Choose a dry stump and let it air out for a day before planting. Preventative tip: Add a layer of gravel at the bottom to improve drainage and reduce rot risks.
What plants work best in a stump planter?
Lightweight, shallow-rooted plants thrive here! Try:
- Herbs: Basil, thyme, or oregano (great for small stumps)
- Flowers: Petunias, marigolds, or impatiens (colorful and low-maintenance)
- Vegetables: Lettuce, radishes, or green onions (harvest quickly!)
- Avoid: Heavy feeders like tomatoes or large shrubs—they’ll outgrow the space.
Pro tip: Use potting mix, not garden soil, to prevent compaction.
Wrapping up and next steps
You’ve now got the skills to transform a simple stump into a functional, eco-friendly planter—no fancy tools or expertise required!
Whether you’re reviving an old tree stump or repurposing a fallen branch, this project adds charm to your garden while giving new life to nature’s leftovers. Now’s your chance to get creative—paint it, carve designs, or let it blend seamlessly into your outdoor space!
Ready to level up your gardening game? 🌱 Start by experimenting with different plants or even turning this into a mini herb garden. Happy planting!