
How To
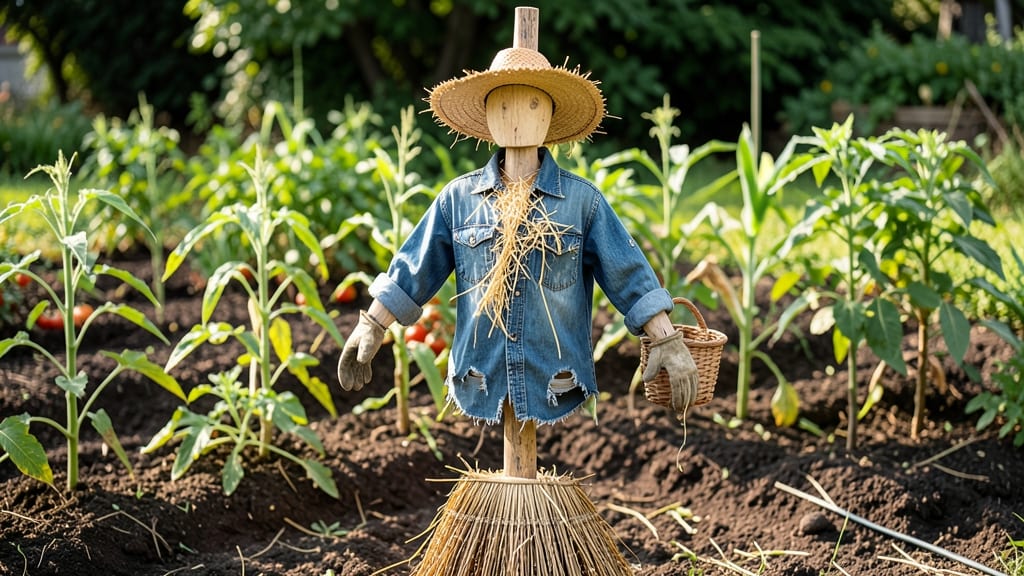
A homemade scarecrow can save your garden from hungry birds and pests—without breaking the bank or harming wildlife. 🌱 I’ve made mine from old clothes, straw, and sticks, and it’s kept my corn and beans safe for years. The best part? It’s free, reusable, and blends right into the landscape.
You’ll need just a few things: an old jacket or shirt, some straw or hay, a sturdy stick or broom handle, and a few rocks for weight. No fancy tools—just what you’ve got lying around.
The key is making it look like a real person (or at least a convincing enough silhouette) to scare off pests without harming beneficial birds or insects.
Once you’ve assembled it, place your scarecrow near the plants that need protection—corn, beans, or young seedlings work best. Move it every few days to keep pests guessing, and add reflective tape for extra deterrence if birds are a problem.
Within a week, you’ll notice fewer pecked leaves and more thriving plants.
If you’re not into the classic look, try a motion-activated sprinkler or even a simple reflective tape setup—both work well and require zero crafting. The goal is the same: keep your garden safe without chemicals or harm to wildlife. Let’s get started!
📚 In This Guide
- What you need
- Instructions
- Tips and common mistakes
- Wrapping up and next steps
What you need
- ● Old clothing: 1-2 pairs of jeans, 1-2 shirts (preferably oversized), and 1-2 hats or bandanas (for that classic scarecrow look!).
- ● Stuffing: Straw, hay, or even old pillows/blankets (fill those clothes to bulk up your scarecrow!).
- ● Sturdy base: 1 wooden post (4-6 ft tall, 2-4 inches in diameter), or
- ● 1 large wooden stake or rebar (for anchoring).
- ● Rope or twine: 50-100 ft of thick, weather-resistant cord (for securing limbs and clothing).
- ● Scissors or shears: For trimming fabric and rope.
- ● Hammer or mallet: To drive the post into the ground.
- ● Safety gear: Work gloves (to protect your hands from splinters or rough edges).
- ● Paint or fabric markers (to add spooky faces or patterns!).
- ● Old sunglasses or a fake nose (for extra personality!).
- ● Wire or coat hangers (to shape arms or add movement).
- ● Waterproof sealant (if your scarecrow will face rain or sun).
- ● Motion-activated eyes (for a super creepy touch!).
Step-by-step instructions for building a homemade scarecrow
Here's how I craft a functional, weather-resistant scarecrow that keeps birds away without breaking the bank.
🪴 Step 1: Gather Your Scarecrow Materials
Start with an old large shirt or jacket—something with long sleeves and a hood works best. I like to use denim or thick cotton because it lasts longer outdoors. Pair it with a pair of old jeans or leggings to create a human-like shape. For the head, you can stuff an old hat, pillowcase, or even a burlap sack with straw or old fabric scraps.
Add stuffing materials like straw, old clothes, or even plastic bags filled with leaves. I keep a bag of dried corn husks or grass clippings handy for this purpose. Don’t forget a burlap sack to cover the body—it blends well with garden scenery and adds extra protection from rain. If you want to make it extra sturdy, grab a sturdy stick or broomstick for the arm and a long dowel for the neck.
✂️ Step 2: Assemble the Body and Head
Begin by stuffing the shirt or jacket with your chosen materials until it’s firm but not overly bulky. Tie the sleeves tightly with string or twine to create arm shapes. For the head, stuff the hat or pillowcase until it’s round and secure it with more string. I like to add two small stones inside the head to weigh it down and keep it upright.
Attach the head to the body by threading the dowel through the shirt’s collar and into the head. Secure it tightly with twine so it doesn’t wobble in the wind. For the arms, tie the broomstick to the sleeves of the shirt, positioning it so it looks like the scarecrow is reaching out. This makes it look more lifelike and intimidating to birds.
🌱 Step 3: Dress and Position for Maximum Effect
Cover the entire body with the burlap sack, tying it securely around the waist and neck. This not only makes the scarecrow look more natural but also protects the stuffing from rain. I like to add old gloves or rags as hands to give it a more complete appearance. For extra realism, tuck a few straws or dried plants into the sleeves or pockets.
Place your scarecrow in a visible but not too close spot in the garden—birds are less likely to be deterred if it’s right next to their food. A 6-foot-tall scarecrow works well for most vegetable patches. I position mine near the edges of the garden where birds often perch before swooping in. Avoid placing it in windy areas, as it might topple over.
☀️ Step 4: Maintain and Refresh Regularly
Check your scarecrow every few weeks to ensure it’s still standing upright and looking intimidating. Birds get used to stationary objects, so I like to move it slightly every few days or give it a new outfit by swapping the burlap sack for a different color. This keeps it looking fresh and unpredictable.
If the stuffing starts to sag or the twine loosens, reinforce it with more string or add extra materials inside. A little petroleum jelly on the twine can help it last longer in wet conditions. I also recommend repainting or re-dressing the scarecrow every season to keep it looking new and effective. With these simple steps, your homemade scarecrow will save your garden all season long.
Tips & tricks for crafting the perfect homemade scarecrow
Here's what nobody tells you—these little details make all the difference between a scarecrow that works and one that just takes up space.
Material Selection Matters: For the best results, choose a shirt with long sleeves and a hood—it creates that classic scarecrow silhouette. I've found that denim or thick cotton lasts longer outdoors because it resists tearing from wind and rain better than lighter fabrics. If you're using old clothes, make sure they're clean to avoid attracting pests. For the head, a pillowcase is my go-to because it's easy to stuff and shape, but a burlap sack adds that rustic charm.
Weight Distribution is Key: The two small stones inside the head are a game-changer—they keep it upright even when winds pick up. I learned this the hard way after watching my first scarecrow topple over in a breeze! For extra stability, consider adding a third stone or a small bag of sand inside the body near the waist. This low center of gravity prevents tipping more effectively than just stuffing more materials.
Positioning for Maximum Effect: Placing your scarecrow near the edges of your garden is crucial—birds often perch there before swooping in. I position mine about 6 feet tall, which is tall enough to be visible but not so close that birds feel cornered. If you have a large garden, consider making two scarecrows and placing them at opposite corners. Birds are less likely to approach if they see "guards" on multiple sides, creating an illusion of a larger protected area.
Maintenance is Non-Negotiable: Checking your scarecrow every few weeks isn't just about keeping it looking good—it's about making it effective. Birds get used to stationary objects, so I like to give mine a little shake or move it slightly every few days. This keeps it looking fresh and unpredictable. A quick spray with water can also help it stand up straighter if it's been sitting in the same spot too long, making it look more intimidating to birds.
Pro Tips for Make A Homemade Scarecrow
- Here's what nobody tells you—these little details make all the difference between a scarecrow that works and one that just takes up space.
- Material Selection Matters: For the best results, choose a shirt with long sleeves and a hood—it creates that classic scarecrow silhouette.
- Weight Distribution is Key: The two small stones inside the head are a game-changer—they keep it upright even when winds pick up.
Frequently asked questions
Got questions about crafting your own scarecrow? You’re not alone—here are the most common ones, answered for quick, easy reference!
What’s the best time of year to put up a scarecrow?
A scarecrow works best when birds and pests are most active—spring through early summer (March to June) is ideal. For year-round protection, place it in late fall to deter winter pests like rodents. Just avoid extreme weather: don’t set it out during heavy rain or snow!
Can I use old clothes or rags instead of new fabric?
Old clothes, burlap sacks, or even denim scraps work great—just ensure they’re clean and pest-free. Avoid anything moldy or treated with chemicals. For extra durability, mix in sturdy canvas or heavy-duty fabric for key areas like the torso.
How do I keep my scarecrow from looking too realistic (and getting attacked)?
Scarecrows need to be unsettling but not lifelike. Use oversized proportions, exaggerated facial features (like a lopsided hat or wild hair), and contrasting colors (e.g., bright red arms on a green body). Move it occasionally to disrupt predators’ expectations!
What if my scarecrow gets damaged or falls over?
Check it weekly for loose stitches, sagging limbs, or leaning. Reinforce weak spots with extra rope or wire, and prop it up with a stake or PVC pipe if needed. For quick fixes, use duct tape or bungee cords temporarily. Rotate it every few weeks to prevent wear on one side.
Will a scarecrow work for pests other than birds?
Yes! Scarecrows can deter rabbits, deer, and even squirrels—but with tweaks. For ground-dwelling pests, place it near vulnerable plants and add reflective tape to create movement. For deer, combine it with fencing or repellent sprays for better results.
Wrapping up and next steps
Creating your own homemade scarecrow is a fun, budget-friendly way to protect your garden while adding a touch of rustic charm! With just a few supplies and a little creativity, you’ve got a sturdy guardian ready to keep pests at bay. 🌱✨
Now that you’re armed with the know-how, why not take it a step further? Try experimenting with different materials or even adding a whimsical touch—like a painted face or a quirky hat—to make your scarecrow uniquely yours. Happy gardening! 🌿🎨