
How To
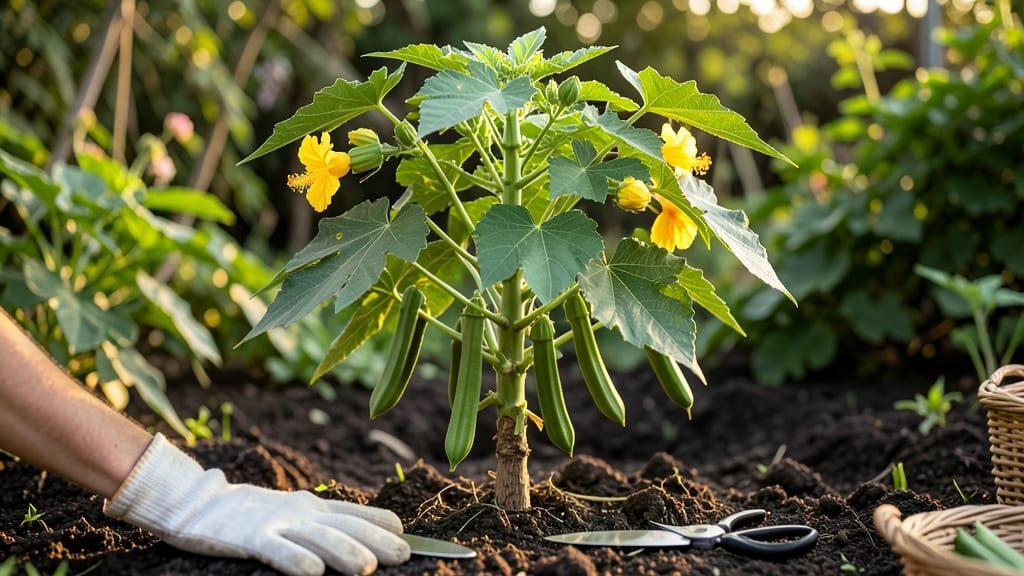
Knowing how to know when to pick okra can mean the difference between a garden full of crisp, tender pods and one full of tough, slimy rejects.
That perfect moment—when your 🌱 okra is at its peak—is easier to spot than you think, and I’ll show you exactly what to look for.
Most gardeners assume okra is ready when it’s just big enough, but the truth is, timing matters more than size. A pod that’s too mature can turn rubbery or even develop tough seeds, ruining that fresh-from-the-garden flavor we all love.
The key is in the texture, color, and even how it feels under your fingers—details that’ll transform your harvest.
If you’ve ever picked okra only to find it’s still too young or already past its prime, you’re not alone. But with just three simple tests, you’ll never second-guess your timing again.
Whether you’re a first-time grower or a seasoned gardener, these tricks will help you harvest at the ideal stage every time.
From the moment your okra plants start flowering in late spring to the peak of summer harvest, I’ll walk you through the exact cues to watch for—so you can enjoy pods that are tender, flavorful, and ready to use in your favorite dishes. Let’s get started.


3 Tactile tests to determine okra ripeness (with visual cues)
Okra pods mature quickly, and timing your harvest correctly ensures crisp texture and sweet flavor. The key is using your senses—especially touch—to identify the perfect ripeness. Overripe pods become slimy and fibrous, while underripe ones lack flavor. Here’s how to test okra readiness like a pro.
Start by examining the pod length, which is your first clue. Most gardeners agree that 2-3 inches is the ideal size for harvesting. This range balances tenderness and full flavor development.
Smaller pods are still edible but can be bland and seedy, while larger ones turn tough and woody.
Next, perform the finger pressure test. Gently squeeze the pod between your thumb and forefinger. If it feels tender but firm, it’s ready to pick. A pod that gives slightly under pressure is perfect—like a ripe avocado. If it feels hard or spongy, it’s past its prime.
Harvest when pods reach 2-3 inches. Use a ruler or measuring tape for precision.
Gently squeeze—tender but firm = ready. Hard or spongy = overripe.
Smooth, glossy skin = peak ripeness. Dull or rough = past its prime.
Seeds should be visible but small. Fully developed seeds = fibrous pods.
🌱 Pro Tip: Harvest in the morning when pods are cool and crisp.
Don’t overlook the skin texture of the pod. At peak ripeness, okra skin is smooth and slightly glossy, almost like a freshly waxed car. If the surface feels rough or dull, the pod has overstayed its welcome in the garden.
This texture change happens quickly, so check your plants every 2-3 days during peak harvest season.
Finally, peek inside the pod to assess seed development. When ready for harvest, the seeds should be visible but not fully formed. If you see large, mature seeds, the pod is too fibrous to eat.
Think of it like a window of opportunity—once seeds bulk up, the pod’s quality declines rapidly.
Seasonal factors also play a role in okra ripening. In hot, dry climates, pods mature faster due to accelerated growth. Conversely, in cooler regions, okra may take longer to reach harvest size. Adjust your harvesting schedule based on your local growing conditions and weather patterns.
For consistent harvests, aim to pick every 2-3 days during peak production. This encourages your okra plants to produce more pods and prevents overripening. Use a sharp pair of pruning shears or a knife to avoid damaging the plant.
Always cut or twist pods cleanly at the base to promote healthy regrowth.
If you’re new to growing okra, start by harvesting a few pods as test samples. Cook them immediately after picking to compare textures and flavors. Over time, you’ll develop an instinct for the perfect harvest window.
Remember, the sooner you pick after reaching the ideal size, the better your okra will taste.
🌿
3 Tactile tests to determine okra ripeness (with visual cues)
Okra pods mature rapidly, so knowing the exact moment to harvest ensures crisp texture and best flavor. The key lies in three simple tactile tests—pod length, skin texture, and finger pressure—each revealing whether your okra is ready to pick.
Skip these checks, and you risk woody pods or overripe messes.
Start by examining the pod length. The ideal harvest window is when pods reach 2-3 inches. At this stage, they’re tender yet firm, offering the perfect balance of crunch and mild flavor.
Let them grow longer, and they’ll turn fibrous and tough, making them less enjoyable to eat.
Next, run your fingers along the pod’s skin. Ready-to-pick okra has a smooth, slightly glossy surface. If the skin feels rough or dull, the pod is past its prime. A quick visual check under sunlight will confirm this—shiny skin means freshness, while dullness signals overmaturity.
Here’s how to apply the finger pressure test: Gently squeeze the pod between your thumb and forefinger. If it feels tender but firm, it’s ready. A pod that yields too easily is underripe, while one that feels hard or woody has passed its peak.
This test is your best tool for consistent quality in every harvest.
Pod Length Check
Harvest when pods are 2-3 inches long—any shorter, and they’re underdeveloped; longer, and they’re tough.
Skin Texture Test
Look for a smooth, glossy surface. Dull or rough skin means the pod is overripe.
Finger Pressure Test
Squeeze gently—tender but firm is perfect. Too soft? Too hard? Adjust your harvest timing.
For best flavor, aim to harvest okra in the morning when pods are cool and crisp. This timing also helps prevent seed development, which can make pods bitter.
If you’re growing okra for seed saving, wait until pods turn yellow and dry—but for eating, stick to the 2-3 inch rule.
Pro tip: Use a sharp knife or pruners to cut pods at the stem. This reduces damage to the plant and encourages more pod production. Harvest every 2-3 days to keep your plants productive throughout the season. With these tests, you’ll never guess again—just pick with confidence! 🌱