
Picking
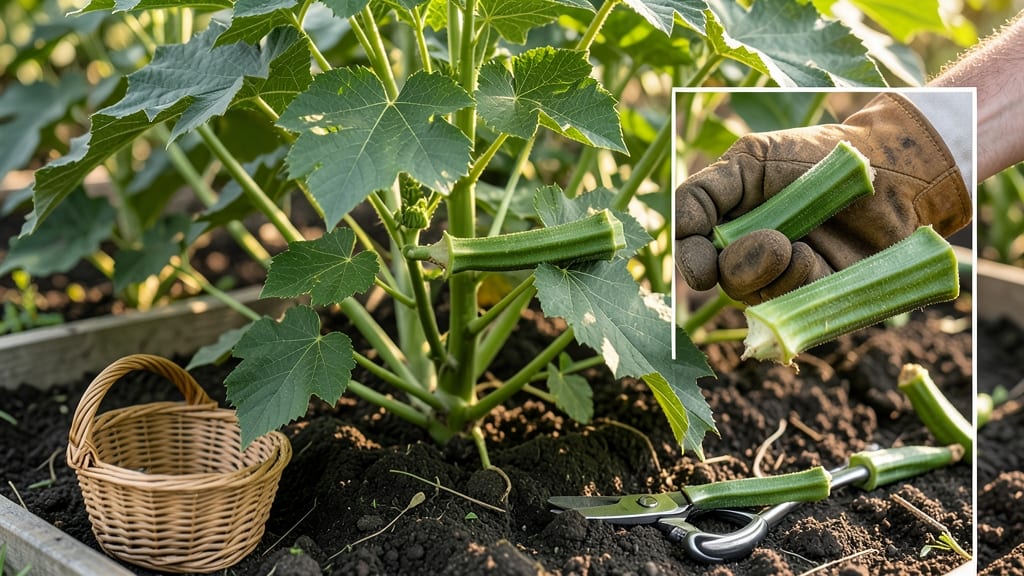
Mastering how to harvest okra without killing the plant feels like walking a tightrope—pick too much, and you stunt the plant; pick too little, and it bolts. ✨ The twist-and-pull method preserves the plant's energy while giving you tender pods week after week, and I've perfected it after years of trial and error with my own plants.
Look for pods that are 3-5 inches long—this is the sweet spot for flavor and harvest frequency. The key is to avoid breaking the stem; instead, gently twist the pod while pulling upward with steady pressure.
If you hear a faint pop, you've done it right. This method keeps the plant healthy and encourages more growth, not stress.
After harvesting, leave the pods in a well-ventilated area for a few hours to firm up before storing. Overcrowded plants or neglected harvests lead to bitter pods and fewer yields, so consistency is everything. With this technique, my plants produce for 8-10 weeks instead of just a few weeks.
Common mistakes include harvesting too late (when pods get tough) or tugging too hard (which damages the plant). Stick to the 3-5 inch rule, and your okra will keep giving you tender, flavorful pods all season long. It’s all about balance—just like gardening itself.
📚 In This Guide
- What you need
- Instructions
- Tips and common mistakes
- Wrapping up and next steps
What you need
- ● Pruning shears or sharp scissors – Small, clean, and sterilized (70% isopropyl alcohol works!) to avoid plant stress.
- ○ Gloves (optional but recommended) – Garden or work gloves to protect hands from okra’s fuzzy texture and thorns.
- ● Harvesting basket or container – A shallow, breathable basket or bucket to prevent bruising okra pods.
- ○ Water spray bottle (optional) – For misting plants post-harvest to reduce stress.
- ● Sharp knife (backup) – Only if pods are too tough for shears—use for clean cuts near the stem.
- ● Mature okra plants – Pods should be 2–3 inches long (harvesting too early stunts growth!).
- ● Morning sunlight – Harvest when pods are firm and dew has dried (early morning is ideal).
- ● Weather check – Avoid harvesting after rain or extreme heat to prevent disease spread.
Step-by-Step instructions for harvesting okra without damaging the plant
Here's the method I've used for years to keep my okra plants producing through the entire season.
🌿 Step 1: Identify the Right Harvest Window
Okra pods should be harvested when they're 3-4 inches long—any longer and the texture becomes fibrous. I check plants every 2-3 days during peak production because pods grow fast. Look for pods that feel firm but still tender when gently squeezed between your fingers.
The key is harvesting before the pod develops a tough, woody shell. If you see a white bloom fading from the flower, that's your signal—the pod is about 24 hours from becoming overmature. I always harvest in the morning when pods are crispest and most flavorful.
✂️ Step 2: Use the Gentle Twist-and-Pull Technique
Never cut pods with scissors—it weakens the stem and invites disease. Instead, grasp the pod firmly about ½ inch below the stem attachment with your thumb and forefinger. Twist gently while applying slight upward pressure. You'll feel a slight resistance, then a clean break as the pod separates.
Don't yank or pull sharply—this can rip the stem or damage the plant's energy flow. A proper twist-and-pull should remove the pod cleanly while leaving the stem intact. You'll know you're doing it right when the stem remains smooth and unbroken after harvest.
🌱 Step 3: Maintain Plant Health After Harvesting
After harvesting, examine the plant for any signs of stress. Healthy okra plants should show new flower buds forming within 3-5 days of proper harvesting. If you notice yellowing leaves or wilting, you may have been too aggressive with your harvesting technique.
Water the base of the plant immediately after harvesting to replenish moisture lost during the process. I use a soaker hose to deliver water directly to the roots without wetting the leaves, which helps prevent fungal issues. Fertilize lightly with a balanced 10-10-10 formula if you notice reduced flower production.
🌿 Step 4: Monitor for Repeated Production Signals
Watch for new flower blooms forming at the base of harvested pods—this is your plant's way of telling you it's ready for another harvest cycle. I keep a small notebook nearby to track which plants produce most consistently, so I can focus my harvesting efforts there.
If you notice pods developing black spots or yellowing leaves, your plant may be stressed from over-harvesting. Scale back to harvesting every 4-5 days until the plant shows signs of recovery. Okra plants can produce for 6-8 weeks with proper care—this is where consistent, gentle harvesting pays off.
Tips & tricks for perfect okra harvesting
Here's what nobody tells you about keeping your okra plants thriving after every harvest.
Timing Secret: The 24-hour window after a white bloom fades is your golden opportunity—the pod becomes fibrous after that point. I've found that harvesting in the early morning gives you the crispest pods because they've had all night to hydrate. If you're harvesting later in the day, look for pods that are slightly cooler to the touch, as they'll be at their peak tenderness.
Technique Tip: When using the twist-and-pull method in Step 2, focus on the half-inch below the stem attachment—this is where the pod naturally separates. I've ruined stems by pulling too high or too low, but this precise spot creates a clean break every time. If you're worried about breaking stems, practice on a few pods first to get the feel for the right amount of pressure.
Plant Health Strategy: The 3-5 day window for new flower buds to appear is your best indicator of plant health. If you're not seeing buds within this timeframe, you might be harvesting too aggressively. I've learned to prioritize quality over quantity—harvesting fewer pods but doing it perfectly keeps plants producing for their full 6-8 week potential. A soaker hose is worth the investment if you're serious about okra production.
Visual Cues: Look for these three signs of a properly harvested pod: 1) A clean break at the stem, 2) No visible damage to the main stem, and 3) A slight sheen on the pod surface indicating it was harvested at peak freshness. These visual cues help you maintain consistency and avoid the frustration of over-harvesting.
Pro Tips for Harvest Okra Without Killing The Plant
- Here's what nobody tells you about keeping your okra plants thriving after every harvest.
- Timing Secret: The 24-hour window after a white bloom fades is your golden opportunity—the pod becomes fibrous after ...
- Technique Tip: When using the twist-and-pull method in Step 2, focus on the half-inch below the stem attachment—this ...
Frequently asked questions
Got questions about harvesting okra the right way? You’re not alone! Here are some of the most common concerns—and their simple, plant-friendly solutions.
How do I know when okra pods are ready to harvest?
Harvest okra when pods are 3 to 4 inches long—this is the sweet spot for tenderness and flavor. If left too long (5+ inches), they become tough and seedy. Check pods every 2–3 days for consistency. Pro tip: Morning harvests often yield the freshest pods!
How often should I harvest okra to keep the plant producing?
Okra plants thrive on regular harvesting—pick pods every 2–3 days during peak production (summer months). This encourages new blooms and prevents the plant from becoming overloaded. Think of it like trimming a bush: less stress = more growth!
What if I accidentally snap the stem while harvesting?
Don’t panic! Okra is tougher than it looks. If you gently twist (not yank) and the stem snaps, just trim the broken part with clean scissors. The plant will recover, though avoid harvesting from that branch for a few days. Prevent future snaps by supporting tall plants with stakes or cages.
Can I harvest okra leaves, or should I leave them alone?
Okra leaves are edible and nutritious, but harvest sparingly—never remove more than 10–20% of the foliage at once. Young leaves (harvested early) are best for cooking. Older leaves can be bitter. Focus on pods first to maximize yields!
What if my okra plant stops producing after harvesting?
Several factors could be at play: heat stress (okra loves warmth), overcrowding (thin plants if needed), or nutrient deficiency (feed with compost or balanced fertilizer). Try pruning dead flowers to redirect energy to new growth. If the issue persists, check for pests like aphids or spider mites!
Wrapping up and next steps
Harvesting okra doesn’t have to be a struggle—with the right technique, you can enjoy a bountiful, long-lasting crop while keeping your plants thriving! 🌱 By using the gentle twist-and-pull method, checking for readiness, and spacing harvests properly, you’ll protect your plants and encourage more pods to grow.
Now that you’re equipped with these tips, it’s time to roll up your sleeves and start harvesting!
🌿 Next Steps:
- Try it out! Pick a few pods today and watch your okra plant reward you with fresh, tender harvests.
- Experiment with recipes. From gumbo to stir-fries, enjoy the fruits of your labor in delicious ways!
- Share the love. Got extra okra? Gift it to neighbors or friends—they’ll thank you!