
Lawn
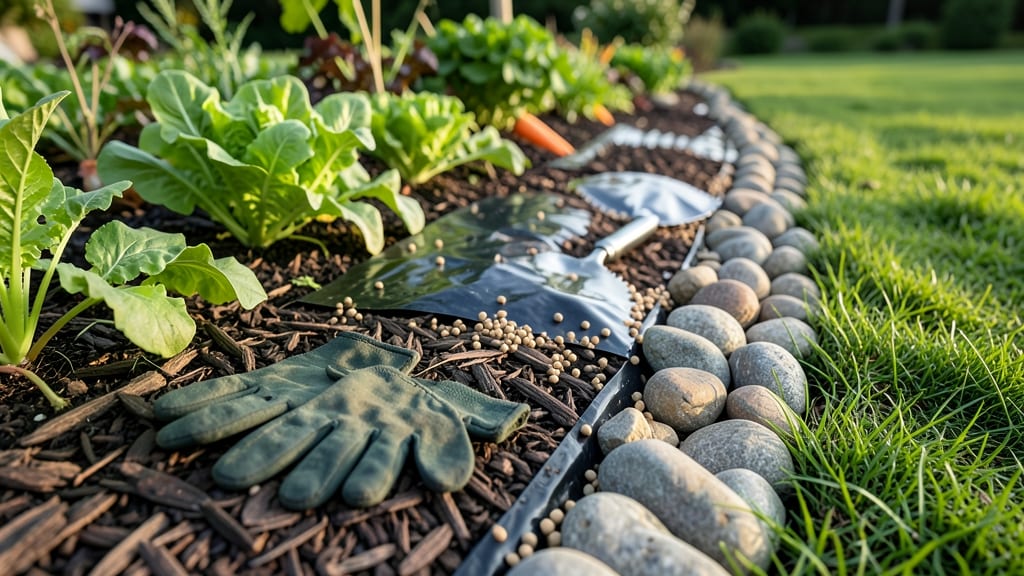
How to keep the grass out of your vegetable garden ruins all the hard work. 🌱 I’ve battled this fight for years—and finally cracked the code with a simple, chemical-free barrier that actually works. The secret isn’t fancy tools or expensive sprays, but a layered approach that smothers grass while keeping your soil healthy for veggies.
Start with a thick layer of cardboard or newspaper (no glossy paper) to block sunlight from grass seeds already in the soil. Then add 4-6 inches of wood chips or straw mulch—this keeps weeds out while breaking down to feed your plants.
For edges, use landscape fabric buried slightly below soil level to create a permanent barrier. It’s a one-time setup that saves hours of weeding.
By summer, you’ll have a clean, productive garden bed where grass stands no chance. The mulch stays in place, suppresses weeds naturally, and even improves soil as it decomposes. No more pulling grass by hand or dealing with stubborn sprouts—just a tidy, thriving vegetable patch that stays weed-free for months.
Works in raised beds, in-ground plots, or even container gardens. The key is consistency: refresh mulch every few months, and you’ll never lose another battle to grass invasion. Let’s get that garden back to being all yours!
📚 In This Guide
- What you need
- Instructions
- Tips and common mistakes
- Wrapping up and next steps
What you need
- ● Landscape Fabric: 1 roll (10 ft. x 50 ft.) of heavy-duty, UV-stabilized fabric (30–45 lb. test weight). Pro tip: Look for woven or non-woven fabric with a 3–5 year UV resistance rating.
- ● Edging Material: Galvanized steel, plastic, or brick edging (12–18 inches tall) to create a clean border. Quantity: Enough to outline your garden bed (e.g., 10–20 ft. per side for a 4’x8’ bed).
- ● Mulch or Wood Chips: 2–3 inches of organic mulch (e.g., straw, cedar chips, or pine bark) to smother grass and retain moisture.
- ● Garden Staples or U-Shaped Landscape Stakes: 1 box (50–100 stakes) to secure the fabric in place.
- ● Shovel & Rake: 1 flat-head shovel and 1 garden rake for clearing soil and leveling the area.
- ● Utility Knife or Scissors: 1 heavy-duty utility knife for cutting fabric to size.
- ● Gloves & Knee Pads: 1 pair of gardening gloves and knee pads for comfort.
- ● Cardboard or Newspaper: Lay down 1–2 layers under the fabric to block grass seeds from sprouting.
- ● Rocks or Gravel: Use 1–2 inches of pebbles around the garden’s edge to deter grass encroachment.
- ● Vinegar or Natural Herbicide: A 10% acetic acid vinegar solution (1 part vinegar, 1 part water) to spot-treat stubborn grass before installing barriers.
- ● Garden Twine: For securing fabric edges in windy areas.
Step-by-Step instructions for creating a grass-blocking vegetable garden barrier
Here's the method I've used for years to keep grass at bay without harsh chemicals or constant weeding.
🪴 Step 1: Outline Your Garden Beds
Use a garden hose or string to mark your new vegetable garden beds. I always aim for 4 feet wide—this size works perfectly with most garden tools and makes planting easier. Keep beds no more than 12 inches high to prevent water pooling and root rot.
Dig down about 6-8 inches deep along the marked lines to create a trench. This depth ensures you remove existing grass roots and create space for your barrier. I like to use a flat shovel for this—it gives me cleaner edges than a spade.
🌱 Step 2: Install the Physical Barrier
Lay down a layer of cardboard (no glossy ink) or thick landscape fabric in the trench. This blocks grass seeds from growing up through the soil. For extra protection, I overlap the edges by 4-6 inches and tuck them into the trench walls.
Cover the barrier with a 2-3 inch layer of coarse mulch like wood chips or straw. This prevents light from reaching any grass seeds that might still be present and adds organic matter to your soil. Press the mulch lightly into the trench edges to keep it in place.
✂️ Step 3: Build Up the Garden Bed
Fill the trench with a mix of topsoil and compost, leaving about 1 inch below the surrounding ground level. This creates a slight depression that helps with water retention. I like to use a wheelbarrow to distribute the mix evenly.
Add a 1-2 inch layer of compost on top of the soil mix. This improves fertility and provides nutrients for your vegetables. Smooth everything out with a rake, creating a level surface for planting.
💧 Step 4: Maintain the Barrier Long-Term
Check the barrier edges every 2-3 weeks to ensure grass isn't creeping in. If you see any grass sprouts along the edges, pull them immediately before they establish roots. I keep a small hand trowel handy for quick edge maintenance.
Top up the mulch layer annually to maintain its weed-blocking effectiveness. In high-grass areas, I add an extra 1 inch of mulch in spring to reinforce the barrier. This method keeps my garden beds clean for years with minimal effort.
Tips & tricks for building a grass-free vegetable garden barrier
These simple strategies will help you create a long-lasting barrier that keeps grass at bay while making your garden beds thrive.
Depth Matters: When digging that 6-8 inch trench in Step 1, don't skimp on depth. Grass roots can extend surprisingly deep—especially in established lawns. I've found that going the full 8 inches gives you the most reliable barrier. Use a flat shovel to create clean, vertical trench walls for better barrier placement. If you're working in rocky soil, a garden mattock can help break up compacted areas without disturbing the surrounding ground.
Barrier Layering: In Step 2, double up on protection by combining cardboard with landscape fabric. First, lay down the cardboard (plain, uncoated) to smother existing grass, then add the fabric on top. This two-layer system blocks both grass seeds and established roots from infiltrating your garden. Press the edges firmly into the trench walls to eliminate gaps where grass could sneak through. For extra security, fold the fabric edges inward by 1-2 inches before adding mulch.
Mulch Selection: Your 2-3 inch mulch layer in Step 2 deserves careful attention. Wood chips break down slowly and provide long-term protection, while straw offers a more temporary solution that's easier to replace annually. I prefer cedar chips—they resist decomposition longer and naturally repel pests. Avoid dyed or treated mulches, as they can leach chemicals into your garden soil. For high-grass areas, consider adding a 4-6 inch layer initially to create an even stronger barrier.
Maintenance Shortcut: For Step 4's edge checks, I've developed a quick system: mark the barrier edges with small landscape flags or colorful stakes every 3 feet. This creates visual checkpoints that make your 2-3 week inspections faster. When you spot grass sprouts, don't just pull them—dig down 1-2 inches to remove any root fragments that could regrow. Keep a small bucket of soapy water nearby to dip your hand trowel between pulls, which helps prevent spreading grass seeds.
Pro Tips for Keep Grass Out Of Vegetable Garden
- These simple strategies will help you create a long-lasting barrier that keeps grass at bay while making your garden ...
- Depth Matters: When digging that 6-8 inch trench in Step 1, don't skimp on depth. Grass roots can extend surprisingly...
- Barrier Layering: In Step 2, double up on protection by combining cardboard with landscape fabric. First, lay down th...
Frequently asked questions
Got questions about keeping grass at bay in your veggie patch? You’re not alone! Here are some of the most common concerns—and straightforward answers to help you garden with confidence.
What’s the best time of year to install a grass-blocking barrier?
The ideal time is early spring or late fall—when weeds and grass are less aggressive. If you’re installing mid-season, choose a dry day and water thoroughly afterward to help the barrier settle. Avoid peak summer heat, as it can stress plants and make installation trickier.
Can I reuse old cardboard or newspaper as a barrier?
Cardboard and newspaper work great as a biodegradable barrier, but make sure they’re ink-free and layered 2-3 sheets thick for best results. Wet them down before covering with mulch or soil to prevent them from blowing away.
Will a barrier smother my vegetable plants if I plant too close?
Not if you plan ahead! Leave at least 6–12 inches of space between the barrier edge and your plants. For root crops (like carrots or potatoes), bury the barrier 6+ inches deep to prevent grass roots from sneaking in. Always cut slits in the barrier where you’ll plant.
How often do I need to check or replace the barrier?
Check your barrier every 2–4 weeks for gaps or signs of grass poking through. If you’re using organic materials (like cardboard), they’ll decompose over 6–12 months—replace them as needed. For landscape fabric, it can last 3–5 years if intact.
What if grass keeps growing through the barrier?
Grass is persistent! If you spot sprouts, pull them immediately—don’t let them seed. For stubborn patches, add a thick layer of mulch (straw, wood chips) or reapply the barrier in problem areas. A vinegar spray (1:1 ratio) can also help kill grass without harming vegetables.
Are there chemical-free alternatives to barriers?
Yes! Besides barriers, try these:
- Sheet mulching: Layer cardboard + compost + mulch to smother grass.
- Corn gluten: Apply in early spring to prevent grass seeds from germinating.
- Heavy mulch: Use 6+ inches of straw or leaves to block light.
Wrapping up and next steps
Keeping grass out of your vegetable garden doesn’t have to be a battle—just a few simple, chemical-free strategies can make all the difference! By using landscape fabric, mulch, or edging barriers, you’ll protect your plants while saving time and effort.
The key is consistency: check your barriers regularly and adjust as needed to keep weeds at bay.
You’ve got this! 🌱 Start with one section of your garden, implement your chosen method, and watch your veggies thrive without unwanted competition. Next up? Grab your tools and give your garden the fresh start it deserves! 🛠️✨