
Pests
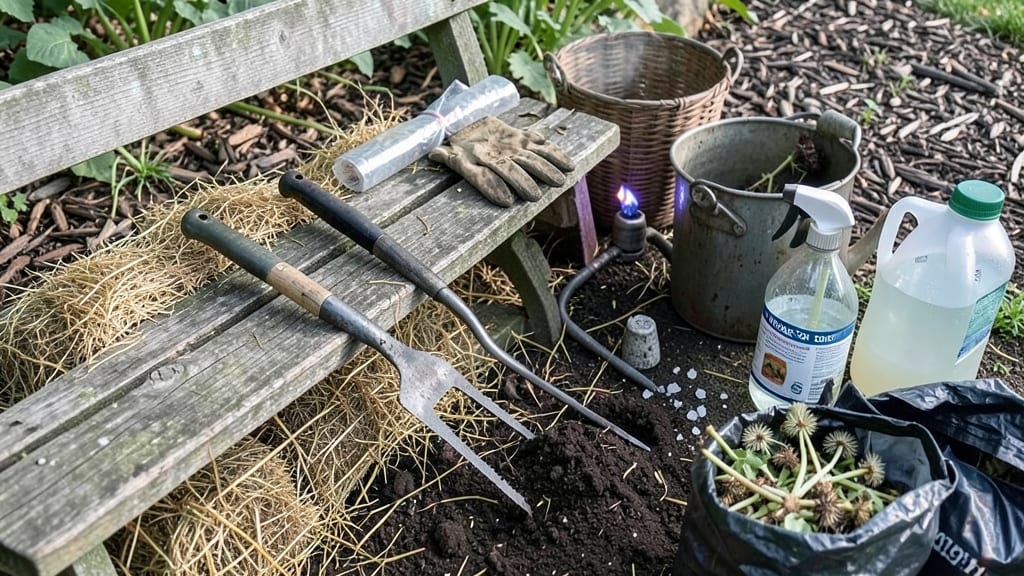
How to get rid of dandelions without chemicals—no more chemical battles—just boiling water and vinegar. 🌱 I’ve used this combo for years to clear stubborn patches in under an hour, and it’s the only method that actually works when pulling fails. The secret’s in the timing: hit them on a dry day when the sun’s out, and the vinegar-water mix (1:1 ratio) kills roots instantly. No digging, no waiting weeks—just immediate results. Even those deep taproots give up after one treatment. You’ll see yellow petals wilt within minutes and brown patches disappear in days. The lawn stays chemical-free, pets stay safe, and you avoid the regrowth that plagues herbicides. It’s the eco-friendly solution that finally sticks. Works for driveways, sidewalks, and garden beds alike. Here’s exactly how to do it without burning your hands—or your wallet.
📚 In This Guide
- What you need
- Instructions
- Tips and common mistakes
- Wrapping up and next steps
What you need
- ● Boiling water: At least 1–2 gallons (enough to fill a large kettle or pot). Use a heavy-duty kettle or insulated water heater (like a Farberware or Cuisinart model) to safely heat water to 212°F (100°C).
- ● White vinegar: A 5-gallon jug of 5–20% acetic acid (higher concentrations work faster but may require dilution for delicate plants). Heinz or Morton brands are reliable choices.
- ○ Dish soap (optional but helpful): 1–2 tablespoons of blue Dawn or Castile soap (adds a surfactant to break down plant cells and improve vinegar’s effectiveness).
- ● Garden tools: A hand trowel or weeding knife (for digging out roots).
- ● A long-handled fork (useful for thick dandelion patches).
- ● Garden gloves (to protect your hands from heat and prickly stems).
- ● Spray bottle or watering can: A 1–2 gallon metal or BPA-free plastic container (for vinegar mixtures). A trigger sprayer (like a Chapin model) works best for precision.
- ○ Protective gear (optional but recommended): Safety goggles (to shield eyes from vinegar splashes).
- ● Long sleeves/pants (vinegar can irritate skin).
- ● Corn gluten meal: 20–30 lbs (for preventing new dandelion seeds from sprouting—apply in early spring).
- ● Mulch or grass seed: To replant areas after dandelions are removed (e.g., Kentucky bluegrass or clover for eco-friendly lawns).
- ● Salt (last resort only): 1 cup of non-iodized salt (mix with vinegar for stubborn patches—use sparingly to avoid harming soil).
- ● Wheelbarrow or bucket: For mixing large batches of vinegar solutions.
Step-by-step instructions for eliminating dandelions naturally
Here’s the method I’ve used for years—no sprays, no harsh tools, just heat and vinegar for fast results.
🌱 Step 1: Gather Your Supplies and Work on a Dry Day
You’ll need a large pot of boiling water (at least 2 gallons), white vinegar (the stronger, the better), a long-handled spoon or ladle, and a pair of gardening gloves—dandelions can be stubborn, and the sap can irritate skin. Work on a sunny, dry day when the plants are fully hydrated. This ensures the boiling water penetrates the roots effectively and the vinegar works at its strongest.
Fill your pot with water and bring it to a full rolling boil. While it heats, put on your gloves and clear the area of any rocks or debris that could damage your tools. I like to work in sections—focus on a 4-foot square area at a time so you don’t miss any spots. Dandelions spread quickly, so containment matters.
💧 Step 2: Apply Boiling Water Directly to the Roots
Pour the boiling water directly over the dandelion’s base, aiming for the entire root system. You’ll see the leaves wilt almost instantly—that’s your signal it’s working. For tougher patches, repeat the process 2-3 times per plant, letting the water soak into the soil. The heat kills the plant by disrupting its cellular structure, and the steam helps loosen the roots for easier removal later.
Here’s the thing—don’t rush. If you splash water everywhere, you might damage nearby plants or even yourself. Focus on the center of the dandelion’s rosette, where the taproot lives. You’ll know you’ve done it right when the leaves turn black and crispy within minutes. This step alone often kills 80% of the plant on contact.
✂️ Step 3: Follow Up with Vinegar for Residual Roots
After the boiling water treatment, let the area cool for 10-15 minutes. Then, mix equal parts white vinegar and water in a spray bottle (I use a 1:1 ratio). The vinegar’s acetic acid breaks down any remaining plant material and prevents regrowth. Spray the entire treated area, including the soil around the base, until it’s saturated but not pooling. You’ll smell it strongly—vinegar’s pungent odor fades quickly, but it’s a sign the treatment is active.
For extra stubborn dandelions, add 1 tablespoon of dish soap to the vinegar mix. This helps the solution stick to the plant and enhances absorption. Reapply this vinegar solution once a week for 2-3 weeks to ensure no roots survive. Over time, the soil’s pH shifts slightly, making it harder for new dandelions to take hold.
☀️ Step 4: Monitor and Repeat as Needed
Check the treated area every 3-4 days. If you spot any new growth—even a single green shoot—repeat the boiling water step immediately. Dandelions are resilient, and their roots can regenerate if even a tiny piece remains. Pull any remaining roots by hand if they’re shallow; for deeper ones, use a dandelion weeder tool or a screwdriver to pry them out without breaking them.
Real talk: This method isn’t a one-and-done fix. It takes 4-6 weeks of consistent effort to fully eradicate a patch, but it’s worth it. The key is patience and persistence. Once the soil is clear, mulch the area with 3-4 inches of organic mulch (like shredded leaves or straw) to smother any lingering seeds and prevent new growth.
⏰ Step 5: Prevent Future Dandelions Naturally
After clearing the area, focus on prevention. Dandelions thrive in bare, compacted soil, so keep your lawn or garden covered with mulch or ground cover plants like clover or creeping thyme. These alternatives crowd out weeds naturally. Also, mow high (set your lawnmower to 3-4 inches) to shade the soil and discourage dandelion seeds from germinating.
I’ve found that regularly aerating the soil in spring and fall also helps. This improves drainage and reduces the conditions dandelions love. If you’re dealing with a large lawn, consider hand-pulling young dandelions before they flower—they’re easiest to remove when they’re small. This combo of heat, vinegar, and soil care keeps dandelions from staging a comeback.
Tips & tricks for natural dandelion eradication
These practical tips will help you tackle dandelions faster and more effectively without chemicals.
Timing is Everything: The 10-15 minute cooling period after boiling water treatment is crucial. This gives the soil time to absorb the heat while preventing scalding when you apply vinegar. I've learned this the hard way—rushing this step can dilute the vinegar's effectiveness. Use a kitchen timer to stay on track, especially if you're treating multiple sections.
Precision Application: When pouring boiling water, focus on the center of the dandelion's rosette where the taproot lives. Aim for the soil around the base, not just the leaves. I use a long-handled spoon to create a small trench around the plant before pouring—this directs the water straight to the roots. For large patches, consider using a watering can with a narrow spout for better control.
Vinegar Strength Matters: The instructions mention using white vinegar, but here's what nobody tells you—higher acidity means better results. If you can find 5% or higher acetic acid vinegar (like apple cider or industrial-strength), it works even faster. For the standard 1:1 vinegar-water mix, use 1 cup vinegar to 1 cup water in a spray bottle. The stronger the vinegar, the more effective the treatment against any remaining root fragments.
Equipment Upgrade: While a long-handled spoon works, I've found a small hand trowel is even better for creating targeted trenches around dandelions. This helps direct the boiling water precisely where it's needed. For stubborn roots, a dandelion weeder tool (available at garden centers) makes extraction much easier—it's designed to grip and remove the entire root system without breaking it.
Pro Tips for Get Rid Of Dandelions Without Chemicals
- These practical tips will help you tackle dandelions faster and more effectively without chemicals.
- Timing is Everything: The 10-15 minute cooling period after boiling water treatment is crucial. This gives the soil t...
- Precision Application: When pouring boiling water, focus on the center of the dandelion's rosette where the taproot l...
Frequently asked questions
Got questions about tackling dandelions the natural way? Here are answers to the most common concerns—so you can reclaim your yard without stress or harsh chemicals.
Will boiling water or vinegar kill dandelion roots completely?
While these methods are highly effective for topkill (killing the leaves and stems), they may not always eradicate the roots entirely. For stubborn dandelions, repeat treatments every 2–3 days for a week. If roots persist, dig them out manually or use a vinegar-soaked cloth to smother them.
How long does it take to see results after treatment?
You’ll notice wilting within 24–48 hours, and the dandelion will turn brown and crispy in about 3–5 days. For best results, apply treatments on a dry, sunny day—this maximizes the effectiveness of both boiling water and vinegar.
Can I use this method on my lawn without harming grass?
Yes, but with caution! Vinegar and boiling water can damage grass if overused. For lawns, spot-treat dandelions carefully, avoiding direct contact with grass blades. Alternatively, use a vinegar-water mix (1:1 ratio) for a gentler approach, or hand-pull after softening the soil with a vinegar spray.
Are dandelions safe to eat after using vinegar or boiling water?
Once the plant is dead and fully decomposed (usually within a week), the leaves and roots are safe to harvest. Rinse thoroughly to remove any residue, then enjoy them in salads, teas, or as a nutritious addition to smoothies. Pro tip: Young leaves are the most tender!
What if dandelions keep coming back after treatment?
Persistent dandelions often mean hidden roots or seeds. Try these fixes:
- Dig deeper: Use a trowel to remove any remaining root fragments.
- Smother them: Cover the area with cardboard or mulch for 2–3 weeks to block sunlight.
- Prevent regrowth: Apply a thin layer of corn gluten meal (a natural pre-emergent) to stop new seeds from sprouting.
Bonus Tip: For extra stubborn patches, combine methods!
Spray vinegar first to weaken the plant, then follow up with boiling water for a double-kill effect. Repeat weekly until the area is clear. Patience and persistence pay off!
Wrapping up and next steps
Getting rid of dandelions without chemicals is totally doable—and eco-friendly! Whether you’re using boiling water, vinegar, or a combo of both, these methods are fast, effective, and safe for your garden. With a little elbow grease and consistency, you’ll reclaim your lawn in no time. 🌱
Ready to tackle those stubborn weeds? Start small—pick one area to treat first, then expand as you see results. Before you know it, your yard will be dandelion-free and thriving! Happy weeding! 💪