
Tools
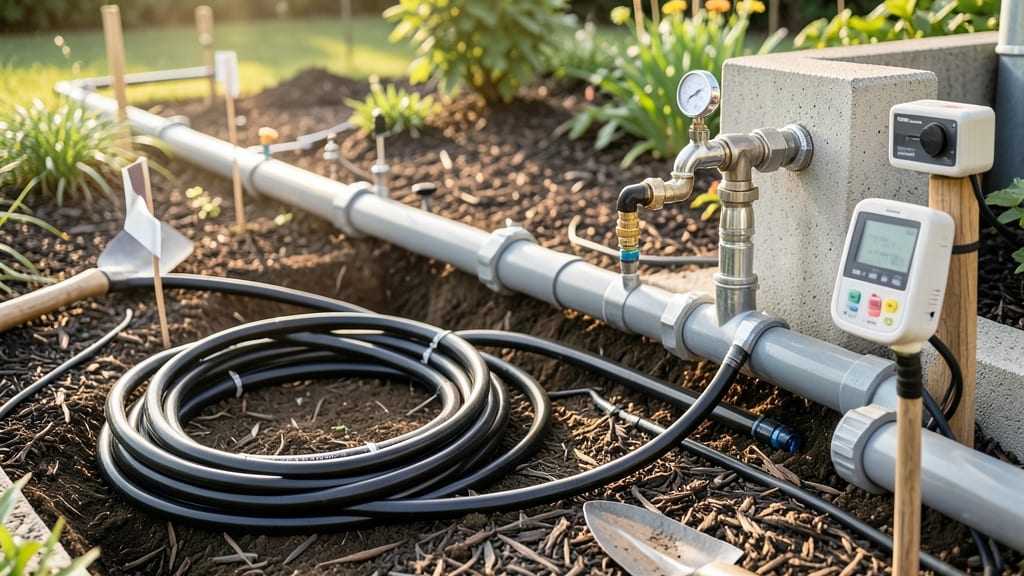
Precision watering transforms your garden from guesswork to science. 💧 I’ve installed three irrigation systems—each time saving hours of watering and cutting my water bill by nearly 30%. The key? Matching the system to your plants and space, not just buying what’s cheapest.
Drip systems work best for vegetables and flowers, delivering water right to roots without waste. Sprinklers suit lawns and large areas, while soaker hoses are perfect for container gardens. You’ll need basic tools—a shovel, tubing, emitters, and a timer—and 2-4 hours to set it up for a small yard.
Once installed, your plants stay consistently moist, roots grow deeper, and you’ll spend less time dragging hoses. My tomatoes now thrive without wilting, and my morning watering routine is just a button press. For troubleshooting, start with a simple layout—test one zone at a time.
Common mistakes include overcomplicating the setup or ignoring pressure needs. Let’s get your system running smoothly!
📚 In This Guide
- What you need
- Instructions
- Tips and common mistakes
- Wrapping up and next steps
What you need
- ● Main Components: Backflow preventer (1, required by code in most areas)
- ● Pressure regulator (1, adjustable to 30-50 PSI)
- ● Timer/controller (1, weather-resistant, programmable)
- ● PVC or poly tubing (50–500 ft, ½" or ¾" diameter, depending on system size)
- ● Polyethylene mainline tubing (100–1,000 ft, ½" or ¾" for water distribution)
- ● Drip emitters or sprinkler heads (quantity based on plant spacing, e.g., 1 emitter per 12–18" for drip systems)
- ● Fittings (adapters, elbows, tees, end caps—mismatch sizes to avoid leaks!)
- ● Filter (1, 180-micron mesh to protect emitters)
- ● Tools: Hacksaw or PVC cutter (1)
- ● Pipe wrench or adjustable wrench (1)
- ● Teflon tape (1 roll, for threaded connections)
- ● Shovel or trenching tool (1, for burying lines)
- ● Measuring tape (1, precision matters!)
- ● Drill with spade bit (for stakes, if needed)
- ● Wireless rain/shutoff sensor (1, auto-pauses watering in rain)
- ● Fertilizer injector (1, for drip systems)
- ● UV-stabilized tubing (if exposed to sunlight)
- ● Label markers (for identifying zones)
- ● Test kit (to check water pressure)
Step-by-step instructions for installing a smart irrigation system
Here's how to set up a system that saves water while keeping every plant thriving—no guesswork involved.
🪴 Step 1: Plan Your Layout and Mark Water Zones
Grab a sketchpad or use graph paper to map your garden beds, noting where each plant type lives. I like to group plants with similar water needs together—succulents and herbs need less while tomatoes and peppers demand more. Use a spray paint marker to outline each zone on the ground, keeping them 4-6 feet wide for even coverage.
Measure the distance between your water source (hose bib or main line) and each zone. You'll need to run ½-inch poly tubing from the source to each zone, with ¼-inch tubing for emitters. Mark the path of your tubing with stakes so you don't accidentally dig into it later. Pro tip: Run tubing along property lines or edges of paths to keep it hidden but accessible.
☀️ Step 2: Install the Backbone and Connect to Water Source
Lay down the ½-inch poly tubing along your marked path, securing it with U-clips every 2 feet to prevent kinking. Connect one end to your water source using a ¼-inch male adapter and a shutoff valve—this lets you winterize the system easily. I always install a pressure regulator set to 30-40 PSI to prevent emitter damage from high pressure.
For gardens larger than 20 feet, install a backflow preventer near the water source to comply with local codes and protect your plumbing. Test your main line by turning on the water and checking for leaks or weak pressure. If pressure drops significantly, you'll need to adjust the regulator or increase tubing size.
💧 Step 3: Install Emitters and Adjust Flow Rates
Cut the ¼-inch poly tubing to match the spacing between plants in each zone (typically 12-18 inches apart). Use a tubing cutter for clean ends, then attach drip emitters with barb connectors. For plants needing ½ gallon per hour, use standard emitters; for thirsty plants like corn or cucumbers, opt for 1-gallon-per-hour emitters.
Turn on the system and watch each emitter for 2-3 minutes. Adjust flow by turning the emitter's tiny screw clockwise to reduce output or counterclockwise to increase. You're aiming for a slow, steady drip—not a stream. For containers, use spike emitters pushed directly into the soil to avoid clogs from debris.
⏰ Step 4: Set Up a Timer and Test the Full Cycle
Install the timer near your water source, programming it to run 2-3 times per week for 15-30 minutes per session (adjust based on soil type—sandy soil needs shorter runs). For clay soil, I set mine to 30 minutes every other day to prevent runoff. Place the timer in a shaded spot to protect it from extreme temperatures.
Run a full test cycle, checking for even saturation in each zone. Walk through your garden after watering and look for dry spots or puddles. If you see uneven coverage, move emitters closer together or add a micro-sprinkler for large areas like lawns. Always water in the early morning to reduce evaporation and fungal risks.
✂️ Step 5: Winterize Before Frost Arrives
Before temperatures drop below 32°F, drain all water from the system by turning off the main valve and opening each emitter. I like to blow out the lines with an air compressor to remove residual water, then disconnect tubing from the water source. Store emitters and connectors in a dry place, and wrap the main tubing in bubble wrap to protect it from freezing.
For year-round use in mild climates, install a frost-free sillcock and use polyethylene glycol (PG) in emitters to prevent freezing. Always label your system with a diagram showing tubing paths and valve locations—next spring, you'll thank yourself for not having to retrace everything from scratch.
Tips & tricks for precision watering systems
These simple strategies will help you build a system that works flawlessly for years—without the headaches.
Layout Planning: Before digging, walk your garden with a measuring tape and mark potential zone boundaries with stakes and flags. This lets you visualize how water will flow without wasting tubing. I always sketch my layout to scale first—it saves time and prevents costly mistakes when you're actually installing.
Tubing Installation: When burying your ¼-inch poly tubing, use a sharp spade to create clean trenches—no jagged edges that could puncture the tubing. Leave the valves accessible at ground level (they need occasional adjustments), but bury the main line 4-6 inches deep to protect it from freezing and accidental damage. I like to lay a thin layer of sand in the trench first to cushion the tubing.
Emitter Placement: For the 12-24 inch spacing between emitters, remember that shallow-rooted plants like lettuce need closer spacing (12 inches) while deep-rooted plants like tomatoes can handle wider spacing (24 inches). Bury emitters 1-2 inches deep—this prevents evaporation and ensures water reaches the roots. I always point the emitter outlet toward the plant's root zone for maximum efficiency.
Testing and Troubleshooting: After installing, test each zone for 10-15 minutes to check for leaks or uneven flow. If you notice water pooling instead of soaking in, adjust emitter placement or bury it slightly deeper. For clogged emitters, I keep a small bottle of vinegar on hand—soak the emitter in vinegar for 10 minutes to dissolve mineral buildup before reinstalling.
Pro Tips for Install A Irrigation System
- These simple strategies will help you build a system that works flawlessly for years—without the headaches.
- Layout Planning: Before digging, walk your garden with a measuring tape and mark potential zone boundaries with stakes and flags.
- Tubing Installation: When burying your ¼-inch poly tubing, use a sharp spade to create clean trenches—no jagged edges that could puncture the tubing.
Frequently asked questions
Got questions about installing an irrigation system? Here are some of the most common ones—plus straightforward answers to help you get started with confidence!
What’s the best time of year to install an irrigation system?
The ideal time is early spring or fall when temperatures are mild, and plants are actively growing but not under stress. Avoid extreme heat or cold—soil is easier to work with, and you won’t risk damaging pipes or components. If you’re in a warm climate, winter installation can work too, just avoid freezing conditions!
Do I need a professional, or can I DIY my irrigation system?
Many homeowners successfully install basic irrigation systems (like drip or sprinkler systems) as a DIY project with the right tools and research. However, for complex landscapes, large properties, or smart systems, hiring a pro ensures precision and avoids costly mistakes. Start small—test a section first if you’re new!
How do I troubleshoot a leaky irrigation system?
First, turn off the water and inspect for obvious issues like loose fittings or cracked pipes. Use a pressure gauge to check for drops in PSI—low readings may indicate leaks. For buried lines, follow the pipes’ path with a listening stick or dig small test holes. If you’re unsure, call a local irrigation specialist to avoid water waste or property damage.
Can I use an irrigation system for indoor plants or just outdoor gardens?
Irrigation systems are primarily designed for outdoor use, but you can adapt them for indoor plants with self-watering pots or DIY drip setups. For indoor use, avoid pressure-based systems (like sprinklers) and opt for low-pressure drip lines or automated timers. Just ensure proper drainage to prevent root rot!
What’s the average cost to install an irrigation system?
Costs vary widely: A basic DIY drip system for a small garden might run $50–$200, while a professional-grade sprinkler system for a large lawn can cost $1,500–$5,000+. Factors like pipe length, controller type, and labor (if applicable) add up. Pro tip: Compare quotes and prioritize quality materials to save on long-term repairs!
Wrapping up and next steps
Installing an irrigation system is a game-changer for your garden—saving time, water, and ensuring your plants thrive with precision. Whether you’ve chosen drip, sprinkler, or smart tech, the key is planning, patience, and a little elbow grease. You’ve got this!
Now that you’re ready to roll up your sleeves, take the next step: sketch out your layout, gather your tools, and start with one zone at a time. Before you know it, you’ll be sipping lemonade while your garden does the work for you. Happy watering! 🌱💦