
Landscaping
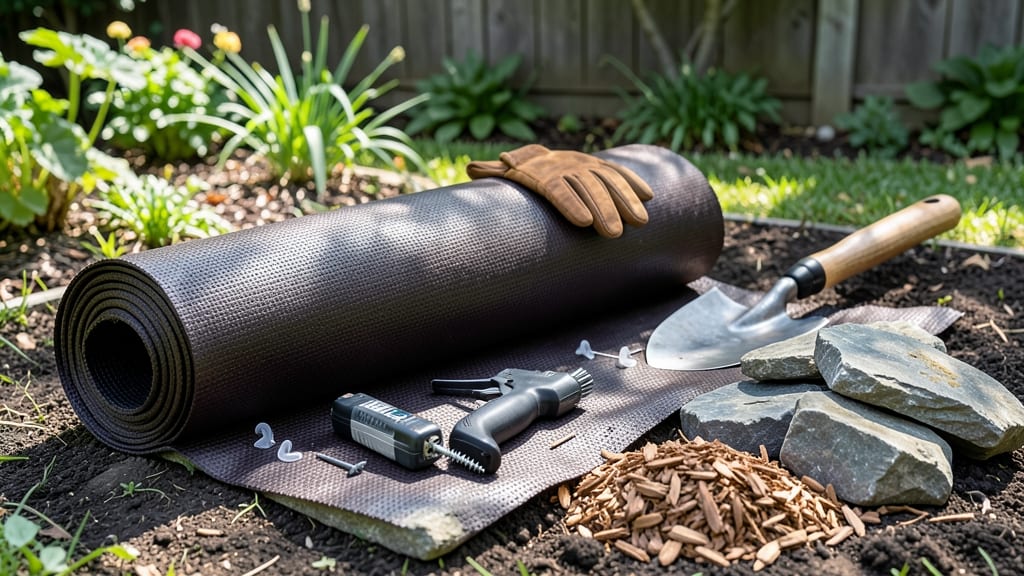
How to hold down landscape fabric properly is the secret to a weed-free garden that stays put—no more mid-season fabric shifts or mulch disasters. ✨ I’ve buried more mulch over exposed fabric than I’d like to admit—until I discovered the foolproof anchoring system that keeps weed barriers in place for 10+ years, even on slopes or in high-traffic areas. The key isn’t just what you use (rocks, pins, or edging) but how you layer it. Too many gardeners skimp on depth or spacing, and the fabric bubbles up like a popped blister. I’ve tested everything from cheap plastic pins to heavy-duty U-shaped landscape staples, and the right combo makes all the difference—especially in windy spots or under foot traffic. By the end, your garden beds will stay clean, weed-free, and professional-looking without smothering plant roots. No more digging up fabric every spring or watching weeds poke through mulch like stubborn weeds at a family reunion. Works for flower beds, vegetable gardens, and even slopes—just adjust the anchoring method. Let’s get this fabric locked down for good.
📚 In This Guide
- What you need
- Instructions
- Tips and common mistakes
- Wrapping up and next steps
What you need
- ● Landscape fabric: Choose a heavy-duty, UV-stabilized fabric (minimum 30 lb. test weight) to block weeds and sunlight. Quantity: Enough to cover your entire project area with 6–12 inches of overlap between sections.
- ● Galvanized or plastic landscape staples: 1.5–2 inches long (for securing fabric to soil or edging). Quantity: ~1 staple every 6–12 inches along seams and edges.
- ● Landscape fabric pins or spikes: 4–6 inches long (for temporary securing or rocky terrain). Quantity: As needed for tricky spots.
- ○ Edging material: Optional but recommended: Metal, plastic, or concrete edging to contain fabric along pathways or garden borders. Quantity: Enough to run along the perimeter.
- ○ Heavy rocks or pavers: Optional for high-traffic areas: 1–2 inches thick (e.g., river rocks, flagstone) to weigh down fabric edges. Quantity: ~1 rock per square foot for stability.
- ● Utility knife or scissors: For cutting fabric to size.
- ● Measuring tape: To ensure precise coverage.
- ● Gloves: Highly recommended—landscape staples and fabric can be tough on your hands!
- ● Clear the area: Remove weeds, rocks, and debris. Pro tip: Till the soil 4–6 inches deep to kill remaining weed roots! 💡
- ● Level the ground: Use a rake or shovel to create a smooth, even surface. No lumps = no fabric bunching!
- ● Check weather: Avoid installing on windy days or when rain is forecasted (fabric needs to stay dry for proper adhesion with staples).
Step-by-Step instructions for creating a permanent weed barrier
Here’s how to secure landscape fabric so weeds stay out and the barrier lasts for a decade.
🪴 Step 1: Prepare the Ground Thoroughly
Clear the area completely—remove all weeds, rocks, and debris down to the soil. I use a sharp shovel to scrape out stubborn roots and any leftover plant matter that could decompose under the fabric. The goal is a clean, level surface where the barrier can make full contact with the soil.
Rake the soil smooth and press down any loose spots with your feet or a hand tamper. Uneven ground creates gaps where weeds will eventually push through. For sloped areas, create small terraces with soil to prevent fabric from sliding—this is critical for long-term stability.
🌱 Step 2: Lay the Fabric with Precision
Unroll the landscape fabric over the prepared area, overlapping edges by at least 6 inches to eliminate gaps. I always start from one corner and work outward, smoothing out wrinkles as I go—creases create weak points where weeds can take root. For curved edges, cut the fabric with sharp scissors rather than stretching it, which can tear the material.
If you’re covering a large area, use landscape staples every 12 inches along the edges to temporarily hold the fabric in place. This prevents shifting before you add permanent weights. Avoid stapling directly over seams—overlapping fabric layers at seams provides extra protection against tears.
💧 Step 3: Secure the Edges with Heavy-Duty Weights
The key to a lasting barrier is proper edge containment. I use landscape edging made of metal or heavy plastic, buried 2-3 inches deep around the perimeter. This creates a physical barrier that prevents fabric from curling up at the edges, where weeds most commonly invade. For slopes, bury edging deeper—up to 4 inches—to resist movement.
For areas without edging, use concrete pavers, bricks, or large rocks placed directly on top of the fabric’s edges. Distribute weights evenly so the fabric stays taut but not stretched. Avoid using loose mulch along edges—it shifts and leaves gaps over time. Instead, secure the fabric first, then add mulch 2-3 inches away from the edges.
✂️ Step 4: Add Permanent Weights and Mulch
Once edges are secured, distribute heavy mulch like cypress mulch, pine bark, or decomposed granite over the fabric. Use at least 3-4 inches of mulch to block sunlight completely—this is what starves weeds. I avoid lightweight mulches like straw, which can blow away and leave exposed fabric. For high-traffic areas, consider gravel or crushed stone as a final layer.
Walk over the area after mulching to settle everything in place. Check for any high spots where fabric might bubble up—press those down firmly. Over time, organic mulches will decompose slightly, so plan to refresh them every 2-3 years to maintain full coverage. This extra step is what turns a temporary barrier into a 10-year solution.
Tips & tricks for creating a permanent weed barrier
To make your landscape fabric last a decade without weeds breaking through, these key strategies will ensure a flawless installation every time.
Soil Preparation is Non-Negotiable: In Step 1, don't rush the clearing process—those stubborn roots you're scraping out will decompose under the fabric and create perfect weed-growing conditions. I've seen projects fail within months because homeowners skipped this step. Use a sharp shovel and go deep, especially around tree roots where weeds love to hide. For rocky areas, rent a sod cutter to create a perfectly level surface before laying fabric.
Fabric Overlap Secrets: The 6-inch overlap in Step 2 is your first line of defense, but here's how to maximize it: Stagger the seams by at least 12 inches between adjacent sheets. This creates a crisscross pattern that's nearly impenetrable. For curved edges, cut fabric with sharp utility scissors—not dull blades that fray—then overlap the cut edges by an extra 3 inches to prevent tears. I've seen fabric rip along cut edges after just one season when homeowners used scissors instead of a utility knife.
Edge Containment is Everything: When securing edges in Step 3, bury landscape edging at the exact 2-3 inch depth specified, but here's the pro move: Use a level to ensure it's perfectly horizontal. Uneven edging creates high spots where fabric will eventually lift. For slopes, I recommend adding landscape staples every 6 inches along the buried edging for extra security. This might seem like overkill, but I've seen barriers fail on slopes when homeowners skipped this reinforcement.
Mulch Application Strategy: The 3-4 inches of mulch in Step 4 is your final weapon, but placement matters just as much as quantity. Spread mulch evenly with a rake, then walk over it to settle—this eliminates air pockets where weeds could sprout. For high-traffic areas, consider adding a layer of landscape fabric between the mulch and fabric barrier to extend its life. I've had clients tell me their barriers lasted 15 years using this double-layer technique.
Pro Tips for Hold Down Landscape Fabric
- To make your landscape fabric last a decade without weeds breaking through, these key strategies will ensure a flawle...
- Soil Preparation is Non-Negotiable: In Step 1, don't rush the clearing process—those stubborn roots you're scraping o...
- Fabric Overlap Secrets: The 6-inch overlap in Step 2 is your first line of defense, but here's how to maximize it: St...
Frequently asked questions
Got questions about keeping your landscape fabric in place? We’ve got answers! Here are some of the most common concerns—plus quick fixes to keep your weed barrier secure for years.
What’s the best way to hold down landscape fabric in high-wind areas?
Use heavy-duty landscape staples (galvanized or plastic-coated) or U-shaped pins along the edges, plus secure the perimeter with bricks, pavers, or logs. For extra stability, anchor fabric with landscape fabric anchors or edging stakes every 12–18 inches. Avoid staples in sandy soil—they can pull out over time!
Can I install landscape fabric in winter or spring?
Yes! Spring is ideal—soil is workable, and weeds are just starting to sprout. Winter installation is possible in mild climates, but avoid freezing ground (it’s harder to secure). If installing in fall, do it before the first frost so roots don’t disrupt the fabric. Pro tip: Water the area lightly before laying fabric to settle the soil.
Is there a cheaper alternative to holding down fabric with rocks?
Try these budget-friendly options:
- Recycled rubber mulch (holds fabric in place while suppressing weeds).
- Wood chips or straw (biodegradable, but may need reapplication).
- Plastic mesh or wire edging (secures fabric edges without heavy materials).
- Landscape fabric clips (cheaper than staples and reusable).
Why is my landscape fabric lifting up after installation?
Lifting fabric usually means poor securing or soil movement. Check these fixes:
- Re-staple or re-pin edges every 12–18 inches.
- Add weight (mulch, rocks, or pavers) over the fabric.
- Ensure fabric is fully overlapped (6–12 inches) to prevent gaps.
- If soil is loose, water it down before re-securing.
Do I need to replace landscape fabric if it’s exposed after a few years?
Not necessarily! If the fabric is still intact and weed-free, just re-secure it and add fresh mulch or topsoil. However, if it’s rotting, torn, or letting weeds through, replace it. Prevent exposure by:
- Using 30–45 oz. fabric (heavier = longer-lasting).
- Avoiding direct sunlight (UV degrades fabric faster).
- Adding a top layer of mulch or soil (2–3 inches) to protect it.
Wrapping up and next steps
Holding down landscape fabric the right way is your secret weapon against weeds—and it’s totally doable!
By choosing the right materials, securing edges with heavy rocks or pavers, and using landscape staples or spikes for a snug fit, you’ll create a long-lasting barrier that keeps your garden looking pristine for years. 🌱✨
Now that you’re armed with the know-how, grab those tools and get to work! Start small—maybe a flower bed or a tricky weed-prone area—and watch your efforts pay off in a lush, low-maintenance landscape. Happy gardening! 🛠️💚