
How To
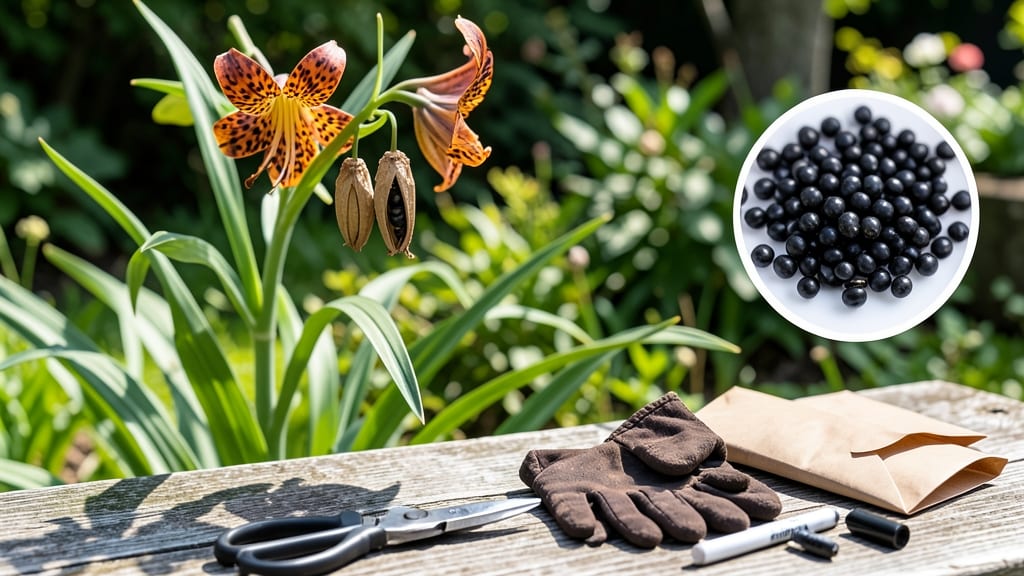
Harvesting tiger lily 🌸 seeds might seem like a hidden gardening secret, but mastering this skill could mean free, vibrant blooms for years to come. The key lies in timing—waiting until those seed pods turn brown and begin to split naturally, usually between August and October in most regions.
Why bother with seeds when you can just buy new bulbs? Because nothing beats the satisfaction of growing your own plants from scratch.
Plus, tiger lily seeds are easy to collect once you know what to look for—those dried, papery pods are nature’s way of telling you it’s time to harvest.
In this guide, I’ll walk you through the exact steps to identify mature seeds, gently extract them without damage, and store them properly for planting next spring. You’ll also learn how to avoid common pitfalls like moldy seeds or premature drops, ensuring a successful harvest every time.
Whether you’re a seasoned gardener or just starting out, these tips will help you turn your tiger lilies into a self-sustaining garden feature. Let’s get those seeds growing!


When and how to identify mature tiger lily seeds for harvesting
Harvesting tiger lily seeds at the right time ensures high germination rates and healthy new plants. The key is watching for visual maturity cues that signal your seeds are ready. Start by observing the seed pods that form after the vibrant orange blooms wither and drop.
In late summer—typically August to October—the pods will transition from green to brown and papery. This color change indicates the seeds inside have fully matured. Wait until the pods begin to split open naturally—this usually happens when about 60-70% of the pods show signs of cracking.
If you harvest too early, the seeds will be soft and underdeveloped, while waiting too long risks them scattering or attracting pests. A good rule of thumb is to collect seeds when the leaves start yellowing and the plant prepares for dormancy, but before the first frost hits.
Here’s what to look for in a ready-to-harvest seed pod:
One common mistake is harvesting seeds when the pods are still half-green. These seeds often fail to germinate because they’re not fully developed. To avoid this, resist the urge to collect pods until they’re completely dry and brown—this usually takes 4-6 weeks after the flowers fade.
Another tip: Collect seeds on a dry, sunny day to prevent moisture-related issues. If you notice mold or discoloration on the pods, it’s a sign of overripe seeds or fungal infection—discard these immediately. Always wear gloves when handling seed pods, as some tiger lily varieties contain mild irritants.
Timing is everything when harvesting tiger lily seeds. If you miss the window, the seeds may scatter or become contaminated. By following these cues, you’ll ensure a high-quality seed harvest ready for planting next spring.
Once you’ve identified mature pods, the next step is gentle extraction. Avoid shaking the pods over your garden—this can spread seeds unpredictably. Instead, use a paper bag or envelope to collect them carefully.
Pro tip: Label your seed collection with the harvest date and variety (if known). This helps track germination rates and ensures you’re planting the freshest seeds possible.
Proper techniques for collecting and storing tiger lily seeds
Once you’ve identified your mature tiger lily seed pods, the next step is harvesting them with care. Use clean, sharp pruning shears or simply pinch the pods off by hand to avoid damaging the plant.
Always wear gloves—tiger lily sap can irritate skin, and the pods may harbor small insects. Collect pods when they’re fully brown and dry but still intact, ideally in the morning when humidity is lower to prevent mold growth.
After harvesting, gently tap the pods on a clean surface to release any seeds already inside. Most seeds will stay attached to the pod, but a few may scatter—this is normal. Store the pods in a paper bag (not plastic) in a dry, well-ventilated area.
Avoid direct sunlight or damp spaces, as these can cause premature germination or mold. A cool basement or garage works well for short-term storage.
Indoor vs. Outdoor Drying: Pros and Cons
| Method | Pros | Cons |
|---|---|---|
| Indoor Drying | Controlled environment, no pests, faster drying | Requires space, risk of humidity if not ventilated |
| Outdoor Drying | Natural airflow, no equipment needed | Exposed to pests, slower process, weather-dependent |
For long-term storage, wait until the pods are completely dry and brittle before opening them. Remove any remaining seeds by hand and store them in an airtight container with a silica gel packet to absorb moisture.
Label the container with the harvest date—tiger lily seeds remain viable for 2-3 years if stored properly in a cool, dark place like a refrigerator.
When ready to plant, soak the seeds in lukewarm water for 12-24 hours to soften the outer shell. This mimics natural rainfall and improves germination rates. Plant them ½ inch deep in well-draining soil, keeping the soil consistently moist until sprouts appear.
Avoid transplanting seedlings until they’ve developed 2-3 true leaves and are at least 3 inches tall.
If you notice any discolored or mushy seeds during storage, discard them immediately—they’re likely moldy and won’t germinate. Always inspect your seeds before planting to ensure you’re starting with healthy stock.
With patience and the right techniques, your harvested seeds can produce vigorous new tiger lilies in as little as 1-2 years.
Remember, the key to success lies in timing and patience. Rushing the process can lead to poor germination, while proper drying and storage ensure you’ll have a steady supply of seeds for future gardens. Happy harvesting! 🌾