
How To
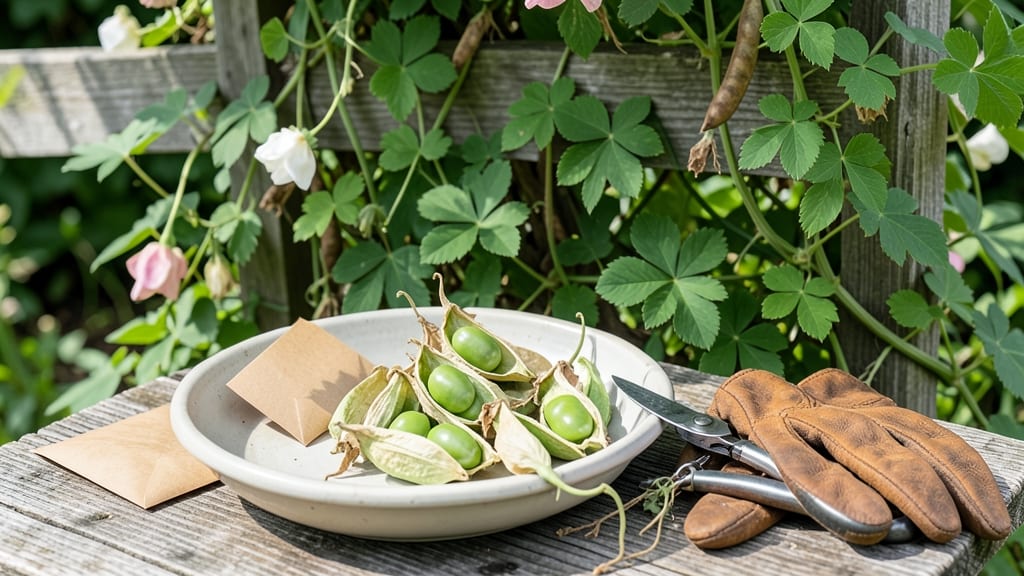
Harvesting sweet pea seeds 🌸 might seem like a small task, but getting it right is the difference between a thriving garden next spring and wasted effort. These delicate climbers pack a big punch—when you save their seeds properly, you’re essentially securing free, homegrown blooms for years to come.
The key to success lies in timing: harvest too soon, and your seeds won’t sprout; wait too long, and they’ll scatter or spoil. I’ll walk you through exactly when to pluck those pods—typically between June and August in Zone 6a—and how to spot the perfect moment when they’re ready.
No more guesswork, just reliable results.
Once you’ve mastered the art of identifying ripe pods, the next challenge is drying and storing them correctly. A little patience here ensures your seeds stay viable until planting season rolls around again.
Let’s break down the step-by-step process so you can avoid common pitfalls and set yourself up for a garden full of vibrant sweet peas.
Whether you’re a seasoned gardener or just starting out, these tricks will transform your sweet pea harvest from a seasonal delight into a year-round resource. Ready to turn those dried pods into next year’s blooms? Let’s get started.


When and how to identify perfectly ripened sweet pea seed pods
Sweet peas produce their seeds in pods that undergo dramatic changes as they mature. The key to successful seed harvesting lies in recognizing these visual cues and acting at the perfect moment.
If you harvest too early, your seeds won’t be viable—if you wait too long, they may scatter or attract pests. Let’s break down exactly what to look for in your sweet pea pods.
First, focus on the pod color. When pods are young, they’re bright green and firm to the touch. As they mature, they gradually shift to a tan or brown hue. This color change signals that the seeds inside are fully developed and ready for harvest.
In cooler climates, this transition might take 8-10 weeks after flowering, while warmer regions may see it in just 6-8 weeks.
Next, give the pods a gentle shake test. Mature pods will rattle when shaken, indicating dry seeds inside. If they feel soft or pliable, they’re not ready yet. This rattling sound is your green light to harvest—it means the seeds are dry enough to store without molding.
Pay close attention to this cue, as it’s the most reliable indicator of readiness.
You’ll also notice the pod texture becomes crisp and slightly brittle when fully mature. Press your fingernail into the pod—if it indents easily, it’s still too moist.
A mature pod should resist slightly before snapping cleanly. This crispness ensures the seeds won’t stick together during drying, giving you cleaner, easier-to-handle seeds for storage.
Here’s a seasonal tip: In regions with humid summers, pods may dry unevenly. Harvest them when they’re 70-80% dry (still slightly green at the tips) and finish drying indoors on a paper towel.
In dry climates, pods can fully mature on the vine, so monitor them daily during peak harvest season (June-August in most zones).
One common mistake is harvesting pods that have turned completely black or are splitting open. These are overripe and may have shattered seeds or attracted pests like mice. Always harvest when pods are brown but still intact—this ensures the highest germination rates for next year’s garden.
| Stage | Pod Color | Texture | Rattle Test | Harvest Action |
|---|---|---|---|---|
| Young Pod | Bright Green | Firm | No sound | Leave on plant |
| Mature (Ready) | Tan/Brown | Crisp, brittle | Rattles loudly | Harvest immediately |
| Overripe | Black or splitting | Soft, mushy | No sound (seeds scattered) | Discard or salvage seeds |
🌱 Pro Tip: Harvest pods in the morning when humidity is lowest to prevent mold during drying.
Timing your harvest is also climate-dependent. In cooler zones (USDA 3-5), pods may take longer to mature, so start checking in late July. In warmer zones (USDA 7-10), pods might be ready as early as June.
Always prioritize dry, sunny days for harvesting to avoid moisture-related issues during the drying process.
Finally, don’t overlook the seed visibility through the pod’s translucent skin. When seeds are fully formed, you’ll see them clearly inside. If they’re small or pale, the pod isn’t ready. This visual check is especially useful for dark-colored pods, where color changes might be harder to spot.
By mastering these identification cues, you’ll ensure your sweet pea seeds are high-quality and ready for long-term storage. Next, we’ll cover the harvesting and drying process to keep your seeds viable until planting season. 🌿
When and how to identify perfectly ripened sweet pea seed pods
Harvesting sweet pea seeds at the right moment means the difference between viable seeds and wasted effort. The key is watching for three critical signs: pod color, texture, and seed visibility. Start checking pods 8-10 weeks after planting, when flowers begin to fade and pods form.
First, look for color changes—ripe pods shift from vibrant green to a dry, papery brown. This transition signals the seeds inside have fully matured. In cooler climates, this may take longer, so don’t rush the process. Overripe pods can split open, scattering seeds prematurely.
Next, give pods a gentle shake. If they rattle loudly with seeds inside, they’re ready. This "rattling test" is foolproof—unripe pods stay silent. Also, press lightly: ripe pods feel crisp and brittle, while unripe ones stay firm and green.
Here’s how to spot perfectly ripe pods at a glance:
Timing matters too—harvest pods on a dry, sunny morning to prevent moisture from causing mold. If you miss the window, pods may split open naturally, but you can still collect seeds from the ground. Just avoid using seeds from pods that fell due to pests or disease.
Pro tip: Label pods by variety and date to track germination rates. Some sweet peas, like 'Cupani' or 'Painted Lady', produce larger seeds that store better than smaller varieties. Always prioritize pods from the healthiest plants for the best results.
Once you’ve identified ripe pods, act quickly—seeds can lose viability within 24-48 hours of pod opening. The next step? Gently harvest and dry them properly to preserve that hard-earned potential for next year’s garden. 🌸