
Picking
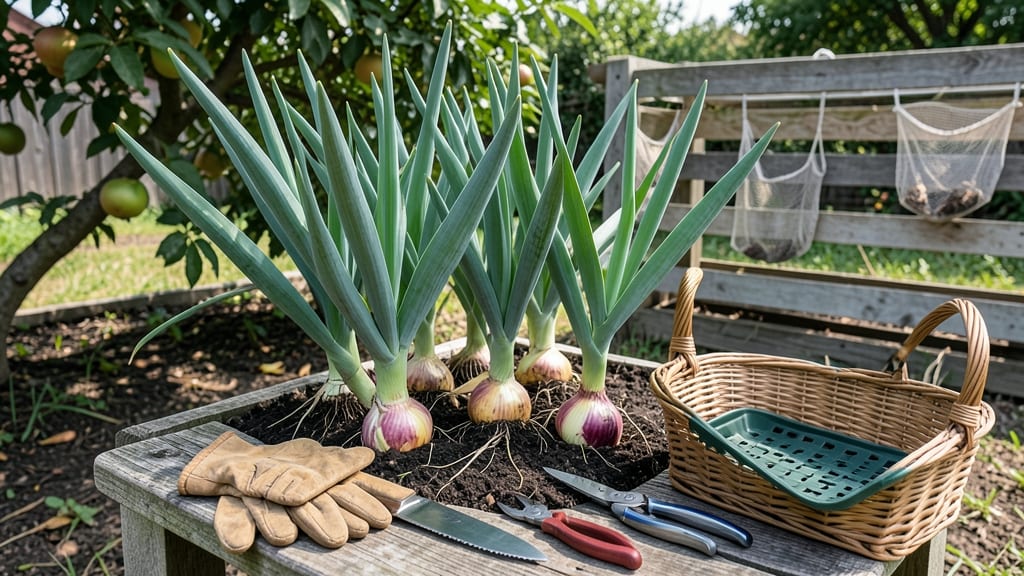
How to harvest onions at home—it’s all about timing the tops to turn a dramatic yellow and flop like nature’s harvest bell. ✨ The twist-and-pull method ensures dry, storable bulbs that last months in a cool, dark spot. I’ve harvested hundreds this way, and the difference between fresh-pulled and store-bought is night and day.
Timing is everything: wait until 60-70% of tops brown before pulling, but don’t let them turn completely papery. Gently twist the base to loosen soil, then tug—resistance means the bulb isn’t ready. For longer storage, cure them in a dry, shaded spot for 1-2 weeks before braiding or hanging.
You’ll end up with plump, papery-skinned onions that stay crisp through winter. The key is patience—rushing leads to soft spots or sprouting. Even in humid climates, proper curing prevents rot, and the flavor? Richer than anything from the grocery store.
This method works for short-day varieties (like Texas Sweet) and long-day types (like Yellow Globe), though storage life varies. For beginners, focus on drying time—it’s the secret to perfect harvests every season.
📚 In This Guide
- What you need
- Instructions
- Tips and common mistakes
- Wrapping up and next steps
What you need
- ● Garden shears or pruning shears – A sharp pair (like Felco F-2 or Corona brand) to trim tops cleanly.
- ○ Gloves (optional but recommended) – Heavy-duty gardening gloves (e.g., Gloves USA or Workrite) to protect hands from sharp edges and soil.
- ● Garden twine or rubber bands – A small roll (~50 ft) to loosely tie onion tops for drying.
- ● Drying rack or mesh screen – A sturdy, elevated surface (like a plastic drying rack or hardware cloth) to allow airflow.
- ● Sharp knife or pruner – For trimming roots if needed (e.g., a X-Acto knife for precision).
- ● Bucket or basket – A large, shallow container (10+ gallons) to collect harvested onions.
- ● Sunny, dry location – A spot with 60–80°F (15–27°C) temps and low humidity (e.g., a garage, porch, or shed with ventilation).
- ● Onion harvester tool – A specialized fork-like tool (e.g., Garden Weasel) for lifting bulbs gently.
- ● Food-safe spray bottle – To lightly mist onions if humidity is too low (50% or below).
- ● Labeling tags – Small tags or a marker to note varieties (e.g., Yellow Sweet Spanish vs. Red Creole).
- ● Dehumidifier (for indoor drying) – If your space is damp, a small unit (e.g., Pro Breeze) speeds up curing.
Step-by-step instructions for harvesting onions at home
Master this technique and you'll achieve perfectly dry, long-storing onion bulbs every season.
🌱 Step 1: Identify When Onions Are Ready for Harvest
Onions are ready when their tops yellow and fall over naturally, typically 8-10 weeks after transplanting. You'll notice the foliage turning from vibrant green to a dull, straw-like yellow—this signals the plant has redirected energy from leaf growth to bulb development. Gently pull back the outer leaves to check the bulb size; it should be 2-3 inches in diameter with a firm texture.
Don't wait until the tops completely brown and dry—this reduces storage quality. Harvest when 60-70% of tops have yellowed, as this balance ensures maximum bulb size without sacrificing dryness. If you're growing for green onions, harvest when stems reach 8-12 inches tall by cutting just above the bulb.
✂️ Step 2: Prepare the Soil and Loosen the Bulbs
Use a garden fork to gently loosen the soil around the onion plants, working the tines 4-6 inches deep but avoiding direct contact with the bulbs themselves. This prevents puncturing while breaking the soil's grip. Onions develop a papery outer layer that protects them during harvest—never dig with a shovel, as this can tear these protective skins.
Pull the plants carefully by grasping the base of the stems where they meet the soil. The twist-and-pull method works best: rotate the onion gently while lifting to disengage the bulb from the soil without damaging the neck. If the bulb resists, wait another 2-3 days—forcing it too soon can cause neck breakage during storage.
☀️ Step 3: Cure the Onions for Optimal Storage
Lay harvested onions in a dry, shaded location with good airflow—a garage, covered porch, or even a mesh bag suspended in a breezy spot works well. Maintain temperatures between 75-85°F for 3-5 days to allow the necks to dry completely. Proper curing hardens the outer skins, preventing rot during storage.
Turn onions once daily to ensure even drying. You'll know they're ready when the necks snap cleanly when bent—this indicates the moisture content has dropped to ideal levels. Avoid direct sunlight during curing, as UV exposure can cause the outer skins to darken prematurely, reducing storage life.
🪴 Step 4: Trim and Store for Long-Term Use
Once fully cured, trim the tops to 1 inch above the bulb using a sharp knife or pruning shears. This prevents sap loss while maintaining the protective layers. Remove any damaged outer skins by gently rubbing them off—never store onions with broken skins, as this invites decay.
Store cured onions in a well-ventilated area at 40-50°F with 60-70% humidity. Braid larger varieties or place them in mesh bags for airflow. With proper curing, onions will keep for 4-6 months—longer than store-bought varieties. Check periodically and remove any soft or moldy bulbs immediately to prevent spoilage.
Tips & tricks for perfect onion harvesting
A few subtle techniques can transform your onion harvest from good to exceptional—here's how to elevate every step.
Harvest Timing Precision: The 8-10 week window is critical, but don't rely solely on time—check the foliage first. Look for that specific straw-like yellowing (60-70% of tops) rather than waiting for full browning. I've learned this the hard way: harvesting too late means smaller bulbs with shorter storage life, while harvesting too early gives you underdeveloped onions. The ideal moment is when you see that perfect balance of yellowed tops while the bulbs remain firm to the touch.
Soil Preparation Technique: When using your garden fork in Step 2, work the tines in a gentle sawing motion rather than stabbing straight down. This prevents puncturing those delicate papery skins while effectively breaking the soil's grip. I recommend loosening soil in the morning when it's slightly damp—this makes the fork glide more smoothly and reduces resistance when pulling. The goal is to create separation between bulb and soil without damaging either.
Curing Environment Secrets: For that perfect 75-85°F curing range, I've found that a well-ventilated garage with a small fan aimed at the onions works better than most commercial dehydrators. The airflow must be gentle but consistent—too strong and you'll dry them too quickly, too weak and moisture lingers. Place onions on a mesh screen or old window screen to allow air circulation on all sides. This creates that ideal snap test when necks break cleanly after 3-5 days.
Storage Optimization: The 40-50°F range is perfect, but don't overlook humidity control. I store my onions in mesh bags suspended from the rafters of my unheated garage—this creates that ideal 60-70% humidity without needing special equipment. For extra protection, I add a few wooden onion skewers to each bag; these help maintain airflow while preventing bulbs from touching each other, which is crucial for preventing rot during those 4-6 months of storage.
Pro Tips for Harvest Onions At Home
- A few subtle techniques can transform your onion harvest from good to exceptional—here's how to elevate every step.
- Harvest Timing Precision: The 8-10 week window is critical, but don't rely solely on time—check the foliage first.
- Soil Preparation Technique: When using your garden fork in Step 2, work the tines in a gentle sawing motion rather than stabbing straight down.
Frequently asked questions
Got questions about harvesting onions? You’re not alone! Here are some of the most common queries—and their answers—to help you master the twist-and-pull method like a pro.
When is the best time to harvest onions?
The ideal time to harvest onions is when the top greens (scape) turn yellow and start to flop over, usually 4–6 weeks before your first frost. If left too long, bulbs may split or rot. For green onions, harvest when the stalks are 6–8 inches tall by cutting them close to the base—no need to wait for bulbs!
What if my onions split or rot before harvesting?
Split or rotting onions often happen due to over-maturity, uneven watering, or poor drainage. To prevent this:
- Harvest promptly when tops yellow.
- Water consistently but reduce frequency 2 weeks before harvest.
- Choose well-draining soil to avoid soggy bulbs.
Can I harvest onions in the rain?
Harvesting in light rain is fine, but avoid heavy downpours—wet bulbs are prone to mold and rot. If rain is forecasted, pull onions a day or two early and let them dry indoors. For best results, harvest on a dry, sunny day with temps between 60–75°F (15–24°C).
How do I store harvested onions long-term?
Proper storage keeps onions fresh for 6–8 months:
- Cure them first: Hang in a dark, well-ventilated spot (like a garage or shed) for 2–3 weeks to toughen skins.
- Store in mesh bags or paper sacks (never plastic!) in a cool, dry place (50–55°F / 10–13°C).
- Avoid refrigeration—it causes onions to sprout!
What if my onions don’t form bulbs?
Small or no bulbs can stem from too much nitrogen, overcrowding, or short daylight hours. Fix it next season by:
- Using a balanced fertilizer (low in nitrogen after 6 weeks).
- Thinning seedlings to 4–6 inches apart for better airflow.
- Planting in early spring (6+ weeks before last frost) for longer daylight exposure.
Wrapping up and next steps
Harvesting onions at home is a rewarding experience that yields flavorful, long-lasting bulbs with just a little patience and know-how! By mastering the twist-and-pull method and following best practices—like proper timing, curing, and storage—you’ll enjoy homegrown onions that rival store-bought (and taste even better 🌱).
Now that you’re equipped with the know-how, roll up your sleeves and try it yourself! Start small with a few plants, experiment with varieties, and soon you’ll be curing onions like a pro. Happy harvesting—and may your pantry always be stocked with homegrown goodness! 🥳
Next step: Share your harvest with friends or save seeds for next season’s garden!