
Vegetables
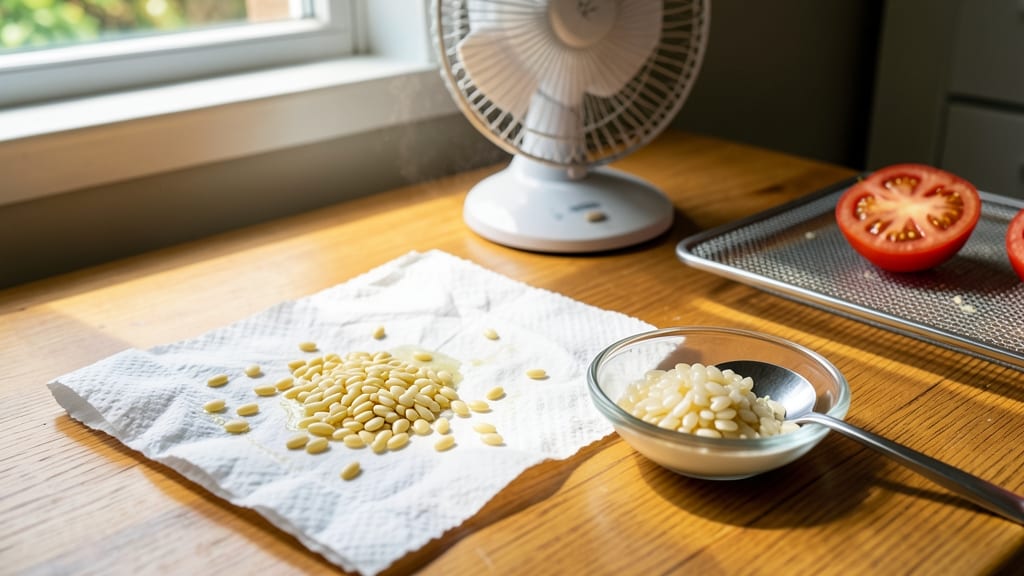
How to dry out tomato seeds properly saves you money and ensures next year's garden thrives. 🌱 The ferment-and-rinse method separates viable seeds from pulp, while thorough drying prevents mold—critical for germination success. I've salvaged hundreds of seeds this way, avoiding store-bought costs and preserving heirloom varieties.
You'll need only three things: a jar with tomato pulp, water, and a dark, dry space. The fermentation process (3-5 days) separates good seeds from bad, while proper drying (1-2 weeks) hardens seed coats for storage.
Skipping these steps leads to weak germination or moldy seeds—don't let that happen to your hard work.
After drying, you'll have plump, dark seeds ready for storage in envelopes. These seeds stay viable for 3-5 years if kept cool and dry, giving you a head start on next season's harvest. The process feels scientific but is surprisingly simple once you've done it once.
This method works for any tomato variety—heirlooms, hybrids, or cherry tomatoes. Whether you're saving seeds from your garden or a grocery store tomato, the same principles apply. Let's get those seeds ready for planting!
📚 In This Guide
- What you need
- Instructions
- Tips and common mistakes
- Wrapping up and next steps
What you need
- ● Ripe tomatoes: 2–4 medium-sized (choose heirloom or organic for best results).
- ● Sharp knife or spoon: For scooping out seeds and gel.
- ● Fine-mesh strainer or cheesecloth: A strainer with 0.02-inch (0.5mm) holes works best to separate seeds from pulp.
- ● Small bowl or jar: For fermenting seeds (glass is ideal, but plastic works too).
- ● Water: Enough to cover seeds by 1 inch.
- ● Paper towels or coffee filters: For drying seeds (use unbleached to avoid chemicals).
- ● Air-tight container or envelope: For storing dried seeds (e.g., a paper seed envelope or small jar with a lid).
- ● Label and marker: To note tomato variety and date.
- ● Glass jar with lid: For fermenting (easier to monitor progress).
- ● Rubbing alcohol (70% or higher): To sterilize tools and containers (reduces mold risk).
- ● Fine-tip tweezers: For picking out debris or damaged seeds.
- ● Humidity-controlled drying tray: If you live in a damp climate (e.g., a seed drying rack).
- ● Food dehydrator: For faster drying (set to 95–115°F for 1–2 hours).
Step-by-step instructions for drying tomato seeds
Here's my foolproof method for fermenting and drying seeds that guarantees strong germination.
🌱 Step 1: Scoop Seeds From Ripe Tomatoes
Cut open fully ripe tomatoes and scoop out the jelly-like pulp into a clean bowl. I use a spoon to scrape every last bit from the fruit—those seeds clinging to the sides are just as viable. You'll need about 4-6 tomatoes to yield enough seeds for a full season's planting.
Don't worry about removing all the gel completely yet—that's the key to the fermentation process. The pulp contains enzymes that help separate the seeds from their protective coating. If you're working with heirloom varieties, this is also your chance to properly identify your seeds before drying.
💧 Step 2: Ferment the Seeds for 2-3 Days
Fill a clean glass jar with 2-3 inches of water and add the tomato pulp. Stir gently to break up clumps, then cover loosely with a paper towel or coffee filter secured with a rubber band. This keeps pests out while allowing airflow.
Place the jar in a warm spot—70-75°F works best—where it won't get direct sunlight. You'll see the seeds sink to the bottom while the pulp ferments and rises to the top. This process takes 2-3 days, but don't rush it—proper fermentation removes the gel that inhibits germination.
⏰ Step 3: Rinse and Separate the Seeds
After fermentation, the good seeds will sink while empty or damaged ones float. Use a fine mesh strainer or your fingers to scoop out the floating debris. Pour the remaining water and seeds through the strainer, then rinse the seeds thoroughly under cool running water to remove all traces of pulp.
Spread the rinsed seeds on a clean, dry paper towel or screen. I like to use a cookie sheet lined with parchment paper for even airflow. This is where patience pays off—proper drying prevents mold and ensures seed viability.
☀️ Step 4: Dry the Seeds Completely
Place the seeds in a warm, dry spot with good airflow—75-80°F and 40-50% humidity is ideal. A sunny windowsill works well, but avoid direct sunlight which can overheat and crack the seeds. Turn the seeds daily for even drying, which typically takes 3-5 days.
Seeds are ready when they're completely dry and make a rattling sound when shaken in the container. Store them in a labeled envelope or jar in a cool, dark place. Properly dried seeds will last 2-4 years and maintain excellent germination rates.
🌿 Step 5: Test Germination (Optional but Recommended)
Before planting your entire seed stash, test 5-10 seeds between damp paper towels in a sealed plastic bag. Place them in a warm spot and check daily. You should see sprouts within 5-10 days—this confirms your drying process worked properly.
If germination is slow or patchy, your seeds may need additional drying time. The test also helps you estimate how quickly your seeds will sprout when you're ready to plant. This simple step saves you from planting dozens of seeds only to have poor results.
Tips & tricks for perfect tomato seed drying
These simple strategies will help you maximize germination rates and avoid common pitfalls in the drying process.
Tomato Selection: Choose fully ripe tomatoes that are soft to the touch and have started to show signs of overripeness. The riper the tomato, the more viable and fully developed the seeds will be. I've found that heirloom varieties often produce seeds with higher germination rates than hybrid tomatoes, so if you're growing your own plants, save seeds from your best producers.
Fermentation Environment: The 2-3 day fermentation period is critical—don't skip it! Maintain that 70-75°F temperature consistently. If your kitchen runs cooler, place the jar near a warm spot like a sunny window (but not in direct sunlight). You'll know fermentation is working when you see a moldy scum form on top—this is normal and helps remove the gel that inhibits germination. Stir the mixture gently once a day to keep the seeds submerged and prevent mold growth.
Drying Conditions: For even drying in Step 4, I recommend using a cookie sheet lined with parchment paper rather than a paper towel. The parchment allows better airflow while preventing seeds from sticking. Place the seeds in a single layer, not overlapping, and turn them daily. If you notice any seeds starting to darken or develop mold, remove them immediately—they'll no longer germinate properly. A small fan on low setting can help speed up drying in humid conditions without damaging the seeds.
Storage Wisdom: Once completely dry, store your seeds in a labeled envelope or small jar with a desiccant packet (like a silica gel packet) to absorb any moisture. Write the variety name and date on the container—this helps track how long you've had them stored. I like to keep mine in the freezer for long-term storage, which can extend viability to 5-6 years instead of the standard 2-4 years at room temperature.
Pro Tips for Dry Out Tomato Seeds
- These simple strategies will help you maximize germination rates and avoid common pitfalls in the drying process.
- Tomato Selection: Choose fully ripe tomatoes that are soft to the touch and have started to show signs of overripenes...
- Fermentation Environment: The 2-3 day fermentation period is critical—don't skip it! Maintain that 70-75°F temperatur...
Frequently asked questions
Got questions about drying tomato seeds? You’re not alone—here are the most common ones to help you troubleshoot and succeed like a pro!
How long should I ferment tomato seeds before drying them?
Ferment your seeds for 2–5 days in a jar of water. The goal is to separate viable seeds (which sink) from pulp (which floats). If you see mold or a foul smell, rinse and start fresh—don’t worry, this is normal!
Can I speed up the drying process?
While seeds need 7–10 days to dry thoroughly, you can speed it up by placing them in a low-heat dehydrator (95°F or less) or a paper towel-lined tray in a warm, dry spot (like a sunny windowsill). Avoid direct sunlight or high heat—it can kill germination!
What if my seeds won’t dry or stay damp?
Humidity is the enemy! If seeds stay sticky, try these fixes:
- Increase airflow: Use a fan on low or swap out damp paper towels.
- Change location: Move to a drier area (like a pantry with a silica gel packet).
- Add silica gel: Place seeds in a sealed container with uncooked rice or silica beads to absorb moisture.
Can I reuse leftover tomato pulp or water?
After fermenting, strain the pulp and compost it—it’s nutrient-rich for your garden. The water? Dilute it 1:1 with fresh water and use it as a fertilizer tea for seedlings. Just avoid using it on open wounds of plants to prevent rot.
How do I store dried tomato seeds long-term?
Once fully dry, store seeds in a cool, dark place (like a sealed envelope or airtight container) with a desiccant packet to prevent moisture. Label them with the date—most stay viable for 2–4 years if stored properly!
Wrapping up and next steps
Drying out tomato seeds properly ensures strong, viable plants for your garden! By fermenting and rinsing them, you remove unwanted gel and boost germination rates—making your gardening efforts even more rewarding. 🌱
Now that you’ve mastered the process, why not put those seeds to good use? Start a small batch of heirloom tomatoes, experiment with different varieties, or even share your seeds with fellow gardeners. Happy growing! 🌿