
How To
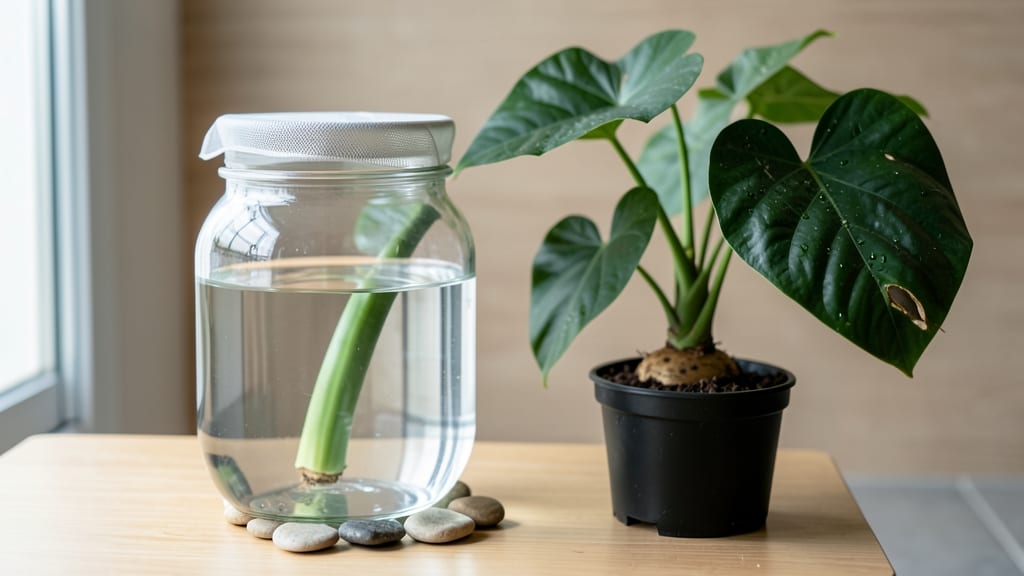
How to grow taro root in water feels like cheating—no soil, no mess, just roots plumping up in a bucket. ✨ I’ve watched stubborn taro crowns send out thick, edible shoots in as little as 3 weeks, all while sipping nutrient-rich water instead of fighting compacted dirt. The secret? Keeping the water clean, the roots submerged just right, and the container big enough for growth.
You’ll need a 5-gallon bucket (or larger), a taro crown with at least two eyes, and a simple nutrient solution—no fancy hydroponics required. Change the water every 5-7 days to prevent rot, and place your container where it gets 6+ hours of bright light daily.
The roots will start branching within 10 days, and you’ll harvest when leaves reach 12+ inches—proof that water growing works even for stubborn tropical plants.
This method saves space, avoids soil-borne pests, and lets you grow taro year-round if you control the light. The trade-off? You’ll need to monitor water quality closely—cloudy water or foul smells mean it’s time for a refresh.
With the right setup, you’ll end up with plump, starchy roots that outperform many soil-grown batches.
Perfect for small spaces, urban balconies, or anyone tired of battling garden pests. Once you master the water method, you’ll never go back to traditional growing. Let’s get those roots thriving!
📚 In This Guide
- What you need
- Instructions
- Tips and common mistakes
- Wrapping up and next steps
What you need
- ● Taro corms (or "hearts"): 3–5 medium-sized, firm corms (1–2 inches in diameter) with visible eyes (growth nodes). Choose organic or pesticide-free for best results.
- ● Clean water: 2–3 gallons of chlorine-free water (tap water left out for 24 hours or filtered/distilled water). Avoid hard water if possible.
- ● Large container: A 5–10 gallon bucket (food-grade plastic or glass) with a 12+ inch depth to accommodate root growth.
- ○ Waterproof growing medium (optional but recommended): Coconut coir bricks (1–2 bricks, hydrated)
- ● Hydroton (clay pebbles, 1–2 lbs)
- ● Or a net pot (3–4 inch diameter) filled with sterilized perlite or vermiculite.
- ● Support structure: A floating rack (DIY with foam boards or buy a pre-made hydroponic net pot tray).
- ● OR a wooden stick or bamboo skewer (for propping corms above water).
- ● pH test kit: To monitor water pH (ideal range: 5.8–6.5). Adjust with citric acid (for lowering pH) or potassium hydroxide (for raising pH).
- ○ Basic hydroponic nutrients (optional but helpful): A balanced liquid fertilizer (e.g., 5-5-5 or 10-10-10, diluted to half-strength).
- ● Calcium nitrate (to prevent tip burn).
- ● Pruning shears or sharp knife: For trimming yellowed or dead leaves.
- ● Spray bottle: For misting leaves and maintaining humidity.
- ● Air stone + small pump: Adds oxygen to water (prevents root rot).
- ● Grow lights: LED or fluorescent (12–16 hours/day) if natural light is <12 hours/day.
- ● Water temperature monitor: Ideal range is 70–85°F.
- ● Journal or app: To track water changes, pH levels, and growth progress.
- ● Harvesting knife: A serrated or sharp chef’s knife for clean cuts when harvesting.
Step-by-step instructions for growing taro root in water
Taro thrives in water with minimal effort—here's the method I've used to grow vibrant, edible roots indoors.
🌱 Step 1: Select and Prepare Your Taro Corm
Choose a firm, disease-free taro corm with visible growth nodes or "eyes" (the small dimples on the surface). These are where new shoots emerge. I like to select medium-sized corms—small ones may not produce enough roots, while giant ones can rot before sprouting. Cut the corm into sections, ensuring each piece has at least one growth node.
Let the cut surfaces dry for 1-2 hours before planting. This prevents rot when submerged. I place the pieces on a paper towel in a warm spot until the edges feel slightly tacky but not wet. This is your signal they're ready for water.
🪴 Step 2: Choose and Fill Your Water Container
Use a clean glass jar, vase, or any clear container with a wide enough opening to accommodate your taro pieces. A 16-ounce mason jar works perfectly for 1-2 pieces. Fill it with room-temperature water, leaving about 2 inches of space between the water line and the rim—this prevents spills when the plant grows.
I always use filtered or rainwater for my taro because tap water often contains chlorine or fluoride that can stress young plants. Change the water every 3-4 days to prevent bacterial buildup. Place the container in a spot with bright, indirect light—direct sun can scorch the leaves as they emerge.
🌿 Step 3: Position and Monitor the Taro Pieces
Place your taro pieces in the water, ensuring the growth nodes are submerged but not buried under more than 1 inch of water. The nodes should face downward—they'll send out roots first, followed by shoots. I use a small weight (like a pebble) to keep the pieces steady if they float.
Within 1-2 weeks, you'll see tiny white roots emerge first, followed by green shoots. This is your cue that the corm is actively growing. Keep the water level consistent—never let it drop below the roots, or they'll dry out. If you notice any black spots or foul smells, immediately change the water and trim affected areas with clean scissors.
☀️ Step 4: Provide Optimal Light and Airflow
Move your container to a location with 6-8 hours of bright, indirect light daily. A south-facing window with sheer curtains works well. If your space lacks natural light, supplement with a grow light placed 6-12 inches above the container for 12-14 hours daily. You'll know the light is sufficient when the leaves grow upright and vibrant green—not leggy or pale.
Ensure good airflow by placing a small fan nearby on a low setting. This prevents mold and encourages sturdy growth. I rotate my container a quarter turn every few days so the plant doesn't lean toward one light source. This keeps the growth balanced and prevents weak stems.
💧 Step 5: Maintain Water Quality and Harvest
Change the water every 3-4 days to keep it fresh and oxygenated. Use a spray bottle to rinse the roots gently before refilling. Over time, the roots will grow long and thick—this is when you'll know they're ready for harvest. For edible roots, wait until they reach 4-6 inches in length and the leaves are lush and healthy.
To harvest, carefully remove the corm from the water and rinse off any debris. You can eat the roots now, or let the plant continue growing for larger harvests. I always save a few pieces to replant—just dry the cut surfaces again and repeat the process. This method lets you grow taro year-round with minimal space and no soil!
Tips & tricks for growing taro root in water
Here's what nobody tells you about growing taro without soil—these tricks make all the difference between thriving sprouts and disappointing results.
Selection Tip: When choosing your taro corm, look for pieces with multiple growth nodes—they'll produce more vigorous shoots. I've found that corms with 3-4 nodes per section grow the fastest, often sprouting roots within the 1-2 week window. Avoid corms with soft spots or mold, as these can introduce rot to your water culture. Confession: I skipped this step for years and wondered why my roots grew so slowly!
The Water Factor: Room-temperature water is critical—cold water can shock the corm and delay sprouting. I always let my tap water sit out for at least 30 minutes before using it. Also, maintain that 1-inch water depth over the nodes; too deep can suffocate the roots, while too shallow exposes them to air and causes drying. The 3-4 day water change schedule is non-negotiable—this prevents bacterial buildup that can turn your water cloudy and stinky.
Lighting Secret: That 6-8 hours of bright, indirect light is your plant's golden ticket. I've learned the hard way that direct sun can scorch delicate new leaves. For indoor growers, position your container near a south-facing window with sheer curtains. If using a grow light, keep it 6-12 inches away—closer than that can burn the leaves, while farther away makes them stretch toward the light (a condition called etiolation). Rotating your container every few days ensures even growth all around.
Harvest Timing: Wait until those roots reach 4-6 inches before harvesting—they'll be thick and sturdy enough for cooking. I've found that patience pays off here; harvesting too early gives you small, underdeveloped roots. The leaves should be vibrant green and healthy looking. When you're ready to harvest, rinse the roots gently with water to remove any debris before cooking. You can even replant the remaining corm pieces after harvest by drying the cut surfaces again.
Pro Tips for Grow Taro Root In Water
- Here's what nobody tells you about growing taro without soil—these tricks make all the difference between thriving sp...
- Selection Tip: When choosing your taro corm, look for pieces with multiple growth nodes—they'll produce more vigorous...
- The Water Factor: Room-temperature water is critical—cold water can shock the corm and delay sprouting. I always let ...
Frequently asked questions
Got questions about growing taro in water? You’re not alone—this method is still new to many! Here are some of the most common queries (and answers) to help you grow lush, edible taro without soil.
Can I grow taro root in water indoors?
Taro thrives in water indoors as long as you provide bright, indirect light (like a sunny windowsill) and maintain warm temperatures (70–85°F). Just ensure your container has good airflow to prevent mold. A small grow light can help if natural light is limited.
How long does it take for taro to grow in water?
With the right conditions, you’ll see small shoots in 2–4 weeks, and edible roots (about 4–6 inches long) in 3–6 months. Patience is key—rushing can lead to leggy or weak plants. Change the water every 3–5 days to speed up growth.
What kind of water should I use for taro?
Use filtered or dechlorinated water (chlorine can harm sprouts). Tap water left out for 24 hours or distilled water works best. Avoid stagnant water—it can cause root rot. A small fan near the container helps oxygenate the water naturally.
Can I eat taro grown in water?
Yes! Water-grown taro is just as safe and nutritious as soil-grown, as long as you:
- Use organic, pesticide-free starting material (store-bought taro may have growth inhibitors).
- Avoid using tap water with high chlorine/fluoride levels (rinse roots before cooking).
- Cook it properly—boiling or baking is safest to break down oxalates.
Why is my taro turning black or mushy?
Black spots or mushy roots usually mean rot, caused by:
- Stagnant water (change it daily).
- Overcrowding (trim to 1–2 shoots per container).
- Cold temps (keep above 60°F).
If caught early, trim the bad parts and refresh the water. For severe rot, start over with a new cutting.
Wrapping up and next steps
Growing taro root in water is a rewarding and efficient way to enjoy fresh, homegrown produce with minimal effort! 🌱 With just a few supplies and a little patience, you can cultivate vibrant sprouts in as little as 2-4 weeks.
Whether you're a beginner or a seasoned gardener, this method opens up a world of possibilities for urban or small-space growing.
Now that you're armed with the knowledge, why not start your own taro adventure today? Try experimenting with different water containers or even repurposing household items—get creative!
Once your taro is thriving, consider sharing your harvest with friends or exploring delicious recipes to make the most of your homegrown bounty. Happy growing! 🌟