
Size
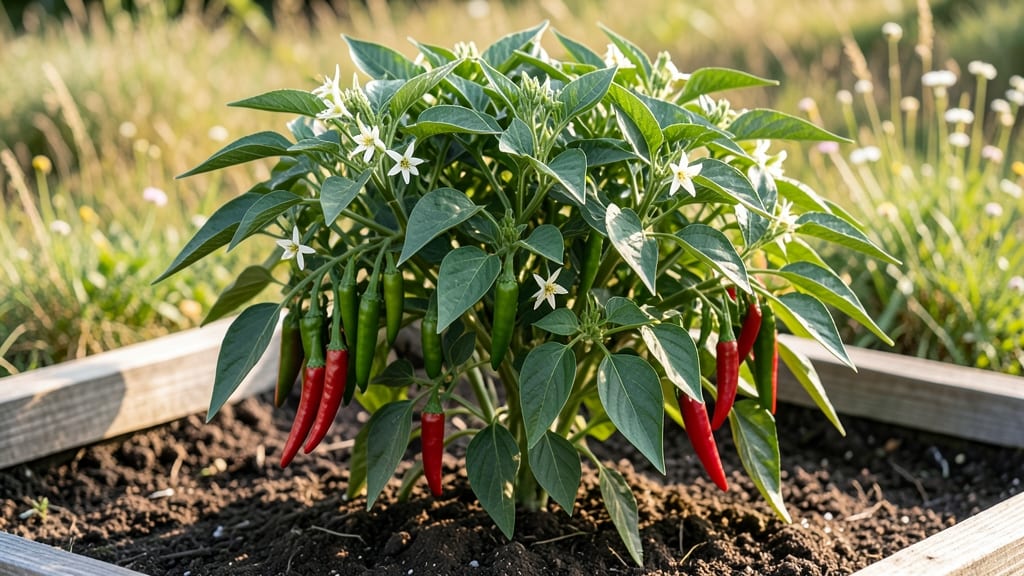
How to grow Tabasco peppers turns your garden into a fiery spice factory. 🌶️ I’ve grown them for years, and the key is patience—these tiny plants pack a serious punch, but they need just the right conditions to thrive. The secret isn’t heat or fancy tools; it’s consistent warmth, well-draining soil, and a little extra care when they’re young. Start with seeds or transplants in well-draining pots (5+ gallons) or garden beds with full sun. Tabasco peppers love warmth—75-85°F is ideal—and they’ll bolt if shocked by cold. Water at the soil level (never overhead) to keep roots happy, and fertilize lightly with a balanced mix every 3-4 weeks. Prune sparingly to encourage bushier growth, but don’t overdo it—they fruit best when left slightly wild. By midsummer, you’ll see clusters of bright red peppers (or green if picked early). The heat ramps up as they ripen—Scoville levels hit 30,000-50,000—so handle them with gloves if you’re sensitive. Harvest when firm and glossy for the best flavor, then ferment or dry them for homemade hot sauce. The first batch is always the sweetest reward. They’re tough but not foolproof—watch for aphids and powdery mildew, and protect young plants from strong winds. With the right setup, you’ll go from seed to spicy harvest in 90-120 days. Ready to grow your own heat? Let’s get started!
📚 In This Guide
- What you need
- Instructions
- Tips and common mistakes
- Wrapping up and next steps
What you need
- ● Tabasco pepper seeds – Choose a variety like Tabasco ‘Small Red’ or Tabasco ‘Large Red’ (5-10 seeds for a small harvest).
- ● Seed-starting mix – A lightweight, sterile blend (10-15 lbs for 10-12 seed trays).
- ● Seed trays or small pots – 2-3 inch pots or a seed tray with drainage (10-15 units).
- ● Grow lights or sunny windowsill – 12-16 hours of light daily for seedlings.
- ● Fertilizer – Balanced liquid fertilizer (e.g., 10-10-10) or organic options like fish emulsion.
- ● Transplant pots or garden space – 5-gallon containers or well-draining soil (pH 6.0-6.8).
- ● Stakes or cages – 3-4 ft tall for support (1-2 per plant).
- ● Watering can or hose with a gentle nozzle – Keep soil moist but not soggy.
- ● Heat mat – Speeds up germination (especially in cooler climates).
- ● Pruning shears – For shaping plants and harvesting.
- ● Pest control (neem oil, insect netting) – Protects against aphids or pepper maggots.
- ● pH testing kit – Ensures soil is optimal for spicy peppers.
- ● Food processor or blender – For making your own Tabasco sauce!
Step-by-step instructions for growing Tabasco peppers
Here's how to coax fiery Tabasco peppers from seed to harvest—with minimal fuss.
🌱 Step 1: Start Seeds Indoors for a Head Start
Tabasco peppers need warmth to germinate, so begin indoors 8-10 weeks before your last frost date. Fill small seedling trays with sterile seed-starting mix (never garden soil) and press it down lightly. Plant 2-3 seeds per cell, just ¼ inch deep—any deeper and they’ll struggle to push through.
Cover the tray with plastic wrap or a humidity dome to trap warmth, then place it in a warm spot (75-85°F). A seedling heat mat speeds things up, but even a sunny windowsill works if your home stays above 68°F. Keep the soil consistently moist—not soggy—until sprouts appear in 7-14 days. Real talk: if your kitchen runs cooler, germination may take longer.
☀️ Step 2: Provide Bright Light and Prevent Leggy Growth
The instant seedlings break soil, move them under grow lights (14-16 hours daily). Tabasco peppers despise stretching. If stems grow thin and pale, your light’s too far away. Position it 2-4 inches above the plants and raise it as they grow. You’ll know they’re happy when leaves are dark green and compact, not spaced far apart.
Once seedlings have 2-3 sets of true leaves (not the first tiny cotyledons), transplant them into 4-inch pots with fresh potting mix. Handle them gently—pepper roots are delicate. Water lightly after repotting, and avoid wetting leaves to prevent disease.
🪴 Step 3: Harden Off and Transplant Outdoors
Two weeks before your last frost, start hardening off seedlings. Place them outside in a sheltered spot for 1-2 hours the first day, gradually increasing time over 10-14 days. Watch for wilting—if it happens, they’re not ready yet. Tabasco peppers thrive in full sun and warm soil, so wait until nighttime temps stay above 55°F before planting.
Choose a spot with well-draining soil and space plants 18-24 inches apart in rows 2 feet apart. Dig holes slightly deeper than the root ball, place each seedling in, and firm soil around the base. Water deeply right after planting to settle roots. Here’s the thing—Tabasco peppers hate soggy feet, so amend heavy soil with compost to improve drainage.
💧 Step 4: Water Deeply and Fertilize for Heat Production
Water deeply once a week (or more in extreme heat), aiming for 1 inch of water per week. Let the top 1-2 inches of soil dry between waterings—peppers rot easily in wet conditions. Mulch around plants with straw or grass clippings to retain moisture and suppress weeds. You’ll see stronger growth and more peppers when plants stay consistently moist but not waterlogged.
Feed plants every 2-3 weeks with a balanced fertilizer (10-10-10) once they’re established. When flowers appear, switch to a low-nitrogen, high-phosphorus fertilizer (like 5-10-10) to boost fruit production. Too much nitrogen = leafy plants, fewer peppers. Watch for yellowing leaves—a sign of overwatering or nutrient imbalance.
✂️ Step 5: Harvest and Preserve for Fiery Flavor
Tabasco peppers ripen in 75-90 days from transplant. Harvest when they turn bright red (green peppers are milder). Pick them early for a sharper kick. Use pruning shears to snip stems cleanly—this encourages more fruit to form. You’ll know it’s time to harvest when peppers start dropping to the ground.
For classic Tabasco sauce, pack fresh peppers into clean glass jars, cover with distilled vinegar, and let ferment for 2-4 weeks in a dark place. Strain, bottle, and age for 3-6 months for maximum heat. Or, dry peppers whole for a slow, smoky flavor. Either way, you’re growing more than peppers—you’re building heat.
Tips & tricks for growing Tabasco peppers
Here's what nobody tells you about growing these fiery beauties—lessons I learned after watching my first batch struggle.
The Heat Factor: Tabasco peppers thrive in warm soil, so if your spring soil is still cool (below 60°F), wait a few more weeks before transplanting. I've seen seedlings wilt when moved too early—just because the air feels warm doesn't mean the ground is ready. A soil thermometer is your best friend here. For extra warmth, consider using black plastic mulch to raise soil temperature by 5-10°F.
Seed Starting Strategy: When planting those tiny seeds in your 2-3 inch deep trays, use a pencil to make small holes first—this prevents overcrowding and makes it easier to space seeds properly. I've found that planting seeds 1 inch apart in the tray gives them enough room to develop strong roots before transplanting. Also, keep those trays consistently moist but never soggy during the 10-20 day germination period.
Sunlight Secret: Tabasco peppers need that full sun (6+ hours daily), but too much direct afternoon sun can scorch young seedlings. If you're starting them indoors, place them near a south-facing window or under grow lights for 12-14 hours daily. Once outside, provide afternoon shade for the first week to help them acclimate gradually. This slow transition prevents shock and encourages stronger growth.
Fertilizer Timing: That 3-4 week fertilization schedule is crucial, but don't start fertilizing until after your plants have established roots—usually about 2 weeks after transplanting. Too much fertilizer too soon burns tender roots. I switch to a low-nitrogen fertilizer (like 5-10-10) when flowers appear to encourage fruit production. And always water thoroughly before fertilizing to prevent root burn.
Pro Tips for Grow Tabasco Peppers
- Here's what nobody tells you about growing these fiery beauties—lessons I learned after watching my first batch strug...
- The Heat Factor: Tabasco peppers thrive in warm soil, so if your spring soil is still cool (below 60°F), wait a few m...
- Seed Starting Strategy: When planting those tiny seeds in your 2-3 inch deep trays, use a pencil to make small holes ...
Frequently asked questions
Got questions about growing your own fiery Tabasco peppers? You’re not alone! Here are answers to the most common queries—from impatient gardeners to troubleshooters—so you can cultivate a thriving crop with confidence.
How long does it take for Tabasco peppers to grow from seed?
Tabasco peppers are slow but steady! From seed, expect 80–120 days to harvest, depending on the variety. Start seeds indoors 8–10 weeks before your last frost for a head start. Patience pays off—these peppers pack a punch!
Can I grow Tabasco peppers in containers?
Tabasco peppers thrive in 5-gallon pots or larger with well-draining soil. Ensure the container has drainage holes and place it in full sun (6+ hours/day). Just keep an eye on watering—containers dry out faster than garden beds.
Why aren’t my Tabasco peppers turning red?
Red is the mature stage, but Tabasco peppers often stay green if they’re harvested too early or lack sunlight. Give them full sun and consistent warmth (70°F+). If they’re still green after 90 days, check for nutrient deficiencies (like nitrogen) or pests.
Do Tabasco peppers need a long growing season?
Yes! Tabasco peppers hate cold—they need 120+ frost-free days to mature. In cooler climates, grow them in greenhouses or start seeds early. If you’re in Zone 8 or below, opt for shorter varieties like ‘Tabasco Shorty’ (60 days).
Can I substitute another pepper if Tabasco seeds are unavailable?
If you’re craving heat but can’t find Tabasco seeds, try ‘Cayenne,’ ‘Jalapeño,’ or ‘Thai Chili’ for a similar kick. For the exact Tabasco flavor, look for ‘Tabasco Pepper’ or ‘Aji Charapita’ seeds—no perfect substitute exists, but these come close!
Wrapping up and next steps
Growing your own Tabasco peppers is a rewarding journey that brings bold flavors and fiery satisfaction straight to your kitchen! With the right soil, sunlight, and patience, you’ll soon be harvesting peppers ready for pickling, cooking, or sharing with fellow spice lovers. 🌶️🔥
Ready to take the next step? Start by planting your seeds this season and watch your garden transform into a spicy paradise. And once those peppers are ripe? Get creative—ferment, dry, or bottle your own Tabasco sauce! Happy growing! 🌱✨