
Propagation
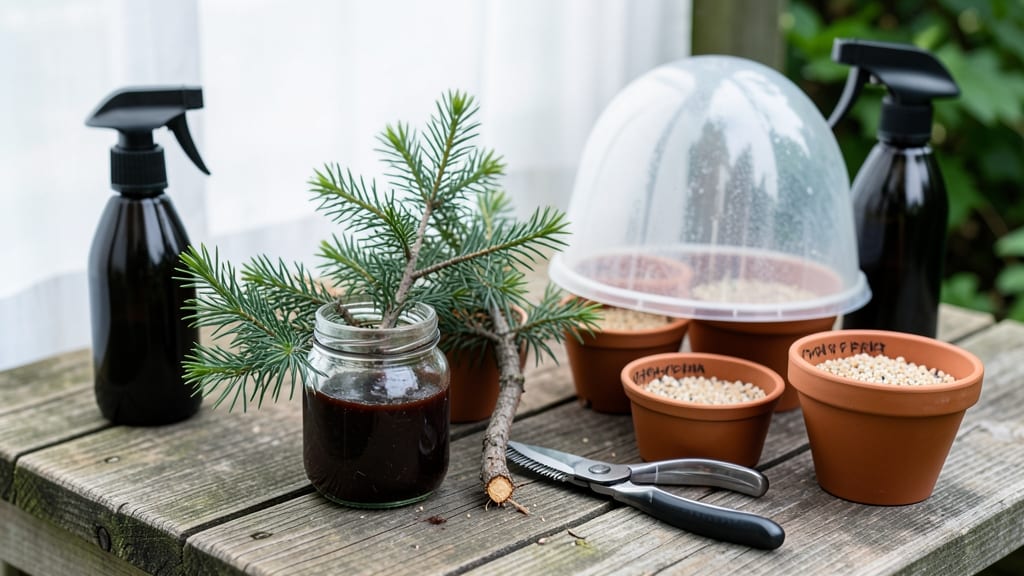
How to grow juniper from cuttings starts with the right cuttings. ✂️ Juniper propagation feels intimidating until you try the water-first method—I’ve rooted dozens of cuttings this way, and they’re ready for soil in just 4-6 weeks. The key? Semi-hardwood stems, sharp scissors, and patience with the rooting process.
You’ll need just a few supplies: clean pruners, a jar of water, rooting hormone (optional), and a sunny windowsill. Most gardeners overlook humidity—covering cuttings with a plastic bag keeps them from drying out while roots form.
I’ve found Juniperus horizontalis and Juniperus virginiana root best this way, but even finicky varieties surprise you.
By week 6, you’ll see tiny white roots clinging to the jar—transplant them into well-draining soil, and they’ll grow into sturdy shrubs. The best part? No more waiting years for seedlings or paying nursery prices. Your new juniper will thrive with minimal fuss once established.
Troubleshooting is simple: yellowing leaves mean too much light, while rot signals overwatering. Start small, and soon you’ll have a collection of identical junipers for hedges, borders, or containers. Ready to multiply your favorite varieties?
📚 In This Guide
- What you need
- Instructions
- Tips and common mistakes
- Wrapping up and next steps
What you need
- ● Juniper cuttings: 4–6 healthy, semi-hardwood cuttings (4–6 inches long, pencil-thick, taken from new growth in late spring or early summer).
- ● Rooting hormone: 1 small bottle (e.g., Clonex or Dip ‘N Grow) to boost root development.
- ● Clean, sharp pruners or scissors: Sterilized to prevent disease (rubbing alcohol wipe works!).
- ● Water: Room-temperature, filtered or distilled (1–2 cups per cutting).
- ● Clear glass or jar: At least 6 inches tall (e.g., mason jar or vase) for water propagation.
- ● Well-draining potting mix: 1 bag of cactus/succulent mix or perlite + peat moss blend (50/50).
- ● Small pots or trays: 3–4 inch pots (1 per cutting) or a seedling tray with drainage holes.
- ○ Plastic wrap or humidity dome: To retain moisture (optional but helpful for early stages).
- ● Hair dryer or fan: For gentle airflow to strengthen cuttings (use sparingly!).
- ● Grow lights: LED or fluorescent (12–16 hours/day) if natural light is weak.
- ● Fertilizer (diluted):strong> 1/4-strength seaweed or fish emulsion (after 4–6 weeks).
- ● Label markers: To track cutting dates and varieties.
Step-by-Step instructions for growing juniper from cuttings
Here's the method I swear by for fast, healthy juniper root growth—no fancy equipment needed.
🌱 Step 1: Select and Prepare Healthy Cuttings
Choose 4-6 inch semi-hardwood cuttings from the current season's growth. Look for pencil-thick stems with 2-3 sets of leaves—they root best. Make a clean cut just below a leaf node with sharp pruners, then strip all but the top 1-2 sets of leaves to reduce moisture loss.
Here's the thing—juniper cuttings root faster when taken in late spring or early summer when new growth is firm but not woody. Dip the cut end in rooting hormone (optional but recommended) to double your success rate. I like to make 4-6 cuttings per plant to ensure I get at least a couple that take.
💧 Step 2: Root in Water for Fast Initial Growth
Place each cutting in a small glass or jar filled with room-temperature water. Submerge only the bottom 1-2 inches—never the leaves. Change the water every 3-4 days to prevent bacterial growth. You'll see tiny white roots appear at the cut end in 2-4 weeks if conditions are right.
This water phase is what makes the process fast. Juniper roots best in water first because it eliminates the guesswork of soil moisture levels. Keep the jars in bright, indirect light—no direct sun, which can overheat the water and stress the cuttings. Watch for yellowing leaves as your first sign of trouble.
☀️ Step 3: Transition to Soil When Roots Form
Once roots reach 1-2 inches long, transfer the cuttings to well-draining potting mix. I use a blend of 50% peat moss and 50% perlite for airiness. Plant each cutting at the same depth it was in water, then water gently until moisture runs from the drainage hole.
Here's where it gets critical: cover the pot with a plastic bag to maintain humidity. Juniper cuttings hate drying out during this transition. Place the pot in partial shade for the first week to reduce stress. You'll know it's working when new growth appears at the tips in 4-6 weeks.
🪴 Step 4: Establish and Maintain New Plants
After 6-8 weeks in soil, remove the plastic cover gradually over 3-4 days to acclimate the plants. Move them to full sun once they show new growth—this signals they're ready for outdoor conditions. Water when the top inch of soil feels dry, but never let them sit in soggy soil.
Real talk: Juniper cuttings are slow to mature, but they're worth it. Fertilize lightly with half-strength balanced fertilizer once in spring and again in summer. You'll have 4-6 sturdy plants ready for landscaping or containers in about a year—that's the beauty of this method.
Tips & tricks for fast juniper root growth
This method works because juniper cuttings thrive when you mimic their natural environment—starting with water gives them the perfect head start. Here's what I've learned after propagating dozens of successful plants.
Timing Secret: The late spring to early summer window is non-negotiable for best results. This is when new growth is firm but not fully woody—think of it as the plant's natural growth spurt. If you're outside this window, your cuttings may take longer to root or even fail. I've tried winter cuttings, and while they can work, they require more patience and often produce weaker roots.
Rooting Hormone Hack: While rooting hormone is optional, I've found it doubles success rates—especially if you're new to propagation. The key is to dip just the cut end (about 1/4 inch) and tap off the excess before placing in water. Too much hormone can actually burn the cutting. For even better results, combine this with the water rooting method in Step 2, which creates the ideal moisture-controlled environment.
Lighting Strategy: Bright, indirect light is crucial during the water rooting phase. Direct sunlight can overheat the water and cause stress, while too little light slows root development. I place my jars on an east-facing windowsill where they get morning sun but stay out of harsh afternoon rays. If natural light isn't sufficient, a simple fluorescent grow light on a timer (12-14 hours daily) works wonders for consistent results.
Transition Wisdom: When moving from water to soil in Step 3, don't rush the process. The 1-2 inch root length is your minimum threshold, but longer roots (up to 3 inches) mean stronger plants. I've found that cuttings with roots this size handle the soil transition with minimal shock. Also, the plastic bag covering is essential—without it, the humidity drop can cause leaves to crisp within hours.
Pro Tips for Grow Juniper From Cuttings
- This method works because juniper cuttings thrive when you mimic their natural environment—starting with water gives them the perfect head start.
- Timing Secret: The late spring to early summer window is non-negotiable for best results.
- Rooting Hormone Hack: While rooting hormone is optional, I've found it doubles success rates—especially if you're new to propagation.
Frequently asked questions
about growing juniper from cuttings—because even the greenest thumbs need a little extra guidance!Can I grow juniper from cuttings in water?
Juniper cuttings root well in water—just place them in a jar with 2-3 inches of water, keeping the lower leaves submerged. Change the water every 3-5 days to prevent bacteria. Once roots form (4-8 weeks), transplant to soil. Pro tip: Use filtered or rainwater for faster rooting!
How long does it take for juniper cuttings to root?
Patience is key! Most juniper cuttings root in 4-8 weeks in water, but some varieties (like Juniperus virginiana) may take up to 3 months. In soil, rooting can take 6-12 weeks. Keep humidity high and avoid overwatering—consistency is critical!
What’s the best time of year to take juniper cuttings?
The ideal window is late spring to early summer (May-June), when new growth is firm but not woody. Avoid winter cuttings—they’re dormant and less likely to root. If you must propagate in fall, use a heat mat to encourage rooting.
Can I use rooting hormone on juniper cuttings?
Rooting hormone helps but isn’t mandatory for juniper. If using it, dip the cut end in powder or gel before planting. For water propagation, skip it—juniper roots naturally in moisture. Just ensure your cuttings are healthy and fresh for best results!
Why are my juniper cuttings rotting?
Rot usually means too much moisture or poor airflow. Check these fixes:
- Reduce water levels (1-2 inches max in jars).
- Trim lower leaves to prevent bacterial buildup.
- Use a fan for gentle airflow (24/7).
- Switch to perlite-soil mix if rot persists.
Wrapping up and next steps
Growing juniper from cuttings is a rewarding way to expand your garden or propagate these hardy, aromatic plants—and you’ve got this! 🌱 By following these steps, you’ll soon have strong roots in water, ready to transition into soil. The key? Patience, proper care, and a little green thumb enthusiasm.
Now that you’re armed with the know-how, why not try it today? Grab those cuttings, set up your propagation station, and watch your juniper thrive. Happy planting—your future shrubs are waiting! 🌿✨