
Companion Plants
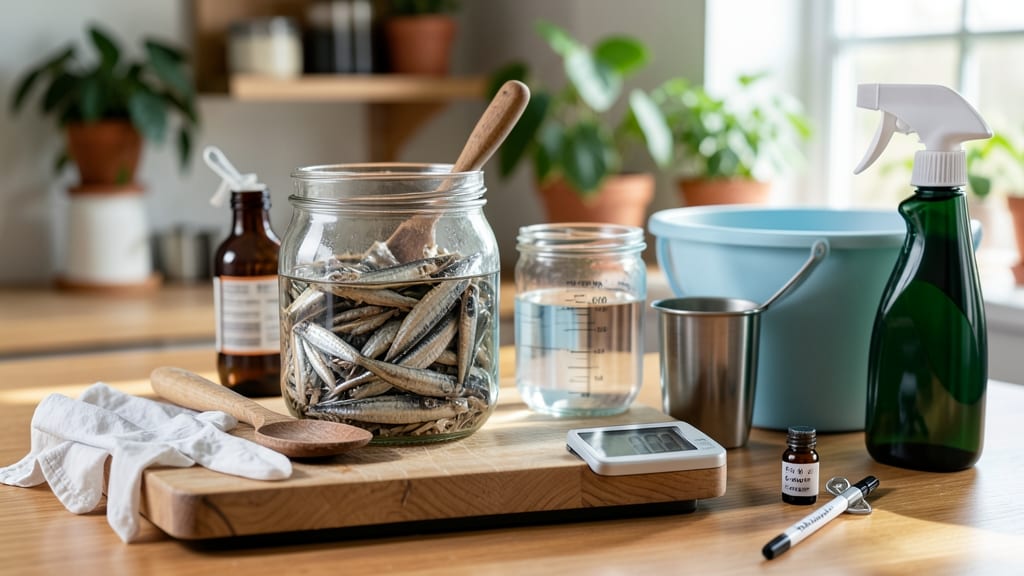
How to make fish emulsion for plants turns kitchen scraps into liquid gold for your garden. 🌱 I started with a bucket of fish heads and bones after cleaning my catch—and now my tomatoes grow like they’re on steroids. This nutrient-packed fertilizer is cheaper than store-bought, packed with nitrogen, phosphorus, and trace minerals plants crave.
The process is simpler than you’d think: just fish scraps, water, and a little patience. You’ll need a 5-gallon bucket, a drill bit for aeration, and a breathable bag to contain the stink (trust me, it’s strong!).
The best part? No synthetic chemicals—just nature’s way of recycling nutrients back into your soil. By day 30, you’ll have a dark, smelly (but amazing) liquid to feed your plants.
Your garden will reward you with vibrant green leaves, stronger stems, and bigger blooms. I’ve seen wilting plants perk up within days of using my homemade emulsion. It’s especially great for heavy feeders like tomatoes, peppers, and roses—just dilute it properly to avoid burning roots.
The smell fades fast once it’s in the soil, leaving only happy, thriving plants behind.
Works for any garden—containers, raised beds, or in-ground—just adjust the dilution based on your plants’ needs. Start small, and soon you’ll be hooked on this zero-waste way to grow. Ready to turn scraps into superfood for your garden? Let’s get started!
📚 In This Guide
- What you need
- Instructions
- Tips and common mistakes
- Wrapping up and next steps
What you need
- ● Fresh fish scraps: 1–2 lbs (450–900g) of clean, uncooked fish (heads, bones, and all!). Avoid oily fish like salmon or mackerel unless you’re okay with extra oil separation.
- ● Water: 1 gallon (3.8 liters) of non-chlorinated water (rainwater or distilled works best). Tap water must sit uncovered for 24 hours to off-gas chlorine.
- ● Container: A 1–2 gallon (3.8–7.6L) non-reactive bucket or jar (glass, food-grade plastic, or ceramic). Avoid metal to prevent contamination.
- ● Breathable cover: A lid with small holes, cheesecloth, or a breathable cloth to keep pests out while allowing fermentation.
- ● Measuring tools: Kitchen scale (for fish) and measuring cup (for water).
- ● Mixing utensil: A wooden spoon, plastic spatula, or gloved hands (fish can be slippery!).
- ○ Stirring stick: Optional but helpful for stirring during fermentation (e.g., a chopstick or dowel).
- ● Strainer or cheesecloth: For filtering the emulsion later (a fine-mesh sieve or coffee filter works in a pinch).
- ● Gloves: Highly recommended—fish scraps can be messy and may carry bacteria.
- ○ pH test strips (optional): To monitor acidity and ensure safety (aim for a pH between 6.0–7.0).
- ● Time: 2–4 weeks for fermentation (longer = stronger, but not necessarily better).
- ● Space: A warm, dark corner (60–75°F / 15–24°C) to ferment. Avoid direct sunlight.
- ● Safety: Work in a well-ventilated area—fermentation releases mild odors! Keep away from pets and kids.
- ● Storage: Once strained, store in a sealed container in the fridge for up to 6 months (or freeze for longer shelf life).
Tips & tricks for perfect fish emulsion
Here's what nobody tells you about making this nutrient-rich plant food right—these little details make all the difference.
Fish Selection Matters: While any clean fish scraps work, fatty fish like sardines or mackerel break down faster and create a richer emulsion. If you're using bony fish like trout, crush the bones slightly with a hammer before adding to water—this releases more nutrients during fermentation. The fresher the fish, the better the final product will be.
Fermentation Temperature Control: Maintain that 60-75°F range consistently—warmer temperatures speed up fermentation but can create off-odors, while cooler temps slow the process. I've found that placing the container on a basement floor (if available) gives the most stable temperature. If your space runs hotter, consider using a cooler with ice packs to regulate temps during summer months.
Stirring Technique: When stirring daily in Step 3, use a clean wooden spoon to keep the mixture aerobic. Stir just enough to break surface scum and prevent foul odors—over-stirring can introduce too much oxygen and create unwanted bacterial growth. The goal is gentle movement, not vigorous mixing. This daily attention is what transforms raw fish into liquid gold for your plants.
Straining Secrets: For the smoothest emulsion, strain through a fine mesh bag or cheesecloth twice—first to remove large solids, then again after letting the liquid sit for 12 hours to allow finer particles to settle. The leftover solids make excellent compost, but don't skip the double-straining if you want that ultra-smooth texture for your plant feed.
Pro Tips for Make Fish Emulsion For Plants
- Here's what nobody tells you about making this nutrient-rich plant food right—these little details make all the difference.
- Fish Selection Matters: While any clean fish scraps work, fatty fish like sardines or mackerel break down faster and create a richer emulsion.
- Fermentation Temperature Control: Maintain that 60-75°F range consistently—warmer temperatures speed up fermentation but can create off-odors, while cooler temps slow the process.
Frequently asked questions
Got questions about fish emulsion?
You’re not alone! Here are some of the most common queries—plus straightforward answers to help you get the most out of this nutrient-rich fertilizer.
Can I use fish emulsion on all plants, or are there exceptions?
Fish emulsion is fantastic for most plants, but avoid using it on acid-loving plants like blueberries or azaleas—it can raise soil pH too much. Also, skip it if you’ve recently applied copper-based fungicides, as they can react poorly with fish byproducts. For sensitive plants, always do a diluted patch test first!
How often should I apply fish emulsion to my plants?
For vegetative growth, apply every 2–4 weeks during the growing season (spring to fall). During flowering or fruiting, reduce frequency to once every 6–8 weeks or switch to a lower-nitrogen fertilizer. Overdoing it can burn roots—always dilute properly and monitor soil moisture!
Is homemade fish emulsion as effective as store-bought?
Yes! Homemade fish emulsion is just as potent—if you follow proper fermentation and straining. The key difference? Store-bought versions are often pre-diluted and stabilized, while DIY requires more effort (and patience). For consistency, test your homemade batch with a pH strip (aim for 6.0–7.0) before use.
Will fish emulsion attract pests like flies or rodents?
Fresh fish emulsion can smell strong, but proper fermentation (3–4 weeks) eliminates most odors. To minimize pests:
- Store unused emulsion in an airtight container in the fridge.
- Avoid applying near compost piles or pet food.
- Dilute it well before use—strong smells fade quickly.
What if my fish emulsion smells rotten or has mold?
If your emulsion has a sour, ammonia-like stink or visible mold, discard it immediately. This means fermentation went wrong (too hot/cold or contaminated). To prevent this:
- Use clean, fresh fish scraps (no spoiled meat).
- Keep the mixture in a warm (70–80°F), dark place.
- Stir daily to avoid anaerobic pockets (where mold thrives).
Wrapping up and next steps
Making your own fish emulsion is a game-changer for gardeners looking to boost plant health naturally! 🌱 With just a few simple steps and readily available ingredients, you’ve unlocked a nutrient-rich, budget-friendly fertilizer that promotes vibrant blooms and robust growth.
Whether you’re a seasoned gardener or just starting out, this DIY solution proves that great results don’t have to cost a fortune.
Now that you’re equipped with the know-how, why not take the next step? Experiment with different plant varieties—try it on your tomatoes, roses, or even houseplants—and observe the transformation firsthand. Happy gardening! 🌿