
Propagation
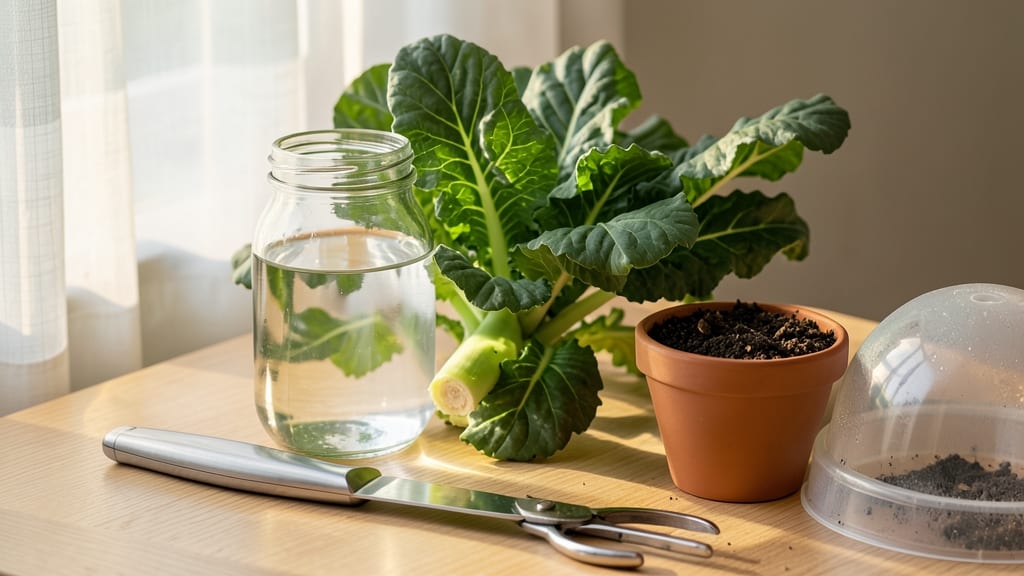
That stubborn collard stem in your fridge can still grow roots—in just 10 days. 🌱 I’ve revived wilted greens this way, and the results are shockingly lush. This method works even with grocery-store cuttings, turning what would be compost into a thriving plant.
You’ll need a clean jar, fresh water, and a sunny windowsill. The secret? Keeping the water clean and the stem upright—no fancy equipment required. Most stems develop roots within 7-10 days, and you’ll be transplanting baby collards in no time.
Once rooted, these plants grow fast, producing tender leaves in weeks. The flavor deepens with frost, making them perfect for fall and winter harvests. No soil prep or seed-starting fuss—just water and light. Works for kale, mustard greens, and other leafy greens too.
Here’s how to make it happen without a single seed packet.
📚 In This Guide
- What you need
- Instructions
- Tips and common mistakes
- Wrapping up and next steps
What you need
- ● Collard green stem: A healthy, disease-free stem (4–6 inches long) with at least 2–3 leaf nodes (where leaves grow from the stem).
- ● Clean, sharp scissors or pruning shears: Sterilized to avoid introducing bacteria or fungi.
- ● Jar or glass container: At least 8–12 inches tall (wide-mouth jars or mason jars work best).
- ● Filtered or room-temperature water: Tap water should sit out for 24 hours to remove chlorine.
- ○ Optional rooting hormone (optional but helpful): A small bottle of powder or gel to encourage faster root growth.
- ● Sunlight: A bright windowsill (south-facing) or a grow light for 6+ hours of indirect light daily.
- ● Patience: Roots typically appear in 7–10 days, but consistency is key!
- ● Clean workspace: A sanitized area to prevent contamination.
Step-by-Step instructions for reviving collard greens from a stem
Here’s how I’ve revived wilted collard stems back to lush, edible greens—no soil needed.
💧 Step 1: Prepare the Stem for Root Revival
Start by selecting a healthy stem with at least 3-4 inches of leafy growth still attached. Use clean, sharp scissors to cut 1 inch below the base of the stem at a 45-degree angle. This angled cut increases surface area for root formation later. Rinse the stem under cool water to remove any dirt or debris—this prevents rot and keeps the water fresh.
Here’s the thing—collard stems are tough, but they need a clean start. If the cut end looks mushy or discolored, trim another ½ inch to expose fresh tissue. You’ll know it’s ready when the inside looks crisp and pale green, not brown or slimy.
🪴 Step 2: Place the Stem in Water
Fill a clean glass or jar with room-temperature water—about 2-3 inches deep. Tap water works fine, but avoid chlorinated water if possible (let it sit out for 24 hours first). Submerge the cut end of the stem only—never let the leaves touch the water, or they’ll rot. Prop the stem upright using a toothpick or small rock if needed to keep it stable.
Change the water every 2-3 days to prevent bacterial growth. You’ll see tiny white bumps forming along the submerged cut within 5-7 days—those are the first roots! Keep the jar in bright, indirect light (a sunny windowsill works). Direct sun can overheat the water and stress the stem.
☀️ Step 3: Encourage Root Growth and New Leaves
After 7-10 days, you should see roots at least 1 inch long and new leaves emerging at the top. This is your signal—roots mean revival! Now, move the jar to a spot with 4-6 hours of indirect sunlight daily. Too much direct sun will scorch the revived leaves, while too little light slows regrowth.
Watch for yellowing leaves—this usually means the water’s stale or the light’s too weak. If you see this, refresh the water and adjust the light. Healthy leaves should be deep green and crisp, not wilted or limp. You’ll notice new growth within 2-3 weeks if conditions are right.
🌱 Step 4: Transplant to Soil (Optional)
Once the roots are 2-3 inches long and new leaves reach 2-3 inches tall, your collard is ready for soil. Fill a small pot (6-inch diameter) with well-draining potting mix, making a hole in the center. Gently remove the stem from the water, shake off excess moisture, and plant it so the roots are just covered—don’t bury the stem too deep. Press the soil lightly around the base to secure it.
Water lightly and place the pot in bright, indirect light for the first week. Avoid direct sun until the plant adjusts. You’ll harvest outer leaves in 3-4 weeks, and the plant will keep producing as long as you maintain it. Real talk: I’ve revived collards this way twice, and they’ve outgrown their pots!
Tips & tricks for reviving collard greens from the stem
Common pitfalls—and how to sidestep every one when bringing your collard stems back to life.
Cutting Technique: That 45-degree angle in Step 1 isn't just for looks—it actually increases the surface area where roots can form. I learned this the hard way after trying straight cuts that barely produced roots. Use a sharp knife or scissors to make clean cuts, and always check the inside for crisp, pale green tissue. If you see brown or mushy spots, trim another ½ inch to expose fresh tissue—this makes all the difference in preventing rot.
Water Quality: Never underestimate the importance of fresh water! Chlorine in tap water can stress your stem, so if you must use it, let it sit out for 24 hours first. I also recommend using filtered or distilled water if possible—it reduces the risk of bacterial growth between water changes. Remember, the water should be room temperature, not cold or warm, to avoid shocking the stem.
Light Management: Bright, indirect light is key during the 7-10 day root development phase. Too much direct sun can overheat the water and scorch the leaves, while too little light slows down root growth. Place your jar near an east-facing window or under fluorescent lights if natural light is limited. I've found that rotating the jar every few days ensures even light exposure all around the stem.
Root Growth Timeline: Those tiny white bumps you'll see within 5-7 days are the first signs of root formation. Don't be tempted to rush this process—patience is crucial. If you notice yellowing leaves during this time, it's usually a sign that either the water needs changing or the light conditions need adjusting. Healthy roots should reach at least 1 inch by day 10, signaling it's time to increase light exposure to 4-6 hours daily.
Pro Tips for Grow Collard Greens From The Stem
- Common pitfalls—and how to sidestep every one when bringing your collard stems back to life.
- Cutting Technique: That 45-degree angle in Step 1 isn't just for looks—it actually increases the surface area where r...
- Water Quality: Never underestimate the importance of fresh water! Chlorine in tap water can stress your stem, so if y...
Frequently asked questions
Can I regrow collard greens from any store-bought stem?
Not all stems will work! Look for fresh, firm stems with at least 3–4 inches of leafy growth and a healthy base. Avoid wilted, yellowed, or mushy stems—they won’t root well. Organic, locally grown greens often have better success rates than pre-washed, packaged varieties.
How long does it take to see roots vs. new leaves?
Roots typically appear in 3–5 days, but full revival (new leaves) can take 7–10 days. Patience is key—keep the water fresh and the stem in bright, indirect light. If no roots form after a week, try trimming the stem slightly and restarting the process.
Why is my stem rotting in water? What should I do?
Rotting usually happens from bacteria growth or overcrowding. To fix it:
- Rinse the stem with hydrogen peroxide (1 part to 4 parts water) to kill bacteria.
- Trim any mushy parts below the waterline with clean scissors.
- Change the water daily and use a small container (like a jar) to prevent stagnation.
Can I transplant the regrown collard directly into soil?
Yes! Once roots are 1–2 inches long (usually after 5–7 days), transfer the stem to moist potting mix or a garden bed. Bury the roots 1 inch deep and keep soil damp (not soggy). Harden off for 2–3 days in partial shade before full sun exposure.
What if I don’t have a jar or water to root the stem?
No jar? No problem! Try these alternatives:
- Paper towel method: Wrap the stem in a damp paper towel, place it in a plastic bag, and check daily for roots.
- Soil propagation: Bury the stem 1 inch deep in moist soil (like a small pot) and keep it humid with a plastic cover.
- Egg carton: Poke holes in the bottom, add water, and place the stem in a compartment.
Will regrown collards taste the same as fresh ones?
Regrown collards retain most of their flavor and nutrients, though they may be slightly milder. For the best taste, harvest young leaves (4–6 inches long) and cook them quickly (sautéing or steaming preserves texture). Older leaves can be tougher but still delicious in soups or braised dishes!
Wrapping up and next steps
Growing collard greens from a stem is a rewarding and simple way to propagate this nutrient-rich plant—even without a garden! With just a few basic supplies and patience, you can watch new roots sprout in 10 days and enjoy a thriving harvest.
Whether you’re a beginner or a seasoned gardener, this method proves that regrowth is always possible with a little care.
Now that you’re equipped with the know-how, give it a try! Start with a healthy stem, keep it hydrated, and soon you’ll be harvesting fresh, homegrown collards. Happy growing—and don’t forget to share your success with fellow plant lovers! 🌱