
Propagation
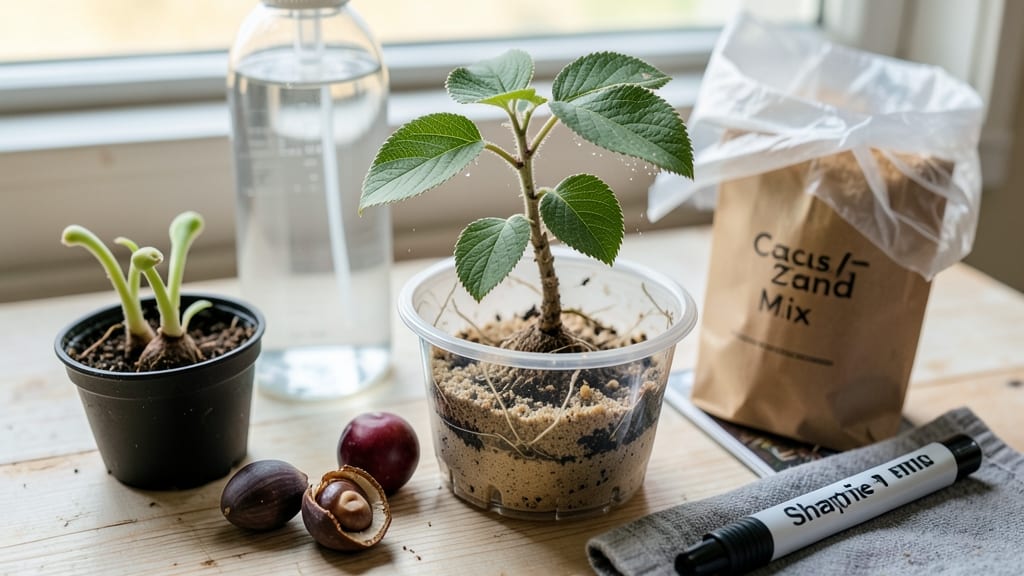
How to grow cherry seeds from pits—that first crack in a cherry pit signals nature’s patience paying off. 🌱 Growing cherry trees from pits feels like unlocking a slow-motion magic trick—weeks of waiting before you hold a seedling that could one day bear fruit. The secret isn’t just planting; it’s tricking the pit into thinking winter already happened.
You’ll need three things: fresh pits (not dried), a damp paper towel or peat moss, and a fridge for the cold treatment. Most people skip the stratification step, which is why their pits never sprout.
I’ve tried every shortcut—none work. The science is simple: mimic winter’s chill to break dormancy, then warm soil to wake it up.
By spring, you’ll have a tiny shoot pushing through soil, its first leaves unfurling like a promise. That first harvest might take 5-7 years, but the journey starts with a single pit. The biggest mistake? Using store-bought cherries—the pits are often treated to prevent sprouting.
Works for sweet, tart, or wild cherries, but expect slower growth than nursery trees. Patience is the only tool you can’t skip. Let’s get those pits sprouting!
📚 In This Guide
- What you need
- Instructions
- Tips and common mistakes
- Wrapping up and next steps
What you need
- ● Cherry pits: 5–10 fresh, firm pits from ripe cherries (avoid cracked or moldy ones!).
- ● Paper towels or damp cloth: 2–3 sheets (for stratification).
- ● Plastic bag or airtight container: 1 (to hold stratified pits).
- ● Soil: 1–2 cups of well-draining potting mix (sandy loam or seed-starting mix works best).
- ● Small pots or seed trays: 2–3 (4–6 inches deep, with drainage holes).
- ● Spray bottle: 1 (for gentle watering).
- ○ Fertilizer (optional): A balanced, water-soluble fertilizer (5-10-5 ratio) for later growth.
- ● Patience: Cherry seeds can take weeks to months to sprout—stratification is key!
- ● Refrigerator space: For cold stratification (30–90 days).
- ● Grow lights or sunny windowsill: To provide 6–8 hours of light daily.
- ○ Heat mat (optional): Speeds up germination if kept at 70–75°F (21–24°C).
- ○ Humidity dome (optional): Helps maintain moisture during early growth.
Step-by-step instructions for growing cherry trees from pits
Here's how to turn those pits into sturdy young trees—no fancy tools needed.
🌱 Step 1: Extract and Clean the Seeds
Crack open the pits carefully with pliers or a nutcracker—cherry pits are hard, but you don’t want to damage the seed inside. Once open, remove the seed and rinse it under cool water to remove any remaining pulp. Pat it dry with a paper towel. This step is crucial because leftover fruit residue can attract mold or pests during storage.
Inspect the seed for cracks or soft spots—discard any damaged ones. Healthy seeds should feel firm and smooth. Store them in a dry, cool place until you’re ready to stratify. I like to label them with the variety and date, since germination timing varies by type.
💧 Step 2: Soak the Seeds for Faster Germination
Fill a small bowl with lukewarm water and let the seeds soak for 24 hours. This softens the hard outer shell, which helps the root break through faster. After soaking, drain the water and let the seeds air-dry for 10-15 minutes—they should feel damp but not wet.
Real talk: Skipping this step won’t kill your seeds, but you’ll wait 2-4 weeks longer for sprouts. The soak mimics natural rain cycles that soften pits in the wild. Place the seeds in a single layer on a paper towel to dry—don’t stack them or they’ll mold.
⏰ Step 3: Stratify for 3-4 Months to Break Dormancy
Mix the dried seeds with a moistened peat moss or coconut coir in a sealed container. Store it in your refrigerator’s crispier drawer (around 35-40°F) for 3-4 months. This cold period mimics winter and tricks the seed into thinking it’s time to grow. Check the mix every 2 weeks—it should stay damp but not soggy.
Here’s the thing—some seeds may sprout earlier, but forcing them to stratify first ensures stronger roots. If you’re impatient, you can cold-stratify for 6 weeks instead, but germination rates drop. Mark your calendar now so you don’t forget to move them to warmer conditions.
☀️ Step 4: Plant After Stratification in Well-Draining Soil
Fill a 4-inch pot with a mix of potting soil and perlite (50/50 ratio) for drainage. Plant each seed 1 inch deep, spacing them 2 inches apart if using multiple pots. Water gently until the soil is moist but not waterlogged. Place the pots in a bright, indirect light spot (like a north-facing window) for 4-6 weeks—direct sun can scorch tender seedlings.
You’ll see the first sprouts in 2-4 weeks after planting, but don’t rush to transplant. Wait until the seedlings have 2-3 sets of true leaves and are at least 4 inches tall. This ensures they’re strong enough to handle outdoor conditions.
🌿 Step 5: Transplant and Care for Young Saplings
Move seedlings outdoors after the last frost date to a sunny spot with well-draining soil. Dig a hole twice as wide as the root ball but no deeper. Water deeply before and after planting to reduce shock. Mulch around the base with 2 inches of wood chips to retain moisture and suppress weeds.
Water once a week (more in dry spells) and fertilize lightly with a balanced 10-10-10 mix every 4-6 weeks in growing season. Cherry trees are slow growers—don’t expect fruit for 5-7 years, but the wait is worth it for homegrown cherries. Prune in late winter to shape the tree and remove dead branches.
Tips & tricks for growing cherry trees from pits
Here's what nobody tells you about turning those cherry pits into thriving trees—trust me, these little details make all the difference.
Seed Selection Tip: Not all cherry pits are created equal. Sweet cherries (like Bing or Rainier) often produce more reliable trees than tart varieties. If you're unsure, test a few pits—some may not germinate at all. I've found that larger, heavier pits tend to sprout more consistently. Look for ones that feel dense and uniform when you tap them together.
Soaking Strategy: The 24-hour soak in Step 2 is your secret weapon for breaking dormancy faster. Use lukewarm (not hot) water—hot water can actually damage the delicate seed. After soaking, I like to place the seeds between two paper towels in a sealed plastic bag for the drying phase. This keeps them from rolling around and prevents mold better than just laying them out flat.
Stratification Hack: When mixing seeds with moistened peat moss in Step 3, don't overpack the container. The seeds need room to expand as they absorb moisture during stratification. I use a small plastic container with drainage holes in the lid—this prevents soggy conditions while maintaining humidity. If you don't have peat moss, coconut coir works perfectly and is more sustainable.
Lighting Secret: That bright, indirect light in Step 4 is crucial—direct sunlight can fry tender seedlings. If you don't have a north-facing window, use a grow light on a timer for 12-14 hours daily. I've seen seedlings get sunburned when placed too close to windows, so keep them 6-12 inches away from glass. Watch for pale yellow leaves as a sign of too much light.
Pro Tips for Grow Cherry Seeds From Pits
- Here's what nobody tells you about turning those cherry pits into thriving trees—trust me, these little details make ...
- Seed Selection Tip: Not all cherry pits are created equal. Sweet cherries (like Bing or Rainier) often produce more r...
- Soaking Strategy: The 24-hour soak in Step 2 is your secret weapon for breaking dormancy faster. Use lukewarm (not ho...
Frequently asked questions
Got questions about growing cherry seeds?
You’re not alone—this process can feel tricky at first! Below, we’ve rounded up the most common questions (and answers) to help you navigate pitfalls and pitfalls (yes, we’re punning ). Whether you’re wondering about timing, troubleshooting, or alternatives, we’ve got you covered.
How long does it take for cherry pits to sprout?
With proper stratification (cold treatment) and soaking, cherry pits typically sprout in 4–12 weeks. Sweet cherries may take longer (up to 3 months), while sour cherries often germinate faster. Patience is key—don’t give up if you don’t see sprouts immediately!
Can I skip the cold stratification step?
Technically, yes—but your success rate will plummet! Stratification mimics winter conditions, breaking the seed’s dormancy. Without it, pits may never sprout or take years to germinate. For best results, always stratify for 6–12 weeks in a damp, chilly environment (like a fridge).
Will my cherry seed grow into a fruit-bearing tree?
Probably not the same variety as your favorite cherry! Seed-grown trees often produce small, tart, or inconsistent fruit (if any at all). For reliable fruit, grafted nursery trees are the way to go. But hey—growing from seed is still a fun experiment, and the tree itself makes a great shade provider!
My pit moldy or rotting—what went wrong?
Mold or rot usually means too much moisture or poor airflow. To fix it:
- Use sterile, well-draining soil
- Avoid overwatering (keep soil moist, not soggy)
- Add a paper towel or sand layer to improve drainage
- Repot if mold appears (trim affected roots and use fresh soil)
Are there faster alternatives to growing cherry seeds?
If you’re eager for results, consider these shortcuts:
- Buy grafted saplings (guaranteed fruit in 3–5 years)
- Layering (propagate from existing cherry tree branches)
- Hydroponic sprouting (faster germination for some pits)
Wrapping up and next steps
Growing cherry trees from pits is a rewarding journey that combines patience with the magic of nature! 🌱 With the right techniques—like stratification, soaking, and warmth—you can turn a simple seed into a thriving sapling in just a few weeks.
Whether you’re a beginner or a green thumb, this process is a fantastic way to nurture life and enjoy homegrown fruit in the future.
Ready to take the next step? Start with a few pits today and watch your cherry tree grow—one tiny sprout at a time! 🌟