
Size
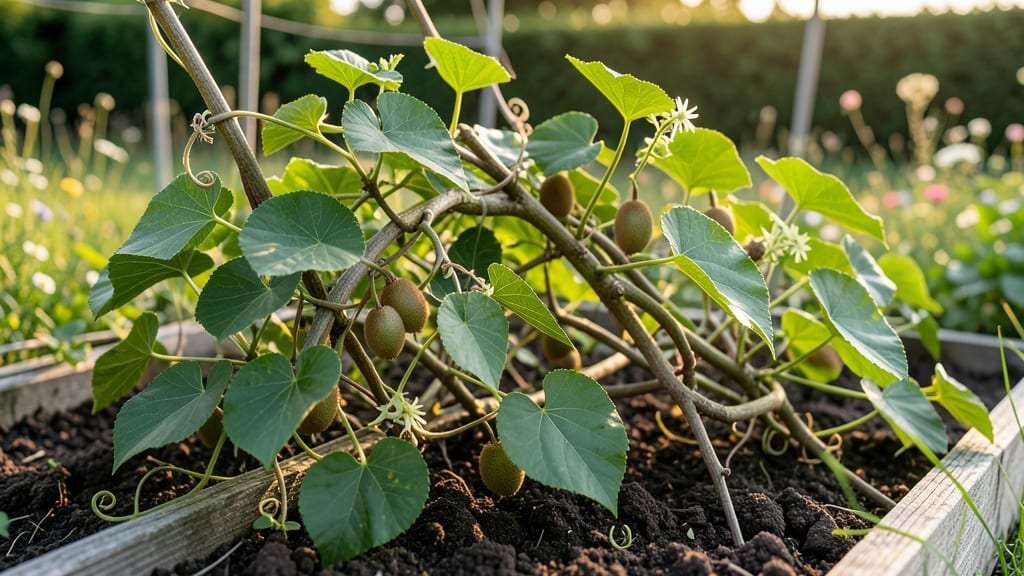
How to grow Arctic kiwi means juicy, grape-sized fruits even in Zone 3. 🌱 I planted my first vines five years ago after assuming they’d freeze solid—turns out, they thrive where regular kiwis would die. The secret? Choosing the right variety and giving them proper support from day one.
You’ll need a sunny spot with 6+ hours of light, well-draining soil (amend with compost if yours is heavy), and a sturdy trellis—these vines climb like crazy. Male and female plants are separate, but one male can pollinate up to six females, so plan accordingly.
Plant in early spring when soil warms to 50°F for best root establishment.
By summer, you’ll see fast growth—prune in late winter to shape the vine and remove dead wood. Water consistently but avoid soggy soil, and watch for powdery mildew (spray with neem oil if needed).
With patience, your first harvest arrives in late summer to fall, tasting like a cross between strawberry and kiwi.
Perfect for northern gardens, small spaces, and anyone tired of store-bought kiwis. The vines are disease-resistant, handle frost like champs, and keep producing for decades. Here’s how to get started without the common pitfalls.
📚 In This Guide
- What you need
- Instructions
- Tips and common mistakes
- Wrapping up and next steps
What you need
- ● Arctic kiwi plants: 1–2 cold-hardy vines (look for Actinidia arguta varieties like 'Issai' or 'Ken’s Red' for self-pollinating options).
- ● Well-draining soil: Mix of 60% topsoil, 30% compost, and 10% perlite/sand (pH 5.5–6.5).
- ● Support structure: Trellis (8–10 ft tall) OR
- ● Arbor or fence (for sprawling varieties).
- ● Organic mulch: 2–3 inches of straw or wood chips to retain moisture and suppress weeds.
- ● Fertilizer: Balanced 10-10-10 or 5-10-10 (apply in early spring and after fruiting).
- ● Watering system: Drip irrigation or hose with a soaker nozzle (Arctic kiwi needs 1–2 inches of water weekly).
- ● Pruning tools: Bypass pruners (for clean cuts)
- ● Loppers (for thicker branches)
- ● Pollination aid: Small paintbrush or bee-friendly flowers (if growing non-self-pollinating varieties).
- ● Frost cloth: For young plants in Zone 4 or colder (spring/fall protection).
- ● Soil tester kit: To monitor pH and nutrient levels.
- ● Garden gloves: For comfortable handling (thorns can be spiky!).
- ● Harvest basket: Soft container to avoid bruising those sweet kiwis! 🍈
Step-by-Step instructions for growing Arctic kiwi vines
Here's how to cultivate cold-hardy Arctic kiwi—tender yet resilient vines that thrive where traditional kiwi struggles.
🌱 Step 1: Choose the Right Location and Planting Time
Arctic kiwi (Actinidia arguta) needs a sheltered spot with full sun to partial shade—at least 6 hours of sunlight daily. I always pick a site near a fence or trellis where winter winds can't scorch the tender young canes. Plant in early spring after the last frost when soil warms to 50°F—this gives roots time to establish before winter.
Dig a hole twice as wide as the root ball but no deeper. The plant's crown should sit just above soil level—burying it too deep invites rot. Mix in a handful of compost with the native soil to boost fertility without overwhelming the plant. Here's the thing—Arctic kiwi is cold-hardy, but young plants still need protection from harsh winter winds.
🪴 Step 2: Install a Support System and Plant
Before planting, set up a sturdy trellis or fence at least 8 feet tall—Arctic kiwi vines grow aggressively and need vertical support. I use a metal T-post trellis because it lasts and won't rot. Space plants 6-8 feet apart to give them room to spread.
Place the vine in the hole and spread roots outward gently. Backfill with soil, tamping lightly to remove air pockets. Water deeply until the soil 6 inches down feels moist. Mulch with 2-3 inches of shredded bark or wood chips to retain moisture and protect roots from temperature swings. This mulch layer also suppresses weeds—something I always appreciate in the first growing season.
☀️ Step 3: Water and Fertilize for Strong Growth
Water newly planted Arctic kiwi 1-2 times per week until established, aiming for 1-2 inches of water per week. You'll know it's enough when the top 6 inches of soil stay consistently moist but not soggy. Overwatering leads to root rot, and Arctic kiwi is particularly sensitive when young.
In early spring, apply a balanced 10-10-10 fertilizer around the base, keeping it 6 inches away from the trunk. Feed again in late summer to encourage next year's growth. I swear by organic options like fish emulsion—it's gentler on the plant and builds soil health over time. Watch for new leaves emerging in 4-6 weeks—that's your sign the plant is thriving.
✂️ Step 4: Prune and Train for Optimal Fruit Production
Prune in late winter or early spring before buds swell. Remove any dead, diseased, or crossing branches first. Then, cut back last year's growth by one-third to encourage bushier, more productive vines. I always look for the strongest canes—these will bear the most fruit. Leave 2-3 main stems to climb the trellis.
Train new growth along the trellis using soft ties or twine. Avoid metal wire—it can damage the tender vines as they thicken. Prune again in summer after fruiting to shape the plant and remove any suckers growing at the base. This keeps energy focused on the main vines and improves air circulation, which prevents fungal diseases.
⏰ Step 5: Protect in Winter and Harvest
Arctic kiwi handles down to -25°F, but young plants or tender new growth may need extra protection. Wrap the base of the vine in burlap or frost cloth in late fall, and mound 4-6 inches of mulch around the roots. This insulation helps the plant survive winter without stress.
Harvest fruit in late summer to early fall when it turns a vibrant green and feels slightly soft to the touch. I pick mine when they're still firm but just beginning to yield to gentle pressure. Arctic kiwi ripens on the vine, so don't wait too long—overripe fruit loses flavor and texture. Store harvested kiwi in the fridge for up to 2 weeks or freeze for longer storage.
Tips & tricks for growing Arctic kiwi vines
Let me share the insights I've picked up after growing Arctic kiwi for years—these little details make all the difference.
Location and Sunlight Secret: While Arctic kiwi tolerates partial shade, I've found that vines planted in the morning sun and afternoon shade produce the sweetest fruit. The morning sunlight gives them the energy boost they need, while afternoon shade prevents leaf scorch—especially important in hotter climates. If your yard only gets full sun, plant near a north-facing wall or fence to create natural shade during peak afternoon hours.
Trellis Training Technique: When training vines in Step 2, I like to use soft horticultural ties rather than twine or wire. These stretch as the vines grow, preventing the kind of damage I used to see from tightening twine. Space the ties every 12-18 inches along the trellis to support the weight of the fruit. I also recommend installing a secondary support wire about 3 feet down from the top—this helps distribute the weight and prevents the main trellis from bending under the load of heavy fruit.
Watering Wisdom: The 1-2 inches per week watering guideline is perfect, but timing matters just as much. I water deeply in the early morning to give the soil time to absorb moisture before the heat of the day. This prevents water from evaporating too quickly and ensures the roots get properly hydrated. If you notice the leaves starting to curl or yellow, that's your plant's way of saying it's thirsty—give it a good drink right away, but don't overdo it after that first deep watering.
Winter Protection Upgrade: For that extra layer of winter protection in Step 5, I've had great success with burlap wraps combined with straw mulch. The burlap protects the trunk from temperature swings, while the straw provides additional insulation. If you're in an area with particularly harsh winters (below -25°F), consider adding a lightweight frost blanket over the entire plant in extreme cold snaps. Just remember to remove it during the day when temperatures rise above freezing to prevent moisture buildup that could lead to fungal issues.
Pro Tips for Grow Arctic Kiwi
- Let me share the insights I've picked up after growing Arctic kiwi for years—these little details make all the differ...
- Location and Sunlight Secret: While Arctic kiwi tolerates partial shade, I've found that vines planted in the morning...
- Trellis Training Technique: When training vines in Step 2, I like to use soft horticultural ties rather than twine or...
Frequently asked questions
about growing Arctic Kiwi can save you time and frustration! Here are answers to the most common questions from gardeners tackling this cold-hardy vine.Can Arctic Kiwi grow in containers, or does it need to be planted in the ground?
Arctic Kiwi thrives in containers if given enough space—aim for at least a 15-gallon pot with drainage holes. Use a well-draining potting mix and provide a sturdy trellis or fence for support. Just
How cold can Arctic Kiwi tolerate, and do I need to protect it in winter?
Arctic Kiwi is hardy down to -30°F (-34°C), making it ideal for northern climates. However, young vines (1–2 years old) benefit from a thick mulch layer (4–6 inches) or frost cloth in extreme winters. Mature vines usually handle winter well without extra protection.
When is the best time to harvest Arctic Kiwi, and how do I know it’s ripe?
Harvest Arctic Kiwi in late summer to early fall (August–September), when the fruit is fully colored and slightly soft to the touch. Unlike hardy kiwi, it won’t ripen off the vine—so pick it at peak flavor! Look for a sweet aroma and a slight give when gently squeezed.
Do Arctic Kiwi plants need bees for pollination, or can I hand-pollinate them?
While Arctic Kiwi is self-pollinating, bees still help boost fruit production. If your garden lacks pollinators, you can gently transfer pollen with a small brush between flowers in the morning. Planting bee-friendly flowers nearby also encourages natural pollination.
What should I do if my Arctic Kiwi leaves turn yellow or the vine stops growing?
Yellowing leaves often signal overwatering or nutrient deficiency. Check soil moisture (it should be evenly damp, not soggy) and adjust watering. Slow growth may mean poor drainage or lack of sunlight—ensure the vine gets 6+ hours of sun daily and amend soil with compost if needed.
Wrapping up and next steps
Growing Arctic kiwi is a rewarding adventure for northern gardeners—just imagine harvesting your own frost-resistant vines! With the right site, support, and care, these hardy plants thrive even in cooler climates. Start small, stay patient, and soon you’ll enjoy sweet, tangy fruit straight from your backyard.
Ready to take the next step? Plant your vines this season and watch your garden transform! 🌱 For extra tips, check out our FAQs or join gardening forums to share your progress.