
Size
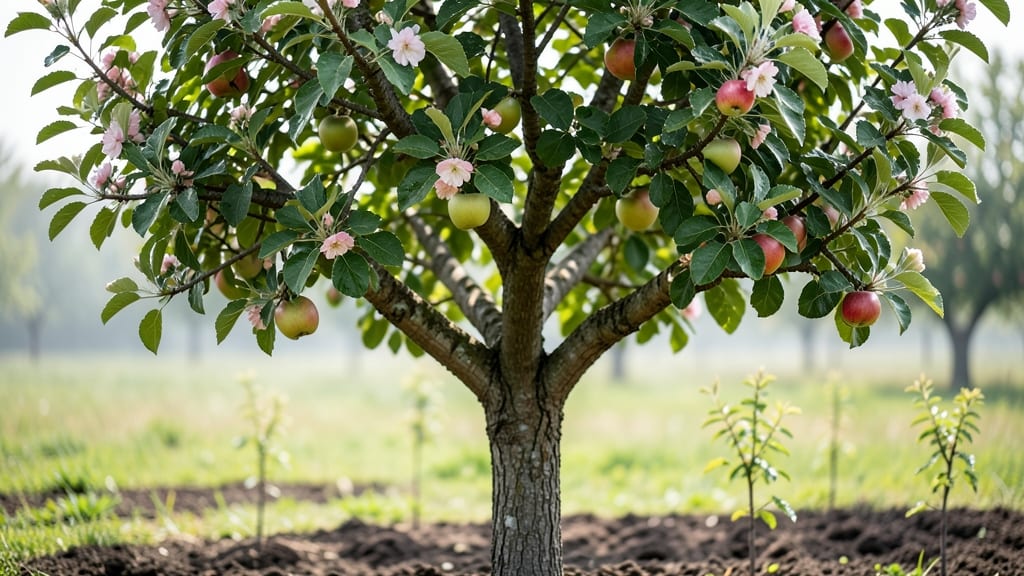
How to grow an apple plant from seed feels like planting hope for future harvests. 🌱 I’ve watched tiny seedlings turn into trees heavy with fruit, and the process starts with the right soil, sunlight, and patience—no green thumb required. The first year is about establishing strong roots and branches, while years two and three focus on shaping the tree and ensuring proper pollination. Dwarf varieties fit small spaces, while standard trees need room to grow, but both reward you with crisp, homegrown apples in just three seasons. You’ll learn how to prune for airflow, protect against pests, and recognize when fruit is ripe. The smell of blossoms in spring and the taste of your first homegrown apple make every step worthwhile. Perfect for backyards, orchards, or even large containers—here’s how to turn seeds into a thriving tree.
📚 In This Guide
- What you need
- Instructions
- Tips and common mistakes
- Wrapping up and next steps
What you need
- ● Apple seeds or seedlings: 1–3 (from organic, disease-free apples or a trusted nursery). Pro tip: 💡 For faster results, buy grafted seedlings (they fruit sooner!).
- ● Well-draining potting mix: 5–10 gallons (sterilized, organic blend with perlite or sand for aeration).
- ● 5–7 gallon nursery pots: 1–3 (with drainage holes) or a raised garden bed (4’x4’ minimum).
- ● Compost or aged manure: 2–3 cups (for nutrient-rich soil).
- ● Slow-release fertilizer: 10–20-10 NPK ratio (1 tbsp per pot or 1 lb per 10 sq ft of bed).
- ● Mulch (straw or wood chips): 2–3 inches (to retain moisture and suppress weeds).
- ● Drip irrigation or watering can: (with a gentle spray nozzle).
- ● Hand trowel or small shovel: For planting and soil prep.
- ● Pruning shears: (sterilized with rubbing alcohol).
- ● Garden gloves: (to protect hands from thorns and soil).
- ● pH test kit: (ideal soil pH: 6.0–7.0 for apples).
- ○ Stakes and twine: (optional, for young trees in windy areas).
- ● Mycorrhizal fungi: (boosts root growth—mix into soil).
- ● Apple tree pollinator variety: (if growing from seed, plant 2+ varieties for cross-pollination).
- ● Frost cloth: (for young trees in cold climates).
- ● Pest control (neem oil or diatomaceous earth): (preventative measure).
Step-by-step instructions for growing apple plants
Here's my foolproof method for growing a healthy apple tree from seed to fruit-bearing.
🌱 Step 1: Select and Prepare Apple Seeds
Choose seeds from a fresh, organic apple—store-bought varieties often contain hybrid seeds that won't produce true fruit. Cut the apple in half, scoop out the seeds, and rinse them thoroughly to remove any pulp. Place the seeds in a bowl of water and let them soak for 24 hours to soften the outer coating and speed up germination.
After soaking, spread the seeds on a paper towel and fold it over them. Place the towel in a sealed plastic bag and store it in a warm, dark place like your fridge's crisper drawer. Check the seeds every few days and mist them lightly with water to keep them moist. You'll see the first signs of sprouting in about 3-4 weeks—tiny white roots will emerge from the seeds.
🪴 Step 2: Plant the Germinated Seeds
Once the seeds have sprouted, fill small pots (about 3-4 inches deep) with a well-draining potting mix. I like to use a blend of 50% potting soil and 50% perlite or sand to ensure good drainage. Plant each seed about ½ inch deep, spacing them 1 inch apart in the pot. Gently pat the soil around the seeds to secure them without compacting it too much.
Place the pots in a warm, sunny spot where they'll receive 6-8 hours of indirect light daily. Keep the soil consistently moist but not soggy—water the pots whenever the top inch of soil feels dry to the touch. You'll notice the first true leaves appear in about 2-3 weeks, signaling that your seedlings are growing strong.
☀️ Step 3: Transplant Seedlings to Individual Pots
When the seedlings are about 4-6 inches tall and have developed their first set of true leaves, it's time to transplant them into their own 5-inch pots. Choose pots with drainage holes to prevent waterlogging, which can cause root rot. Fill each pot with fresh potting mix and carefully remove the seedlings from their original pot, making sure not to damage the roots.
Plant each seedling in its own pot, burying it up to the first set of true leaves. This helps encourage stronger root growth. Place the pots in a location that receives full sun (6+ hours daily), and continue to keep the soil moist but well-drained. You'll see new growth within a few weeks, and the seedlings will start to develop a more robust structure.
🌿 Step 4: Acclimate and Plant Outdoors
After the seedlings have grown for about 6-8 months and are at least 12 inches tall, they're ready to be transplanted outdoors. Choose a sunny spot in your garden with well-draining soil and space the seedlings about 20 feet apart to give them room to grow. Dig a hole that's twice as wide as the seedling's root ball but only as deep as the root ball itself.
Carefully remove the seedling from its pot and place it in the hole, backfilling with soil and pressing gently around the base. Water the seedling deeply to help it settle into its new home. Mulch around the base with a 2-3 inch layer of organic mulch to retain moisture and suppress weeds. Over the next few weeks, gradually introduce the seedlings to outdoor conditions by keeping them in a sheltered spot before moving them to full sun.
⏰ Step 5: Care for Your Apple Tree Through the Years
In the first year, focus on establishing strong roots and a sturdy trunk. Water your apple tree deeply once a week, providing 1-2 inches of water each time. Fertilize lightly in the spring with a balanced, organic fertilizer to encourage healthy growth. Prune any dead or diseased branches and shape the tree to promote an open canopy, which allows better airflow and sunlight penetration.
By the third year, your apple tree should be well-established and ready to produce fruit. Continue to water deeply during dry spells and fertilize in early spring. Thin out any overcrowded branches to improve fruit size and quality. With patience and care, you'll be harvesting your own homegrown apples in no time!
Tips & tricks for growing healthy apple trees
Here's what I've learned from watching my own apple trees grow—simple tricks that make all the difference between thriving seedlings and struggling saplings.
Seed Selection: Confession: I skipped this step for years and wondered why my trees never bore fruit. Always choose seeds from a fresh, organic apple—store-bought varieties often contain hybrid seeds that won't produce true fruit. Look for heirloom varieties if you want predictable results. The 24-hour soak is non-negotiable—it softens the seed coat and speeds up germination by breaking down natural inhibitors.
Light Balance: That 6-8 hours of indirect light in Step 2 is crucial for young seedlings. Too much direct sun can scorch tender leaves, while too little causes leggy growth. I use a sheer curtain to diffuse harsh afternoon sun during hot months. A south-facing windowsill works great for indoor growing, but rotate your pots weekly so all sides get even light exposure.
Transplant Timing: When your seedlings reach 4-6 inches in Step 3, don't rush the transplant. Wait until you see strong true leaves—those little cotyledons don't count! The key is to handle roots gently. I dip the root ball in water before planting to encourage root growth. After transplanting, keep them in partial shade for a few days to reduce transplant shock.
Outdoor Acclimation: The 6-8 month mark in Step 4 is when patience pays off. Before moving seedlings outdoors permanently, do a two-week "hardening off" process. Start with just 1 hour outside in morning sun, then gradually increase exposure. I've seen seedlings go into shock when moved too quickly—watch for wilting or yellowing leaves as warning signs. That 2-3 inch mulch layer is your best friend for moisture retention and weed control.
Pro Tips for Grow Apple Plant
- Here's what I've learned from watching my own apple trees grow—simple tricks that make all the difference between thriving seedlings and struggling saplings.
- Seed Selection: Confession: I skipped this step for years and wondered why my trees never bore fruit.
- Light Balance: That 6-8 hours of indirect light in Step 2 is crucial for young seedlings.
Frequently asked questions
Got questions about growing your own apple tree? You’re not alone! Here are some of the most common queries—plus straightforward answers to help you avoid pitfalls and maximize success.
Can I grow an apple tree from a store-bought apple?
Technically, yes—but it’s not ideal. Seeds from grocery-store apples often produce trees that take 10+ years to fruit (if ever) and may not yield true-to-type fruit. For faster, reliable results, start with rootstocks or grafted nursery trees. If you’re experimenting, try heirloom apple varieties like Granny Smith or Honeycrisp!
How long does it take for an apple tree to bear fruit?
With proper care, most dwarf or semi-dwarf apple trees produce fruit in 3–5 years. Standard-sized trees may take 5–7 years. Patience pays off—young trees focus on root and canopy growth first. Prune strategically in the first 2 years to encourage flowering buds!
What’s the best time to plant an apple tree?
Plant in early spring (just as buds swell) or late fall (6–8 weeks before frost). Avoid extreme heat or cold—roots need time to establish. If planting in spring, water deeply 2–3 times per week for the first month. Pro tip: Mulch with wood chips to retain moisture and regulate soil temp!
Why are my apple leaves turning yellow or curling?
Yellow leaves often signal nutrient deficiencies (like iron or nitrogen) or pests (aphids, mites). Check the undersides of leaves for tiny bugs. Curling can also mean herbicide drift or fungal issues (e.g., apple scab). Treat with neem oil or copper fungicide if needed. Monitor regularly to catch problems early!
Do apple trees need another tree to produce fruit?
Most apple varieties are self-pollinating but produce more fruit with a pollinator nearby (even 50+ feet away). Plant 2+ compatible varieties (e.g., Gala + Fuji) for cross-pollination. Check your tree’s label—some, like Granny Smith, need a partner. Bonus: Bees will thank you!
Wrapping up and next steps
Growing your own apple tree is a rewarding journey that combines patience, care, and a little bit of magic! 🌱 From selecting the right variety to nurturing your sapling, every step brings you closer to harvesting fresh, homegrown fruit.
With the right conditions—sunlight, soil, and love—you’ll be enjoying crisp, delicious apples in just a few years.
Ready to take the next step? Start small: plant your seedling or grafted tree today, and soon you’ll be sharing your harvest with friends and family. Happy growing—your future apple orchard awaits! 🍏✨