
Propagation
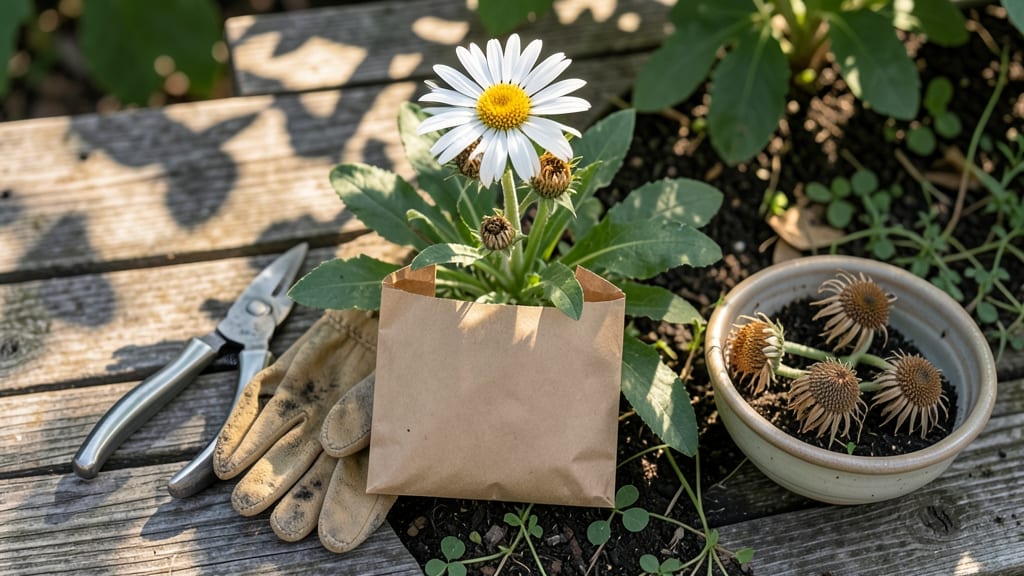
How to get seeds from daisies turns last year’s blooms into next season’s garden magic. ✨ The secret lies in patience—waiting for seed heads to fully mature and dry before gently harvesting them. I've saved seeds from my perennial daisies for years, and this method ensures fluffy, viable seeds that sprout reliably.
You'll need only three things: mature daisy seed heads, a dry paper bag, and a quiet corner to work. The process starts when seed heads turn brown and papery, signaling they're ready.
Simply twist or cut the dried stems and place them in your bag, leaving them undisturbed for a week to fully release their seeds.
What you'll end up with is a bag of fluffy white seeds, ready to store for planting next spring. These seeds maintain viability for up to three years when kept in a cool, dry place.
The satisfaction of growing daisies from seeds you saved yourself is unmatched—especially when they return year after year.
This method works for both wild and cultivated daisies, making it perfect for gardeners who love heirloom varieties or want to expand their garden naturally. Regional climates may affect drying times, so keep an eye on your seed heads until they're fully mature.
📚 In This Guide
- What you need
- Instructions
- Tips and common mistakes
- Wrapping up and next steps
What you need
- ● Mature daisies: Choose fully bloomed daisies (preferably Gerbera daisies or Oxeye daisies) with dry, brown centers—this means the seeds are ripe! 🌻 (3–5 plants recommended for a good yield.)
- ● Clean, dry paper bags or brown paper: Enough to cover the seed heads (e.g., 4–6 small paper bags or a large sheet). (Avoid plastic—it traps moisture!)
- ● Scissors or pruning shears: Sharp and clean for snipping seed heads without damaging stems.
- ● Rubbing alcohol (70% isopropyl) or mild soap: For sterilizing tools to prevent mold or bacteria.
- ● Drying surface: A clean, dry tray, cardboard box, or mesh screen in a warm, well-ventilated spot (e.g., a sunny windowsill or indoor shelf).
- ○ Optional but helpful: Glove (to protect hands from seed fluff and potential allergens).
- ● Small paintbrush or soft-bristle brush (for gently dislodging stubborn seeds).
- ● Labeling tags + marker (to track seed types if propagating multiple varieties).
Step-by-Step instructions for harvesting daisy seeds
Here's how to save daisy seeds the easy way—no fancy tools needed, just patience and a gentle touch.
🌱 Step 1: Wait for Seed Heads to Fully Mature
Pick your daisies when the center disk turns from bright yellow to a deep, papery brown. This signals the seeds are fully mature and ready for harvest. I usually wait until the petals start to droop slightly—they’ll look a little tired, almost like they’re bowing out of the garden.
Don’t rush this step. If you harvest too early, the seeds won’t be fully developed, and your saved seeds may not grow properly. A good rule of thumb is to wait until the center disk feels dry and brittle to the touch—it should crumble easily when you gently squeeze it.
🌿 Step 2: Snip the Seed Heads and Prepare for Drying
Use clean scissors or pruners to cut the seed heads from the stems, leaving about 1 inch of stem attached. This extra stem helps keep the seed head intact during drying. Place the cut heads in a paper bag or a breathable container—plastic traps too much moisture, which can spoil the seeds.
Here’s the thing—don’t wash the seed heads. Any dirt or debris will brush off naturally during the drying process, and moisture can ruin the seeds. Just give them a little shake to remove loose particles before storing them in your drying spot.
💧 Step 3: Dry the Seed Heads Completely
Find a warm, dry place with good airflow—like a sunny windowsill or a well-ventilated shelf. Lay the seed heads flat or hang them upside down in small bundles. I like to use a mesh bag or an old pillowcase to keep them contained while still allowing air to circulate.
Drying takes about 1-2 weeks, depending on your climate. You’ll know they’re ready when the center disk fluffs up easily at the slightest touch. If you rub it between your fingers, the seeds should come out in a soft, fluffy cloud—this is the sign you’ve been waiting for.
✂️ Step 4: Extract and Store the Seeds
Once the seed heads are completely dry, gently rub the center disk between your palms or use a fork to scrape out the seeds. The seeds should separate easily into a light, fluffy mass. Avoid crushing them—this can reduce viability.
Store the seeds in a cool, dry place in a sealed envelope or small jar. Label it with the daisy variety and the date. Seeds stored this way can last for years, so you’ll always have a backup supply for next season’s garden.
🌱 Step 5: Test a Few Seeds Before Full Planting
Before you plant all your saved seeds, test a few to make sure they’re viable. Sprinkle a handful in a small pot with moist potting soil and cover lightly. Place the pot in a warm, sunny spot and keep the soil damp. If you see sprouts within 10-14 days, your seeds are ready to go.
If germination is slow or spotty, don’t worry—sometimes seeds just need a little extra time. Just be patient, and you’ll have a fresh batch of daisies in no time. Happy saving!
Tips & tricks for perfect daisy seed harvesting
Patience pays off when saving daisy seeds—here's how to avoid common pitfalls and get the fluffiest, most viable seeds every time.
Timing is Everything: The 1-2 week drying period in Step 3 is your secret weapon. If your climate is particularly humid, consider using a small fan on low to increase airflow around your drying seed heads. This helps prevent mold while maintaining that perfect fluffy texture. I've had the best success when the center disk feels completely dry and papery—like it would disintegrate if you breathed on it too hard.
Equipment Upgrade: While paper bags work fine, I've found that using a breathable mesh produce bag creates even better airflow during drying. These bags allow moisture to escape while keeping the seed heads contained. If you don't have one, a clean pillowcase with holes punched in it works just as well—just don't skip the airflow entirely!
Seed Viability Test: The 10-14 day germination test in Step 5 is your quality control measure. If you're impatient and want to speed up the process slightly, try placing the test pot in a warm spot (like on top of your fridge) rather than just a sunny windowsill. Just be careful not to overheat the soil—you're looking for warmth, not steam!
Storage Wisdom: For long-term storage beyond a few years, consider adding a small silica gel packet to your seed envelope. These packets absorb excess moisture and help maintain viability. You can find them in craft stores or online—just make sure they're food-safe. I've kept seeds viable for over 5 years using this method, though most daisy seeds will germinate well within 2-3 years anyway.
Pro Tips for Get Seeds From Daisies
- Patience pays off when saving daisy seeds—here's how to avoid common pitfalls and get the fluffiest, most viable seeds every time.
- Timing is Everything: The 1-2 week drying period in Step 3 is your secret weapon.
- Equipment Upgrade: While paper bags work fine, I've found that using a breathable mesh produce bag creates even better airflow during drying.
Frequently asked questions
Got questions about harvesting daisy seeds?
You’re not alone! Here are answers to the most common ones—so you can grow those fluffy blooms with confidence.
When is the best time to collect daisy seeds?
The ideal time is when the daisy flower heads turn brown and the center fluff (pappus) looks dry and papery—usually late summer to early fall. Wait until the petals drop naturally; harvesting too early can ruin seed viability.
How do I know if the seeds are ready to harvest?
Gently squeeze a dried flower head—if the seeds inside rattle freely and the fluff separates easily, they’re ready! Avoid collecting seeds that still feel moist or sticky. A quick sniff test helps too: dry seeds smell earthy, not fresh.
Can I save seeds from store-bought daisies?
Probably not! Most commercial daisies are hybrids bred for color or size, so their seeds won’t grow true to the parent plant. Stick to heirloom or open-pollinated varieties from seed savers or local nurseries for reliable results.
How long do daisy seeds stay viable for storage?
Daisy seeds can last 1–2 years in a cool, dry place (like a paper envelope in the fridge). For longer storage, dry them thoroughly first and keep them in an airtight container with silica gel. Test a few each year to check viability!
Will birds or squirrels steal my seeds before I can collect them?
Yes! These critters love daisy seeds. To outsmart them, harvest seeds early in the morning or cover flower heads with mesh bags once they’re dry. A quick shake over a tray can also deter snacking wildlife.
Wrapping up and next steps
You’ve now mastered the gentle twist-and-dry technique to harvest daisy seeds—no fuss, just fluffy viability! Whether you’re saving seeds for next season’s garden or sharing them with fellow plant lovers, your newfound skills will ensure success. 🌼✨
Ready to take it further? Try experimenting with different daisy varieties or even growing them from seed to watch your garden bloom with ease. Happy gardening!