
Pests
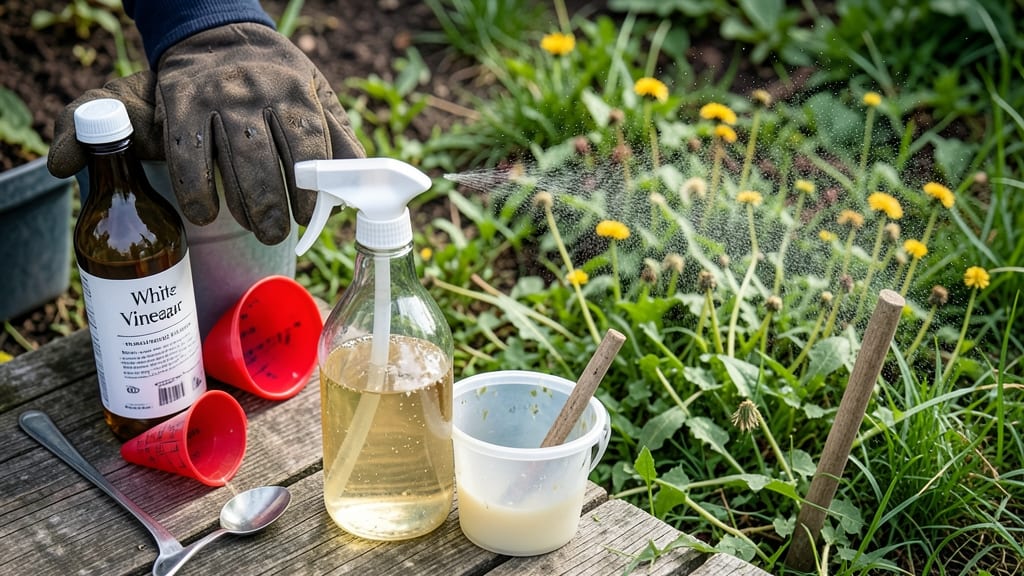
How to get rid of weeds using vinegar—it’s the fastest, chemical-free way to clear stubborn weeds in hours, not days. ✨ I’ve used this trick for three summers now, and it’s the most efficient method for tackling weeds without harsh chemicals. The secret? A precise mix that works fast but won’t wreck your soil or nearby plants.
You’ll need plain white vinegar (5% acetic acid), a spray bottle, and a sunny afternoon. Most weeds wilt within 24 hours of treatment, but don’t expect miracles—it works best on young, healthy weeds in direct sunlight.
This method is cheap, reusable, and chemical-free, but it’s not perfect for every garden.
By the end of the day, your walkways and garden beds will look cleaner, and you’ll avoid the backbreaking work of pulling weeds by hand. The best part? No more digging or scrubbing—just spray and watch them collapse.
Just remember: timing and concentration matter—too weak, and it won’t work; too strong, and you might damage your soil.
This method works best for driveways, sidewalks, and non-organic garden areas where you don’t mind sacrificing a little soil life. If you’re growing edibles or want to protect beneficial microbes, we’ll cover safer alternatives too. Let’s get started!
📚 In This Guide
- What you need
- Instructions
- Tips and common mistakes
- Wrapping up and next steps
What you need
- ● White vinegar (5% to 20% acetic acid) – 1 gallon (3.8 liters) per treatment. Higher concentrations (10-20%) work faster but may require dilution for delicate plants.
- ● Spray bottle or garden sprayer – A 1-gallon pump sprayer (for large areas) or a 16-ounce handheld spray bottle (for spot treatments).
- ○ Dish soap (optional but recommended) – 1 tablespoon. Helps the vinegar stick to weed leaves.
- ● Water – 1 gallon (3.8 liters) to dilute vinegar (adjust based on concentration).
- ● Protective gloves – Vinegar can irritate skin, so grab a pair of nitrile or rubber gloves.
- ● Sunny day – Full sunlight is ideal for maximum effectiveness (apply between 10 AM and 4 PM).
- ● Garden hose with nozzle – For rinsing off nearby plants or cleaning tools.
- ● Plastic sheeting or cardboard – To protect desired plants from accidental vinegar splashes.
- ● Garden trowel or hoe – For uprooting stubborn weeds after treatment.
- ● Labeling spray or tape – To mark treated areas and avoid reapplying.
Step-by-Step instructions for weed control using vinegar
Here's how to tackle weeds quickly and effectively using a natural, chemical-free approach.
💧 Step 1: Choose the Right Vinegar Solution
For maximum effectiveness, use undiluted white vinegar with a 5% acetic acid concentration—the higher the acidity, the faster the kill. Clear vinegar works best because it penetrates weeds more effectively than colored varieties. Avoid apple cider vinegar, which has lower acidity and requires longer contact time.
Check the label to confirm the acid percentage. If you're unsure, a simple test works: pour a small amount on a weed and observe within 15 minutes. If the vinegar starts to bubble or foam, it's strong enough to kill weeds. Store your vinegar in a spray bottle for easy application—just make sure to use a plastic or glass container to avoid corrosion.
☀️ Step 2: Target Weeds on a Sunny, Dry Day
Timing is everything when using vinegar for weed control. Apply the solution on a sunny, dry day when temperatures are between 70-85°F. The sun helps the vinegar evaporate quickly, ensuring the acetic acid penetrates the weed's leaves and stems without washing away.
Focus on young, actively growing weeds—they absorb vinegar faster than mature plants. Avoid spraying near desirable plants, as vinegar can harm them too. If you're treating a large area, mark the weeds with a stick or flag for accuracy. A handheld sprayer with a narrow nozzle gives you precision control, reducing the risk of drift onto plants you want to keep.
✂️ Step 3: Apply Vinegar Directly to the Weeds
Fill your spray bottle with undiluted vinegar and shake it well to mix. Hold the bottle 6-8 inches above the weeds and spray until the leaves are completely saturated, including the undersides. You'll know you've done it right when the vinegar begins to drip off the foliage—this ensures maximum absorption.
Reapply every 3-5 days for two weeks to kill the roots. Vinegar works by dehydrating the plant, so repeated applications are key. If you miss a spot, the weed may regrow. For stubborn weeds, add 1 tablespoon of dish soap per gallon of vinegar to help the solution stick and improve penetration. Just be cautious—soap can also harm nearby plants, so use it sparingly.
🌱 Step 4: Monitor and Retreat as Needed
After your first application, watch for signs of wilting or browning within 24-48 hours. If the weeds don't respond, they may be too mature or thick. In that case, trim the foliage down to 1-2 inches before reapplying the vinegar—this helps the solution reach the roots more effectively.
For best results, treat weeds before they seed. A single application may not be enough, especially for deep-rooted weeds like dandelions or clover. If new growth appears, repeat the process. Keep in mind that vinegar won't prevent future weeds—it's a short-term solution for visible weeds only. For long-term control, combine vinegar treatments with mulching or hand-pulling to starve out new growth.
Tips & tricks for effective weed elimination with vinegar
Here's what I've learned from years of battling weeds—these tricks make vinegar treatments work faster and more reliably.
Acidity Test: The 15-minute bubble test in Step 1 is your best quality check. If your vinegar doesn't foam when applied to weeds, it's not strong enough. I've seen garden centers sell vinegar with as little as 3% acidity—always verify the label. For maximum results, use straight 5% white vinegar without dilution, as this ensures the acetic acid concentration stays optimal throughout the entire process.
Precision Application: When you're spraying in Step 3, aim for the undersides of leaves where the vinegar can penetrate most effectively. I've found that holding the spray bottle at exactly 6-8 inches above the weeds creates the perfect saturation without overspray. For stubborn weeds, add the dish soap only to the affected areas—not the entire bottle—to avoid harming nearby plants.
Timing Strategy: The 24-48 hour window after application is critical. If you don't see wilting within this timeframe, the weeds may be too mature. I've learned to trim back thick foliage to 1-2 inches before reapplying—this forces the vinegar to reach the roots where it's most effective. For best results, treat weeds before they seed, as established plants have thicker cell walls that resist vinegar penetration.
Pro Tips for Get Rid Of Weeds Using Vinegar
- Here's what I've learned from years of battling weeds—these tricks make vinegar treatments work faster and more reliably.
- Acidity Test: The 15-minute bubble test in Step 1 is your best quality check.
- Precision Application: When you're spraying in Step 3, aim for the undersides of leaves where the vinegar can penetrate most effectively.
Frequently asked questions
Got questions about using vinegar to kill weeds? You’re not alone! Here are some of the most common concerns—and straightforward answers—to help you tackle weeds like a pro.
Is vinegar safe for all types of weeds?
Vinegar works best on broadleaf weeds (like dandelions and clover) and young grasses. However, it may not kill deep-rooted perennials or thick grass lawns effectively. For stubborn weeds, you might need multiple applications or a stronger vinegar solution (like 20% acetic acid). Always spot-test on a small area first!
How long does it take for vinegar to kill weeds?
You’ll usually see results within 24–72 hours, but full death may take 3–7 days, depending on the weed type and weather. Hot, sunny days speed up the process, while rain can dilute the vinegar and reduce effectiveness. Reapply if weeds persist after a week.
Will vinegar harm my plants or grass?
Yes, vinegar is non-selective, meaning it can kill anything it touches—plants, grass, and even soil microbes. To protect desired plants, apply vinegar only to weeds on wind-free days and use a targeted spray nozzle. For lawns, consider spot-treating or using a shield (like cardboard) around plants.
Do I need to water before or after applying vinegar?
Watering before application can dilute the vinegar, reducing its potency. However, watering after (lightly) helps the solution stick to the leaves and prevents evaporation. Avoid heavy watering for 24 hours post-application to maximize effectiveness.
What if vinegar doesn’t work? Are there alternatives?
If vinegar falls short, try these natural alternatives:
- Boiling water: Pour directly on weeds (best for small, localized areas).
- Salt or dish soap: Mix 1 gallon of water with 1 cup of salt or 1 tbsp of dish soap for a budget-friendly herbicide.
- Corn gluten meal: A pre-emergent herbicide that prevents weed seeds from sprouting (great for long-term control).
Wrapping up and next steps
Getting rid of weeds using vinegar is a simple, budget-friendly, and eco-conscious solution that works wonders without harsh chemicals! 🌱 Whether you're tackling stubborn weeds in your garden, driveway, or sidewalk, this method is effective and safe for most plants—just avoid spraying near your prized flowers or veggies.
With a little patience and consistency, you’ll see those unwanted invaders disappear in no time.
Ready to reclaim your space? Grab your vinegar, spray bottle, and gloves, and give it a try today! For even better results, experiment with different vinegar strengths or add dish soap for extra power. Happy weeding! 🌿