
Pests
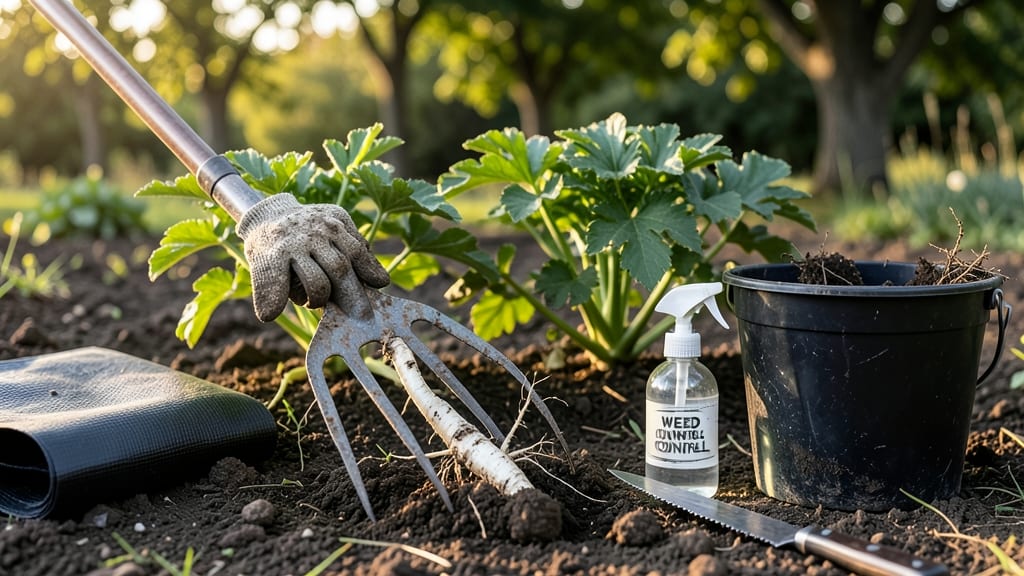
How to get rid of horseradish in the garden requires more effort than you might expect—three feet down is common for its roots. 🌱 I’ve spent years battling this invasive plant, and the only way to truly remove it is by digging out every last root fragment. No shortcuts work here; even a tiny piece left behind will regrow. The process requires patience and persistence, but it’s worth it. You’ll need a sturdy shovel, gloves, and a tarp to collect debris. The goal is to expose and remove the entire root system, including the thick, white taproot that anchors the plant. This isn’t a one-time job—you’ll likely need to repeat the process for 2-3 seasons to ensure it’s gone for good. Once you’ve dug up the roots, dispose of them carefully. Never compost horseradish—it can survive and spread. Instead, bag it and throw it away, or burn it if possible. The key is preventing any part from taking root again in your soil. For large infestations, consider smothering the area with thick cardboard or landscape fabric for 6-12 months before replanting. This starves out any remaining roots and gives you a clean slate for your garden. It’s tough work, but the payoff is a horseradish-free space for years to come.
📚 In This Guide
- What you need
- Instructions
- Tips and common mistakes
- Wrapping up and next steps
What you need
- ● Garden gloves (2 pairs): Heavy-duty, chemical-resistant gloves (e.g., nitrile-coated) to protect your hands from sap and sharp roots.
- ● Shovel or garden fork (1): A sturdy, wide-blade shovel (16–18 inches) or heavy-duty fork for digging deep roots (horseradish can grow 5+ feet down!).
- ● Pruners or loppers (1): For trimming thick stems and foliage above ground.
- ● Garden tarp or heavy-duty plastic sheeting (1–2 sheets, 4x6 feet): To smother regrowth or collect debris.
- ● Trash bags or compost bin (5–10 gallon bags): For disposing of all horseradish parts—even tiny root fragments can regrow!
- ● Vinegar (white or apple cider vinegar) (1 gallon): For spot treatments on remaining roots or soil (use undiluted for best results).
- ○ Boiling water (optional but effective): A 5-gallon kettle or garden sprayer for pouring on stubborn root clusters.
- ● Root killer or herbicide (glyphosate-free option like vinegar + dish soap): For stubborn patches after digging.
- ● Soil solarizer (if available): A clear plastic tunnel to bake out remaining roots with sunlight.
- ● Compostable mulch (straw or wood chips): To suppress regrowth in treated areas.
- ● Label or marker: To tag areas where horseradish was removed (so you don’t forget to check for regrowth!).
Step-by-Step instructions for removing horseradish naturally
This dig-and-repeat method works because horseradish spreads aggressively through roots—we’ll starve it out systematically.
🌱 Step 1: Identify and Map the Horseradish Patch
Start by walking the garden and marking every visible horseradish leaf or stem with flags or chalk. Horseradish spreads through underground rhizomes, so the infestation is often larger than it appears. Dig a small test hole near the outer edges of the marked area—if you find roots, expand your map by 2 feet in all directions.
Here’s the thing—horseradish roots can grow 10-15 feet deep over time, but the most aggressive growth happens in the top 12 inches. Focus your efforts there first. If your garden is small, you might need to repeat this process for 2-3 seasons to fully eradicate it.
✂️ Step 2: Cut and Remove All Above-Ground Growth
Use pruning shears or a sharp knife to cut horseradish stems at the soil line. Don’t pull—this breaks the plant but leaves roots intact to regrow. Bag all cuttings immediately and dispose of them in sealed trash bags (never compost). If you leave even a small piece behind, it’ll sprout again within 2 weeks.
I know it seems tedious, but this step is critical. Horseradish stores energy in its roots, and removing the foliage forces the plant to use up those reserves. Repeat this cutting every 2 weeks during the growing season to weaken the roots over time.
🪴 Step 3: Dig Out the Root System in Sections
Use a digging fork or spade to remove the top 12 inches of soil in the mapped area. Focus on pulling out the thick, gnarled rhizomes—these are the main spreaders. Horseradish roots can be tough, so wear gloves and work in sections. If you hit resistance, switch to a garden fork to pry without breaking roots.
Real talk: You won’t get it all the first time. Even small root fragments left in the soil can regrow. After digging, sift through the soil with your hands to spot any missed pieces. Remove every bit—no exceptions. This is the moment that matters: thoroughness now saves months of frustration later.
💧 Step 4: Solarize the Soil to Kill Remaining Roots
Once the area is cleared, water the soil deeply to saturate it, then cover the entire section with clear plastic sheeting (at least 4-6 mil thickness). Secure the edges with bricks or soil to trap heat. Leave it in place for 6-8 weeks during summer, when temperatures exceed 85°F.
Solarization works by baking the soil, killing any remaining horseradish roots and seeds. Check weekly—if the plastic lifts, weigh it down again. After the treatment, till the soil to 12 inches deep to break up any heat-damaged roots. This step is non-negotiable if you want long-term success.
🌿 Step 5: Monitor and Repeat for Full Eradication
After solarization, keep the area free of new growth for 3-4 months. If any horseradish sprouts appear, repeat Steps 2 and 3 immediately. In most cases, you’ll need to repeat the entire process 2-3 times over 2 growing seasons to fully eliminate the plant.
Here’s where patience pays off: Horseradish is persistent, but consistent effort wins. Once the area stays clear for a full year, you can replant. I’ve seen gardens reclaim space within 12-18 months of diligent removal—it’s worth the grind.
Tips & tricks for natural horseradish removal
Between us, I've battled horseradish more times than I care to admit—here's what I've learned to make this process actually work.
Digging Depth is Non-Negotiable: That 1-foot-deep trench in Step 1 isn't just a suggestion—horseradish roots can extend 2-3 feet deep in some cases. If you're dealing with an established patch, rent a soil knife or borrow a post-hole digger to get down to 18-24 inches in stubborn areas. I once missed a root at 12 inches only to find it growing back from 2 feet down. Trust me on this.
Root Identification Hack: Horseradish roots have a distinctive pearly white color when fresh. Cut a cross-section—if it's creamy white inside with a slight yellowish center, you've got horseradish. The roots also have a slightly rubbery texture when you squeeze them. Keep a small bucket nearby to toss roots as you find them—it's easy to lose track when you're digging.
Vinegar Application Strategy: When mixing your 1 gallon vinegar + 1 gallon water solution in Step 3, add 1 tablespoon of dish soap to help it penetrate the soil better. The soap acts as a surfactant, breaking surface tension so the solution seeps deeper. Apply it right after digging when the soil is most receptive—don't let the trench dry out first. And here's the thing: the smell is awful, but it works.
Smothering Success Secret: For the mulch layer in Step 4, use black plastic sheeting instead of cardboard if you have it—it blocks even more light and lasts longer. If using cardboard, soak it first to prevent it from breaking down too quickly. The key is maintaining that 4-6 inch mulch layer without gaps. I've seen horseradish pop through when mulch was only 2 inches thick—don't skimp on the coverage.
Pro Tips for Get Rid Of Horseradish In Garden
- Between us, I've battled horseradish more times than I care to admit—here's what I've learned to make this process actually work.
- Digging Depth is Non-Negotiable: That 1-foot-deep trench in Step 1 isn't just a suggestion—horseradish roots can extend 2-3 feet deep in some cases.
- Root Identification Hack: Horseradish roots have a distinctive pearly white color when fresh.
Frequently asked questions
Got questions about tackling horseradish in your garden?
You’re not alone—this stubborn plant can be tricky! Here are answers to the most common concerns to help you reclaim your yard with confidence.
How do I know if I’m dealing with horseradish or just a weed?
Horseradish (Armoracia rusticana) has deep, pencil-thick roots and grows in clumps with long, narrow leaves. Unlike weeds, it has a distinctive pungent aroma when crushed. If you’re unsure, dig up a small section—if it smells like horseradish, you’ve found your foe!
Is now the best time to remove horseradish from my garden?
The ideal time is early spring or late fall when the plant is dormant but still accessible. Avoid peak summer heat, as the roots may be harder to dig out. If you spot it now, go ahead—but plan for multiple dig sessions to prevent regrowth. Patience is key!
Will vinegar or boiling water kill horseradish roots completely?
While vinegar or boiling water can kill above-ground growth, they rarely destroy the deep roots. Horseradish is resilient—use these methods as a short-term solution, but follow up with digging to prevent regrowth. For best results, combine with smothering or repeat treatments.
How often do I need to check for regrowth after removal?
Check your garden every 2–4 weeks for the first season, then monthly for at least a year. Horseradish roots can sprout from tiny fragments, so stay vigilant! If you see new shoots, dig them out immediately—don’t wait.
Can I replant the area after removing horseradish?
Yes! Once all roots are gone, wait 1–2 months to replant. Horseradish roots can linger in soil, so choose a new location if possible. For extra safety, test the soil by planting a sensitive crop (like lettuce) first—if it thrives, your garden is horseradish-free!
Wrapping up and next steps
Removing horseradish from your garden doesn’t have to be a battle—just a strategic dig-and-repeat effort! By combining persistence, the right tools, and natural methods like smothering or vinegar sprays, you can reclaim your space. Remember: patience is key—horseradish roots are tough, but you’ve got this!
Now that you’re armed with the know-how, roll up your sleeves and start today. Check one patch at a time, celebrate small wins, and soon, your garden will be horseradish-free—and ready for the plants you actually love! 🌱✨