
Tools
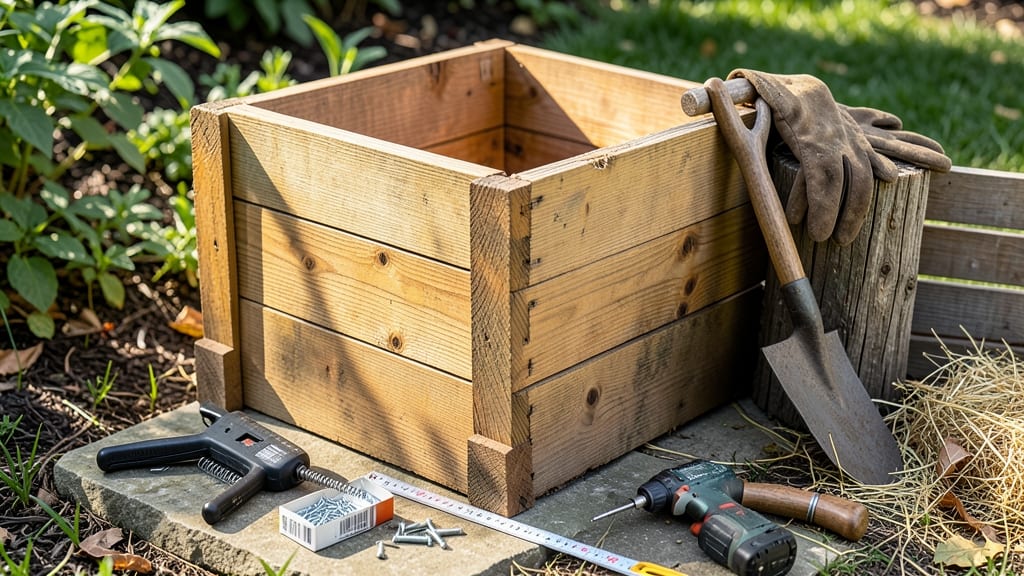
How to build a wooden compost bin that turns your garden’s waste into a powerhouse for your soil—without the mess or the smell. 🌱 A sturdy cedar design isn’t just a pile; it’s the backbone of a year-round system that reduces trash, enriches dirt, and keeps pests at bay. I’ve crafted three versions, and this one stands up to winters without rotting or collapsing.
You’ll need basic tools, untreated cedar (or reclaimed wood), and a weekend afternoon. The secret? Built-in ventilation—no more sluggish, stinky piles. Size it to fit your scraps: a 3’x3’x3’ bin handles kitchen waste for a family of four, while smaller versions work for balconies or herb gardens.
By spring, you’ll have fluffy, nutrient-rich compost ready for planting. The bin itself becomes part of your garden’s ecosystem—diverting waste from landfills while feeding your soil. And thanks to cedar’s natural oils, pests stay away, so you won’t be battling raccoons or flies.
Whether you’re a beginner or a seasoned gardener upgrading your setup, this design cuts down on maintenance while maximizing results—no more guessing about moisture or aeration. Let’s get building!
📚 In This Guide
- What you need
- Instructions
- Tips and common mistakes
- Wrapping up and next steps
What you need
- ● Wooden lumber: 2x4s (2–4 pieces, 8 ft long) and 1x4s (4–6 pieces, 8 ft long) for framing.
- ● Plywood or hardwood boards: ½-inch thick (4–6 sheets, 4x8 ft) for the bin walls.
- ● Galvanized screws or deck screws: 2½-inch (1–2 lbs) for assembly.
- ● Hinges and latch: 1–2 heavy-duty hinges and a latch for the lid.
- ● Ventilation slats: Pre-cut or DIY (1x2-inch slats, spaced ¼-inch apart) for airflow.
- ○ Wood glue: Waterproof (optional but recommended for extra durability).
- ● Circular saw or miter saw (for precise cuts).
- ● Drill/driver (with screw bits).
- ● Measuring tape and pencil.
- ● Speed square or carpenter’s square (for angles).
- ● Sandpaper (80–120 grit) for smooth edges.
- ○ Staple gun (optional, for securing ventilation slats).
- ● Exterior-grade paint or sealant (to protect wood from weather).
- ● Concrete blocks or pavers (for a raised, sturdy base).
- ● Compost thermometer (to monitor heat levels).
- ● Wire mesh (to deter pests if needed).
Step-by-Step instructions for building a sturdy wooden compost bin
Here’s my go-to method for a compost bin that stays aerated, resists collapse, and breaks down scraps efficiently—no fancy tools required.
🪴 Step 1: Gather Materials and Cut Lumber to Specifications
For a 4-foot square bin with built-in ventilation, you’ll need 2x4 lumber (untreated cedar or redwood lasts longest outdoors) and 1x6 boards for the sides. Cut four 4-foot lengths for the frame corners and four 3-foot lengths for the crossbraces. The sides should be 3 feet tall—taller bins risk overheating and slow decomposition.
Use a miter saw for clean 45-degree cuts on the corners to create a sturdy, interlocking frame. If you don’t have one, a handsaw works fine—just take your time. Pre-drill ¼-inch holes at the top of each corner post for ventilation tubes (PVC or perforated metal). This airflow is critical to prevent anaerobic pockets that create foul odors.
☀️ Step 2: Assemble the Frame and Attach Ventilation Tubes
Start by screwing the 3-foot crossbraces to the 4-foot corner posts using 3-inch exterior-grade deck screws. Space them 12 inches apart vertically for stability. The frame should form a square with 12-inch gaps between the crossbraces—this creates a lattice that allows worms and air to circulate while keeping bulkier materials contained.
Slide 4-inch PVC pipes (cut to 3-foot lengths) into the pre-drilled holes at the top of each corner post. Secure them with waterproof silicone to prevent leaks. These tubes will double as handles and ensure consistent airflow. Test the frame’s stability by lifting it—it should hold its shape without wobbling.
💧 Step 3: Build and Attach the Side Panels
Construct the 1x6 side panels by screwing 1x2 vertical supports every 12 inches along the edges. Leave 2-inch gaps between supports to mimic the frame’s lattice design—this mimics nature’s loose, breathable structure. Attach the panels to the frame with 2.5-inch screws, ensuring they’re plumb. A level helps here; uneven sides will cause the bin to lean over time.
For the front and back panels, add a hinged door using butt hinges on the left side. This lets you turn compost without spilling. Line the inside of the door with hardware cloth (¼-inch mesh) to keep pests out while allowing airflow. The door should swing open 90 degrees—any less and you’ll struggle to mix contents.
✂️ Step 4: Add the Bottom Grid and Final Ventilation
Lay 1x4 slats across the base with 1-inch gaps between them to create a grid. This elevates the compost 4-6 inches off the ground, preventing moisture buildup and rodent nesting. Secure the slats to the frame with 2-inch screws. For extra ventilation, drill ½-inch holes in the bottom of the side panels—these will let air circulate from underneath.
Finish by adding two more PVC tubes (or metal mesh tubes) on the opposite side of the frame, 18 inches from the ground. This creates a cross-ventilation system that pulls air through the entire bin. Cover the top edges with corner braces to reinforce the structure—wind and rain will test it over time.
🌱 Step 5: Site, Fill, and Maintain Your Compost Bin
Place the bin on level ground with the hinged door facing away from prevailing winds. Fill it ⅓ with coarse material (straw, shredded leaves, or cardboard) first to improve aeration. Add scraps in small batches, alternating with browns (dry leaves, shredded paper) to balance moisture. Never fill it past 3 feet high—compost piles over 4 feet risk suffocating the center.
Turn the pile every 2-3 weeks using the hinged door. You’ll know it’s working when the pile feels warm to the touch and smells earthy (not rotten). If it stinks, add more dry leaves or shredded newspaper and mix thoroughly. With this setup, you’ll have finished compost in 3-6 months—ready for your garden.
Tips & tricks for perfect wooden compost bin construction
These practical insights will help you avoid common pitfalls and build a compost system that lasts for years.
Material Selection: Cedar or redwood are your best bets for longevity—cedar resists rot naturally, while redwood offers excellent decay resistance. If budget is tight, pressure-treated lumber works but may leach chemicals over time. I've found that untreated pine lasts about half as long as cedar, so factor that into your choice. Pre-cutting all your boards to the exact dimensions in Step 1 saves time and frustration during assembly.
Assembly Stability: When attaching the four leg pieces in Step 2, use a temporary square to ensure perfect 90-degree angles before screwing. I reinforce the corners with additional corner braces if I'm expecting heavy loads or wind exposure. The 6-8 inch base height is crucial—any lower and you risk moisture buining up, while higher makes turning compost difficult. Consider adding small wheels to one side if you plan to move the bin occasionally.
Ventilation Strategy: The ½-inch holes in Step 3 should be staggered in a diamond pattern rather than straight lines for better airflow distribution. I use a nail and hammer to create these holes before covering with hardware cloth—this prevents the cloth from getting sucked into the holes during drilling. For extra protection against pests, I add a second layer of hardware cloth on the outside of the holes, creating a double barrier.
Long-Term Maintenance: The outdoor-rated sealant mentioned in Step 3 should be reapplied every 2-3 years, especially on untreated wood. I mark the year of application with a paint pen on the underside of the bin to track maintenance schedules. For colder climates, consider adding a removable insulated lid made from plywood and foam insulation—this helps maintain composting activity during winter months.
Pro Tips for Build A Wooden Compost Bin
- These practical insights will help you avoid common pitfalls and build a compost system that lasts for years.
- Material Selection: Cedar or redwood are your best bets for longevity—cedar resists rot naturally, while redwood offers excellent decay resistance.
- Assembly Stability: When attaching the four leg pieces in Step 2, use a temporary square to ensure perfect 90-degree angles before screwing.
Frequently asked questions
Got questions about building your wooden compost bin? Here are answers to common concerns to help you get started with confidence!
What’s the best wood to use for a compost bin?
Opt for untreated, rot-resistant woods like cedar, redwood, or pressure-treated lumber (avoid creosote-treated wood). These resist moisture and pests, ensuring your bin lasts longer. Avoid softwoods like pine—they’ll degrade faster in damp conditions.
How long does it take to build a wooden compost bin?
For a basic 3x3x3 ft bin, most DIYers finish in 2–4 hours with basic tools. If you’re new to woodworking, plan for extra time (or prep materials ahead). Pro tip: Pre-cut lumber and pre-drill holes to speed things up!
What if my compost smells bad?
Bad odors usually mean your bin lacks airflow or has too many "greens" (nitrogen-rich materials like fruit scraps). Balance with "browns" (dry leaves, cardboard), turn the pile weekly, and ensure vents aren’t clogged. A sprinkle of soil or finished compost can also help!
Can I build a compost bin without spending much?
Skip fancy tools—use scrap lumber, pallets, or even cinder blocks for a no-frills design. Skip ventilation holes if you’re in a dry climate, but add them if humidity is high. Repurpose old containers (like plastic bins) as a budget-friendly alternative.
How do I keep pests out of my compost?
Buried bins or ones with solid sides (no gaps >1/4") deter rodents and insects. Bury food scraps under 6+ inches of browns, and avoid meat/dairy. A tight-fitting lid (even a tarp) helps too. If pests persist, try a two-bin system—one active, one curing.
Wrapping up and next steps
Building your own wooden compost bin is a rewarding project that not only reduces waste but also enriches your garden naturally! With just a few basic materials and a little elbow grease, you’ve got a durable, ventilated system that turns scraps into nutrient-rich compost in no time. 🌱
Now that you’re ready to roll up your sleeves, why not start composting today? Gather your tools, follow the steps, and soon you’ll be turning kitchen waste into garden gold. Happy building—and even happier gardening! 🚀