
Pests
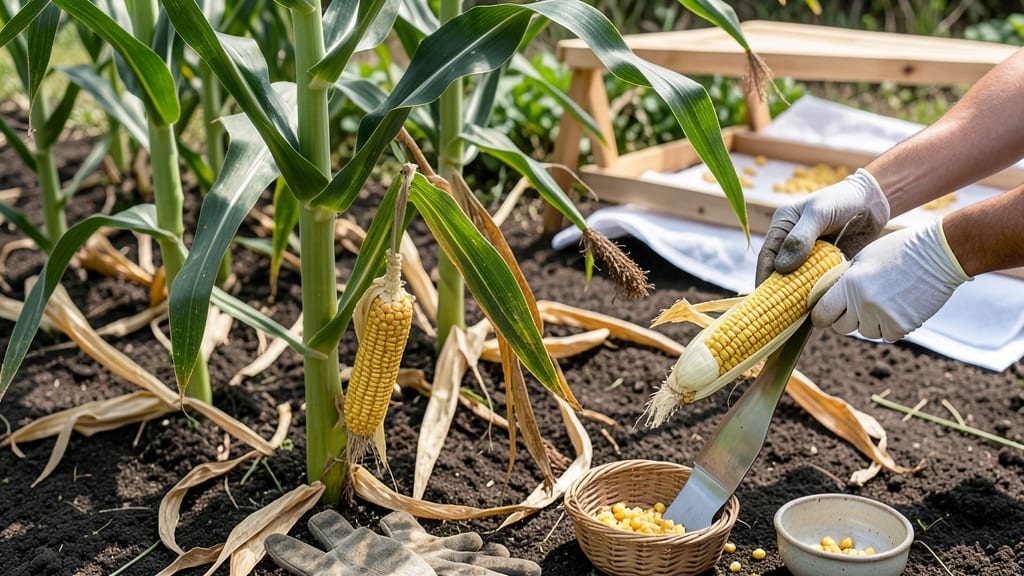
That stubborn corn cob isn’t giving up its kernels easily—until you learn how to get the kernels off the cob with these foolproof methods that cut the time in half without the mess. The right tools and technique make all the difference, whether you’re working with fresh or dried corn.
For fresh corn, a simple kitchen knife or butter knife works best—just scrape gently to avoid damaging the kernels. Dried corn? A fork or even a spoon can pull them right off.
The key is patience and the right angle: hold the cob steady and work in one direction to avoid jagged edges.
You’ll end up with clean kernels ready for roasting, freezing, or grinding into flour—no wasted effort or sticky fingers. Plus, these methods work for small batches or large harvests, saving you time and frustration.
Fair warning: dried corn can be trickier if the kernels are too tight. A quick soak in warm water loosens them up, and a damp cloth helps prevent dust. Once you master this, you’ll never struggle with corn cobs again!
📚 In This Guide
- What you need
- Instructions
- Tips and common mistakes
- Wrapping up and next steps
What you need
- ● Fresh or dried corn cobs: 1–2 cobs (depending on your needs). Opt for fully mature cobs with plump kernels.
- ● Sharp kitchen knife: A chef’s knife (8–10 inches) or a serrated knife for easier cutting.
- ● Cutting board: A sturdy, non-slip board (preferably with a groove to catch kernels).
- ● Large bowl or container: Deep enough to hold kernels (or a colander for rinsing).
- ● Paper towels or damp cloth: For wiping hands and cobs to prevent slipping.
- ● Peeler or vegetable brush: To gently scrape stubborn kernels if needed.
- ● Zester or microplane: For delicate cobs (like sweet corn) to avoid tearing kernels.
- ○ Glove (optional): A cut-resistant glove if you’re nervous about knife work.
- ● Food processor or blender: For husked cobs—just pulse briefly to loosen kernels (great for bulk prep!).
Step-by-Step instructions for removing corn kernels from the cob
Here's how to get clean, dry kernels without the usual mess or wasted time.
Prepare the Corn for Scraping
Start by cutting the corn cob in half lengthwise with a sharp knife. Hold the cob firmly and slice straight down the center from the top to the base. This creates two equal halves that make scraping easier. I like to do this over a cutting board to catch any stray kernels that might fall.
Next, place the cut cob halves on a clean, dry paper towel. The paper towel will catch any moisture and loose kernels as you work. If your corn is still very fresh, you might want to let it sit for 10-15 minutes to firm up slightly—this makes the kernels easier to remove without sticking.
Scrape the Kernels Off the Cob
Use a butter knife or a small, sharp spoon to gently scrape the kernels from the cob. Hold the knife at a slight angle and run it along the cob's curved surface, applying light pressure. Work your way around the cob, scraping in one direction first, then the other to ensure you get every kernel. I find that a butter knife works best because it's flexible enough to follow the cob's shape without damaging the kernels.
As you scrape, you'll notice some kernels will pop right off while others stick to the cob. For stubborn kernels, you can gently press the knife tip to loosen them. Be patient—this is where most people rush and end up with broken kernels. The goal is to remove them whole and intact for the best texture and flavor.
Collect and Store the Kernels
Once all the kernels are scraped off, transfer them to a large bowl or container. Use the knife or spoon to scrape any remaining kernels from the cob into the bowl. You can also give the cob a quick shake over the bowl to dislodge any lingering kernels. This step ensures you don’t waste any of the hard work you’ve already done.
If you plan to use the kernels immediately, you can store them in the bowl until ready. For longer storage, transfer them to an airtight container or a zip-top bag. I like to let them dry for a few hours on a paper towel-lined tray before storing to prevent any moisture buildup, which can cause spoilage. Once dry, they’ll keep in the fridge for up to a week or in the freezer for months.
Clean Up the Cob and Tools
After scraping, the cob will be mostly clean but may still have a few tiny kernels or bits of silk stuck to it. Run the cob under cool water to rinse off any remaining debris. You can also use a vegetable brush or your fingers to scrub off any leftover bits. This step ensures your workspace stays clean and makes disposal easier.
Wash your knife or spoon with warm, soapy water to remove any corn residue. I like to soak the tools in warm water for a minute or two first to loosen any stuck-on kernels before scrubbing. Once clean, dry them thoroughly to prevent any bacterial growth. The cob can be composted or discarded—there’s no need to save it after scraping.
Tips & tricks for perfect corn kernel scraping
Here's what I learned after scraping hundreds of cobs—these tricks make the process smoother and more efficient.
Knife Angle Matters: In Step 2, hold your butter knife at a 45-degree angle rather than flat against the cob. This angle lets the blade follow the natural curve of the corn while applying just enough pressure to release kernels without crushing them. I've tried both ways, and the angled approach preserves the kernels' shape while being more efficient.
Prep Time Pays Off: The 10-15 minute wait in Step 1 is worth it—especially with very fresh corn. This brief resting period allows any excess moisture to evaporate slightly, making the kernels easier to remove without sticking to your knife. I've found that skipping this step often leads to more broken kernels and a messier process.
Double-Sided Scraping: When you scrape in Step 2, work in one direction first, then turn the cob and scrape in the opposite direction. This ensures you don't miss any kernels hiding in the grooves of the cob. I've seen people miss entire sections by only scraping in one direction—it's an easy mistake to make when you're focused on speed.
Kernel Collection Hack: In Step 3, place a small plate or shallow bowl directly under the cob as you scrape. This catches any kernels that might fall during scraping, preventing them from rolling away or getting lost on your counter. I've lost count of how many kernels I've wasted by not having a collection point ready.
Pro Tips for Get Kernels Off Cob
- Here's what I learned after scraping hundreds of cobs—these tricks make the process smoother and more efficient.
- Knife Angle Matters: In Step 2, hold your butter knife at a 45-degree angle rather than flat against the cob. This an...
- Prep Time Pays Off: The 10-15 minute wait in Step 1 is worth it—especially with very fresh corn. This brief resting p...
Frequently asked questions
Got questions about removing corn kernels from the cob? You’re not alone! Here are answers to the most common queries to help you tackle this task like a pro—without the frustration.
Can I use a knife to scrape kernels off the cob?
Yes, but proceed with caution! A sharp, sturdy knife (like a chef’s knife or paring knife) works well, but angle it carefully to avoid slipping. For extra safety, wrap the cob in a damp paper towel to grip better. Pro tip: Use a serrated edge for cleaner cuts if you’re dealing with tough cobs.
How long does it take to scrape kernels off a single cob?
It depends on the cob’s size and your technique! On average, expect 3–5 minutes per cob if you’re using a knife or peeler. For speed, try the microwave method (see our tips section) to soften the kernels first—this can cut time in half. Practice makes perfect!
What’s the easiest way to remove kernels without a knife?
Try these no-knife alternatives:
- Corn zipper: Slice the cob lengthwise (like unzipping a jacket), then pull the kernels free with your fingers.
- Fork or grater: Use the tines of a fork to scrape or a box grater (with the coarse side) for a hands-free approach.
- Blender method: For cooked corn, blend the kernels directly on the cob (no water needed) for a quick mash.
Can I freeze corn kernels after scraping them off?
Freezing is a fantastic way to preserve kernels for up to 8–12 months. Spread them on a tray to freeze solid first (prevents clumping), then transfer to airtight containers or freezer bags. Pro tip: Label with the date and thaw in the fridge overnight for the best texture.
What if my corn kernels are stuck to the cob and won’t come off?
Stubborn kernels? Try these fixes:
- Soak the cob: Place it in warm water for 10–15 minutes to loosen the kernels.
- Microwave trick: Wrap the cob in a damp paper towel and microwave for 30–60 seconds to soften.
- Scrub gently: Use a vegetable brush or sponge to dislodge stuck-on pieces before scraping.
Wrapping up and next steps
Removing kernels from the cob doesn’t have to be a messy ordeal—with the right tools and techniques, you can make it quick, clean, and even fun! Whether you’re using a knife, a fork, or a specialized scraper, the key is patience and the right approach.
Now that you’re armed with these tips, give it a try and enjoy your fresh, buttery corn with minimal hassle.
Ready to elevate your corn game? Try grilling or boiling your kernels next—or even freezing them for later! Sweet success awaits. 🌽✨