
Shrubs
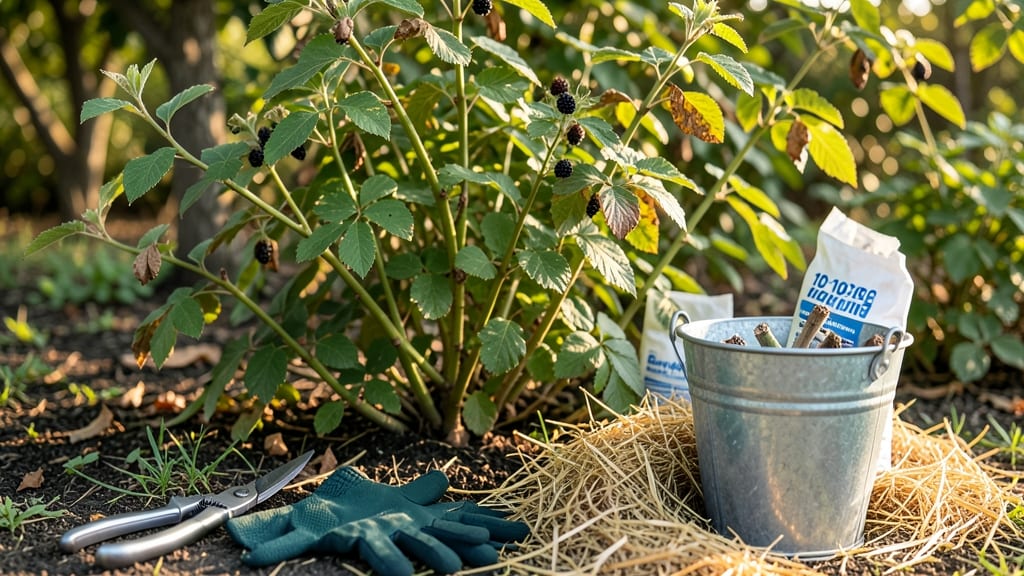
How to get blackberry bushes to produce—that’s the question every frustrated gardener asks when their canes stand tall but yield nothing but thorns. 🌿 I’ve spent years watching my own bushes go from hopeful new growth to frustratingly barren, and the culprit was almost never what I first suspected. The secret to production isn’t just pruning—it’s understanding when, why, and how to cut (or not cut) to trigger those sweet, juicy canes to finally bear fruit.
The biggest mistake? Assuming all blackberries need the same treatment. Floricane types (like ‘Triple Crown’) produce on second-year canes, while primocane varieties (like ‘Natchez’) fruit on first-year growth—and pruning them wrong means zero harvest.
Add in sunlight struggles, nutrient gaps, or overcrowded canes, and you’ve got a recipe for disappointment. But here’s the good news: once you fix the root causes, you’ll see berries within a single season.
By late winter, you’ll be snipping back old canes with surgical precision, knowing exactly which ones to keep for next year’s fruit. The result? Bushes so productive they’ll make your neighbors jealous, with berries ripening in waves from summer through fall.
And the best part? No more guessing—just clear, step-by-step fixes that actually work.
Whether you’re dealing with a first-year bush or a veteran that’s forgotten its purpose, this method works for both. Let’s turn those thorny stalks into a berry bonanza—starting with the pruners in hand.
📚 In This Guide
- What you need
- Instructions
- Tips and common mistakes
- Wrapping up and next steps
What you need
- ● Pruning shears or loppers – Sharp, clean, and sterilized (bleach or rubbing alcohol) to prevent disease. Choose bypass pruners (not anvil) for precision cuts.
- ● Gloves – Heavy-duty gardening gloves to protect against thorns and blisters.
- ● Disinfectant (70% isopropyl alcohol or bleach solution) – For sterilizing tools between cuts.
- ○ Pruning saw (optional but helpful) – For thicker stems (over ½ inch in diameter).
- ● Garden twine or stakes – To support canes if needed (especially for floricane types like Cheyenne or Natchez).
- ● Compost or balanced fertilizer (10-10-10 or 5-10-10) – To replenish nutrients after pruning. 1–2 cups per bush is plenty.
- ● Mulch (straw, wood chips, or pine needles) – 2–3 inches thick to retain moisture and suppress weeds.
- ● Watering can or hose with a gentle spray nozzle – For post-pruning hydration.
- ● Know your blackberry type – Determine if your bush is floricane (produces on second-year canes) or primocane (produces on first-year canes). This changes pruning strategies!
- ● Healthy, established bushes – Prune only mature plants (at least 2 years old) for best results.
- ● Sunlight & spacing – Ensure bushes get full sun (6+ hours/day) and have 4–6 feet of space between plants for airflow.
- ● Patience & timing – Prune at the right time (dormant season for floricanes, late summer for primocanes).
- ● Pruning paint or sealant – To cover large cuts and prevent disease entry.
- ● Soil test kit – To check pH and nutrient levels (ideal range: 5.5–6.5).
- ● Bird netting – If wildlife loves your berries as much as you do!
- ● Journal or app – To track pruning dates, cane growth, and harvest progress.
Step-by-step instructions for maximizing blackberry production
Here's the pruning system I've used for years to turn struggling blackberry bushes into fruit-bearing powerhouses.
✂️ Step 1: Identify and Remove Old Canes
Blackberries produce fruit on second-year canes, so the first step is ruthless elimination. In late winter or early spring, cut back all canes that fruited last year—these are the thin, brown, woody stems—down to the ground. I always start by marking them with a white flag so I don't accidentally cut productive canes. These old canes are done for the season and won't produce again.
Don't skip this step, even if the canes look healthy. The bush needs space for new growth. I've seen gardeners hesitate here, but trust me—this creates room for next year's fruit-producing canes. Aim to leave about 4-6 of the thickest, green canes standing after pruning. These are your future harvesters.
🌱 Step 2: Prune for Airflow and Light Penetration
After removing old canes, focus on the remaining ones. Cut back any branches that cross or rub against each other—these create wounds that invite disease. Thin out crowded areas so light reaches the center of the bush. I like to step back and visualize the bush as a vase shape, with the widest part at the base gradually narrowing upward.
Remove any weak, spindly canes that aren't growing upright. These won't produce well and just compete with stronger growth. You'll know a good cane by its thick, green growth and upward angle. Leave about 6-8 inches of height on each remaining cane—this encourages strong basal growth from the crown. This is where next year's fruit-producing canes will emerge.
☀️ Step 3: Fertilize and Mulch for Spring Growth
After pruning, spread a 2-3 inch layer of organic mulch (like wood chips or straw) around the base, keeping it 6 inches away from the crown. This protects roots from temperature swings and retains moisture. I always fertilize right after pruning with a balanced 10-10-10 formula, applying about 1/2 cup per bush. Blackberries are heavy feeders and need nutrients to produce those energy-rich canes.
Water deeply after fertilizing to help nutrients reach the roots. You'll see new growth within 2-3 weeks—these are your primocanes, which will grow into next year's fruiting canes. Watch for bright green leaves and rapid vertical growth. This is your signal that the bush is responding well to the pruning and feeding.
⏰ Step 4: Summer Maintenance for Fruit Production
During the growing season, keep the area around your bushes weed-free—blackberries hate competition. When new canes emerge, remove any that grow from the base of old canes (these are called "suckers") unless you're propagating new plants. Also, remove any canes that develop thorns—these are usually male plants and won't produce fruit. You want to focus energy on the thornless, vigorous canes.
In late summer, after the first harvest, apply another 1/4 cup of fertilizer to replenish nutrients. This second feeding helps the remaining canes prepare for next year's fruit production. You'll notice the canes growing thicker and more robust. This is the bush building its energy reserves for your next harvest. Don't forget to water during dry spells—blackberries need 1-2 inches of water per week to produce well.
Tips & tricks for maximizing blackberry production
Real talk: Pruning blackberries isn't just about cutting back—it's about creating the perfect environment for your bushes to thrive. These are the secrets that'll transform your struggling plants into fruit-bearing machines.
Pruning Precision: When you're removing old canes in Step 1, don't just cut at the base—make clean cuts about 1/4 inch above the ground. This prevents disease from lingering at the cut surface. I've seen gardeners leave stubs, and those little nubs can rot over time. Also, use sharp, clean pruners to avoid crushing the canes, which can introduce bacteria. A quick wipe with rubbing alcohol between cuts keeps your tools sterile.
Visual Cues for Healthy Canes: In Step 2, when selecting which canes to keep, look for ones with a diameter of at least pencil thickness (about 1/4 inch). Thin canes won't produce well, and thick ones will become overcrowded. Another trick: Run your hand along the cane—healthy ones should feel firm, not hollow or spongy. If you're unsure which canes fruited last year, check for old fruit scars or dried clusters near the base.
Fertilizer Timing: The instructions mention applying fertilizer right after pruning, but here's what nobody tells you—blackberries actually absorb nutrients best when the soil is warm. If you're in a cooler climate, wait until the soil reaches at least 50°F before fertilizing. Also, spread that 1/2 cup of 10-10-10 fertilizer in a ring pattern about 6 inches from the crown, not piled directly on top. This encourages outward root growth rather than concentrated root burn.
Summer Watering Strategy: During the growing season, water deeply but infrequently—about once a week for 1-2 inches total. The key is to soak the root zone (about 12 inches deep) rather than giving light surface waterings. I use a rain gauge to track rainfall and only water when we've had less than 1 inch in the past week. Morning watering is best to prevent fungal diseases that thrive in damp foliage overnight.
Pro Tips for Get Blackberry Bushes To Produce
- Real talk: Pruning blackberries isn't just about cutting back—it's about creating the perfect environment for your bu...
- Pruning Precision: When you're removing old canes in Step 1, don't just cut at the base—make clean cuts about 1/4 inc...
- Visual Cues for Healthy Canes: In Step 2, when selecting which canes to keep, look for ones with a diameter of at lea...
Frequently asked questions
Got questions about coaxing those juicy blackberries into production? You’re not alone—growing these thorny powerhouses can be tricky! Here are answers to the most common questions gardeners ask when trying to maximize their blackberry harvest.
Why isn’t my blackberry bush producing fruit?
Blackberries need both primocanes (new growth) and floricanes (second-year canes) to fruit. If your bush is young (<2 years old), it’s normal to see little fruit—patience is key! Older bushes may need better pruning, sunlight (6+ hours/day), or fertilizer (high in potassium and phosphorus). Pro tip: Check for pests like spider mites or disease (like anthracnose) that can stress plants and reduce yields.
When should I prune for the best harvest?
Timing matters! For floricanes (bearing canes), prune immediately after harvest to remove dead or weak canes. For primocanes (next year’s fruit), cut back to the ground in late winter or early spring (before buds swell). Ever-bearing varieties need a summer pruning too—trim back 1/3 of the new growth after the first harvest to encourage a second flush.
Do blackberries need winter protection?
Most blackberries are hardy, but young plants or tender varieties (like Cheyenne or Natchez) benefit from winter mulch (4–6 inches of straw or leaves) to insulate roots. In Zone 5 or colder, mound soil around the base or use row covers. Avoid heavy mulch in summer—it can smother roots! Fun fact: Some gardeners wrap canes in burlap for extra coziness.
Can I grow blackberries in containers?
Dwarf varieties like ‘Arapaho’ or ‘Triple Crown’ thrive in 15–20 gallon pots with well-draining soil. Use a trellis or cage to support canes (they can get heavy!). Containers dry out faster, so water deeply 2–3x/week in summer. Just ensure the pot has drainage holes—blackberries hate soggy roots!
How do I increase pollination for bigger berries?
Blackberries are self-pollinating, but bees and wind help! Plant near other pollinator-friendly plants (like lavender or marigolds) to attract bees. If your harvest is sparse, hand-pollinate by gently shaking canes on a calm day. Bonus: Avoid pesticides during bloom—chemicals can deter pollinators!
What do I do if my blackberries are small or tasteless?
Small, bland berries often mean the plant is overcrowded or underfed. Thin canes to 6–8 strong ones per bush (more = smaller fruit!). Feed with a balanced fertilizer (10-10-10) in spring, then switch to a high-potassium formula (like 0-10-10) when flowers appear. Pro tip: Water consistently—fluctuating moisture leads to poor flavor!
Wrapping up and next steps
Getting your blackberry bushes to thrive—and burst with juicy fruit—is all about patience, timing, and the right techniques. With proper pruning, soil care, and a little extra attention, you’ll soon be rewarded with a bountiful harvest that’s the envy of the neighborhood. 🍇✨
Now that you’re armed with the secrets, roll up your sleeves and get pruning! Start small, observe your bushes, and adjust as you go.
Before you know it, those thorny branches will be loaded with sweet, ripe berries—and you’ll be sharing (or freezing!) your harvest for months to come.
Next step: Mark your calendar for your first pruning session—your future blackberry feast starts now! 🌱💪